To capture stunning landscapes with your smartphone, focus on three essential settings. First, enable HDR mode to blend multiple exposures, enhancing details in high-contrast scenes. Next, activate the grid overlay to apply the rule of thirds, improving composition by aligning key elements along gridlines. Finally, use manual focus adjustment for precise control over image sharpness, ensuring crisp details throughout your scene. Remember to keep your phone steady, especially when using HDR, and experiment with off-center compositions for dynamic shots. By mastering these settings, you'll elevate your landscape photography and reveal your smartphone's full potential.
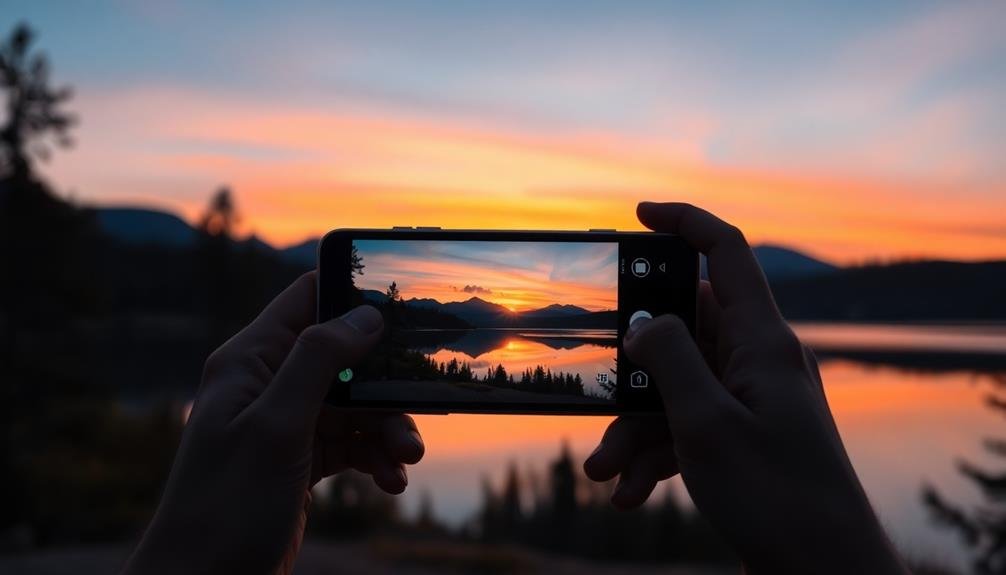
HDR Mode

The HDR mode on your smartphone can dramatically enhance your landscape photos. It stands for High Dynamic Range and works by combining multiple exposures into a single image. This technique allows your camera to capture a wider range of light and dark areas, resulting in more balanced and detailed shots.
When shooting landscapes, HDR is particularly useful for scenes with high contrast, such as sunsets or scenes with both bright skies and shadowy foregrounds. It helps prevent overexposed highlights or underexposed shadows, preserving details in both areas.
To use HDR effectively, keep your phone steady or use a tripod, as any movement can cause ghosting or blurring. Be aware that HDR may not always be the best choice, especially for scenes with moving subjects or when you want to capture a specific mood with deep shadows or bright highlights.
Most smartphones offer an automatic HDR option, but you can also manually enable or disable it. Experiment with different scenes to understand when HDR works best for your landscape photography.
Remember that while HDR can improve your images, it's not a substitute for good composition and lighting.
Grid Overlay

Precision in composition is key when capturing stunning landscape photos, and your smartphone's grid overlay feature can be a game-changer. It divides your screen into a 3×3 grid, helping you apply the rule of thirds effortlessly. To activate it, check your camera app's settings or your phone's main settings menu.
Once enabled, you'll see two horizontal and two vertical lines on your screen. Use these lines to align key elements in your landscape:
| Element | Placement |
|---|---|
| Horizon | Along top or bottom line |
| Focal point | At intersection of grid lines |
| Leading lines | Aligned with vertical lines |
| Symmetry | Centered using middle line |
| Foreground | In bottom third of frame |
Don't feel constrained by the grid; it's a guide, not a rule. Experiment with different compositions, placing subjects off-center for visual interest. The grid also helps you keep your horizons straight, a vital aspect of landscape photography. By mastering the grid overlay, you'll improve your compositions and create more balanced, visually appealing landscape shots. Remember to turn it off when you're done if you prefer an uncluttered viewfinder for casual shots.
Manual Focus Adjustment
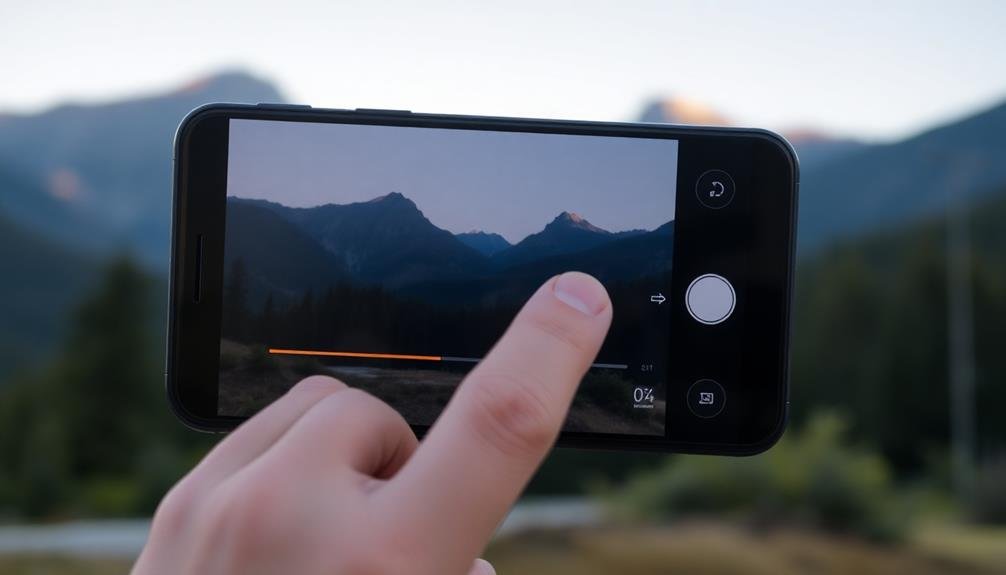
Mastering manual focus adjustment on your smartphone can elevate your landscape photography to new heights. While most smartphones default to autofocus, manual focus gives you precise control over your image's sharpness.
To access this feature, look for a focus slider or tap-to-focus option in your camera app's pro or manual mode.
When using manual focus, start by tapping on the area of your landscape you want to emphasize. This could be a foreground element or a distant mountain range.
Then, fine-tune the focus using the slider or by adjusting the focus ring on the screen. Pay close attention to the edges of objects to guarantee they're crisp and well-defined.
For landscapes with multiple points of interest, try focus stacking. Take several shots with different focus points and combine them later in editing.
This technique guarantees sharpness throughout the entire image.
Frequently Asked Questions
How Do I Clean My Smartphone Camera Lens for Better Landscape Photos?
You'll want to clean your smartphone camera lens gently. Use a microfiber cloth to remove dust and smudges. For stubborn dirt, lightly dampen the cloth with lens cleaner. Avoid harsh chemicals or abrasive materials that could scratch the lens.
What's the Best Time of Day to Capture Landscape Photos on a Smartphone?
You'll get the best landscape shots during the golden hours: just after sunrise or before sunset. The soft, warm light enhances colors and creates long shadows. Midday can work too, especially for dramatic sky photos.
Are There Any Recommended Smartphone Accessories for Landscape Photography?
You'll benefit from a few key accessories. Get a sturdy tripod for stability, a wide-angle lens for expansive shots, and a remote shutter to avoid camera shake. Don't forget a portable charger to keep your phone powered up.
How Can I Reduce Camera Shake When Taking Landscape Photos With My Smartphone?
To reduce camera shake, use a tripod or stabilize your phone against a solid object. Hold your breath and gently tap the shutter. Enable your phone's image stabilization feature and use a timer or remote shutter release.
What File Format Should I Use for Smartphone Landscape Photography?
You'll want to use RAW format for smartphone landscape photography. It captures more data, giving you greater flexibility in post-processing. If your phone doesn't support RAW, use the highest quality JPEG setting available.
In Summary
You're now equipped with three powerful tools for stunning landscape shots on your smartphone. By mastering HDR mode, you'll capture vibrant scenes with balanced exposure. The grid overlay will help you compose striking images using the rule of thirds. And with manual focus adjustment, you'll guarantee your landscapes are razor-sharp. Don't be afraid to experiment with these settings in various lighting conditions and locations. Your smartphone's capable of producing breathtaking landscapes – it's time to get out there and start shooting!


Leave a Reply