To elevate your mobile night photos, utilize available street lights for moody effects and silhouettes. Experiment with neon signs for vibrant colors and reflections. Capture car light trails using long exposure techniques. Leverage moonlight for natural ambiance, and play with reflections in water or glass surfaces. Incorporate handheld light sources like flashlights or phone screens for unique illumination. Maximize golden hour lighting for warm tones, and harness architectural lighting for dramatic compositions. Don't forget to use your phone's flashlight creatively for spotlight effects or soft illumination. These tricks will transform your nighttime shots, but there's even more to discover in the world of mobile night photography.
Utilize Available Street Lights
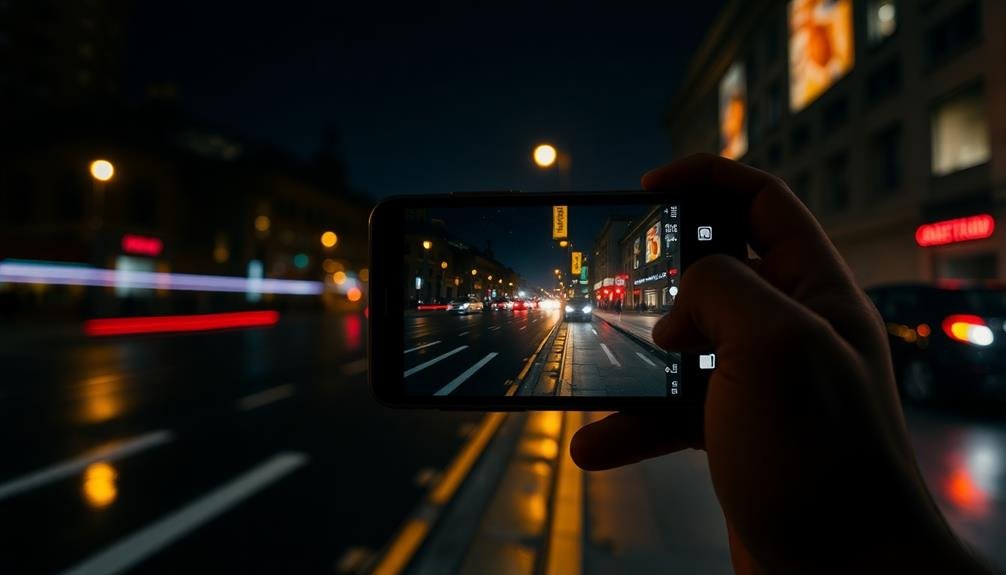
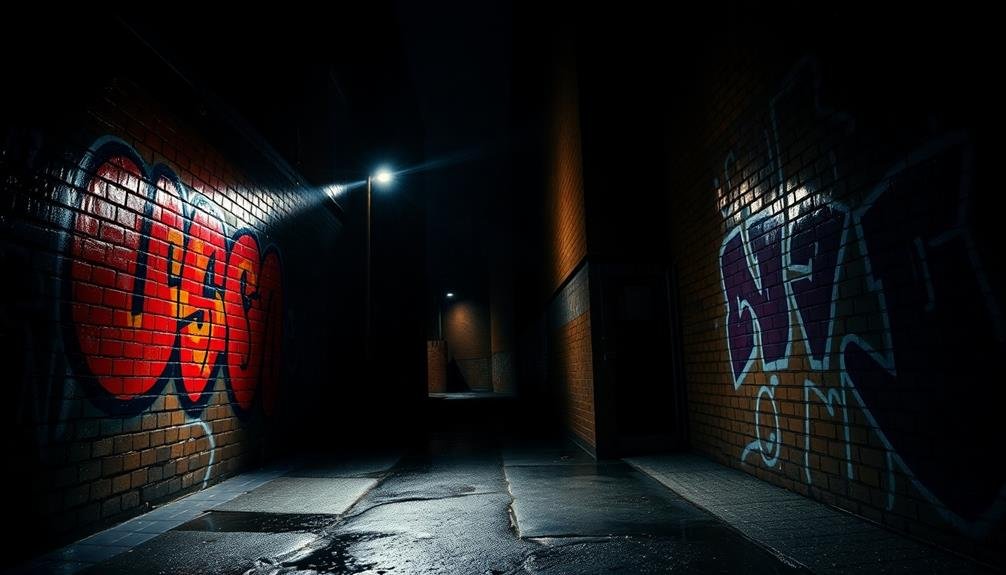
When you're out at night, street lights can be your best friend for mobile photography. These ubiquitous light sources offer unique opportunities to create atmospheric shots with minimal equipment. Position yourself near a street light to illuminate your subject, creating a moody, cinematic effect. Experiment with different angles to control the intensity and direction of the light.
Try capturing silhouettes by placing your subject between the street light and your camera. This technique creates dramatic, high-contrast images that emphasize shape and form. You can also use street lights to create interesting lens flares and starbursts. Simply adjust your position so the light source is partially visible in the frame.
Don't forget to play with shadows. Street lights cast long, dramatic shadows that can add depth and intrigue to your compositions. Use these shadows as leading lines or to frame your subject. If you're shooting portraits, position your subject at the edge of a pool of light for a mysterious, noir-inspired look.
Remember to adjust your camera settings to compensate for the limited light. Increase your ISO, widen your aperture, and slow down your shutter speed as needed.
With practice, you'll master the art of using street lights to elevate your nighttime mobile photography.
Experiment With Neon Signs

When you're shooting at night, neon signs can be your secret weapon for eye-catching mobile photos.
Try framing your subject with the neon glow, creating an enchanting halo effect that draws attention to your focal point.
Don't be afraid to play with the vibrant color palette neon signs offer, experimenting with different angles and exposures to capture the perfect mood for your nighttime shots.
Framing With Neon Glow
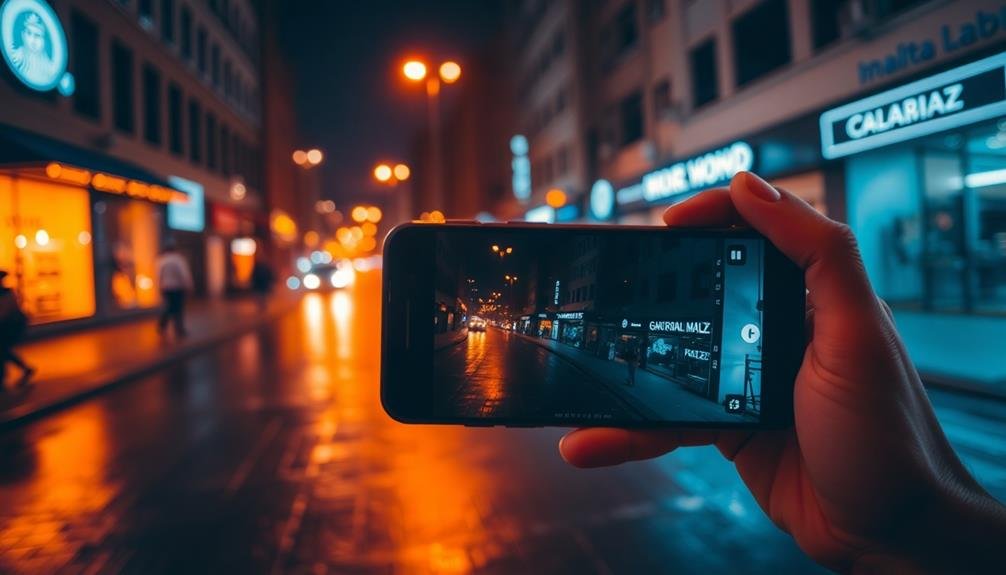
Neon signs offer a unique opportunity to frame your night photos with vibrant, colorful light. To create compelling compositions, use the neon glow as a natural frame for your subject. Position your camera so that the neon sign surrounds or partially encircles your main focus, drawing the viewer's eye to the center of the image.
Experiment with different angles and distances to achieve the desired effect. You can create a halo effect by placing your subject directly in front of the neon sign, or use the sign's glow to cast interesting shadows and highlights.
Don't be afraid to get creative with reflections, too. Capture the neon's reflection in puddles, windows, or shiny surfaces to add depth and interest to your shot.
Play with your camera's exposure settings to balance the bright neon with your subject. Use a lower ISO to reduce noise and a wider aperture to let in more light. If your phone has a night mode, try it out to see if it enhances the neon's vibrancy.
Color Palette Experimentation
From out of the vibrant glow of neon signs emerges a playground for color experimentation in night photography.
You'll find that neon signs offer a unique opportunity to play with bold, saturated hues in your mobile shots. Start by identifying areas with multiple neon signs, as these provide a diverse color palette to work with.
Experiment with different camera angles to capture interesting color combinations. Try positioning your phone to frame complementary colors side by side, or create contrast by juxtaposing warm and cool tones.
Don't be afraid to get close to individual signs to capture the intricate details of the illuminated tubes. Use your phone's manual settings to adjust white balance and exposure, allowing you to emphasize certain colors or create a specific mood.
Play with long exposures to capture light trails from passing cars, adding dynamic streaks of color to your composition. You can also try using reflective surfaces like puddles or windows to double the neon's impact and create symmetrical color patterns.
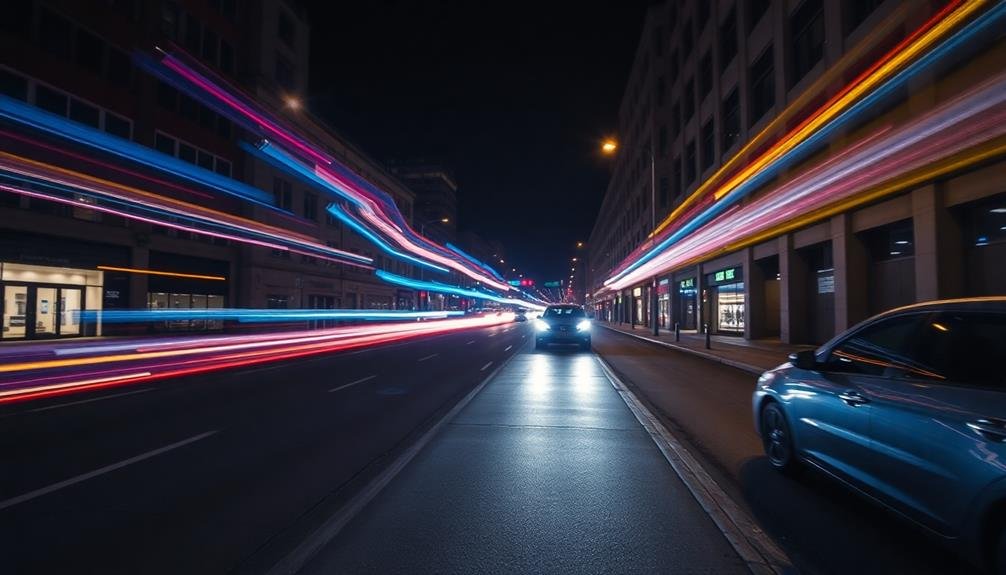
Capture Car Light Trails
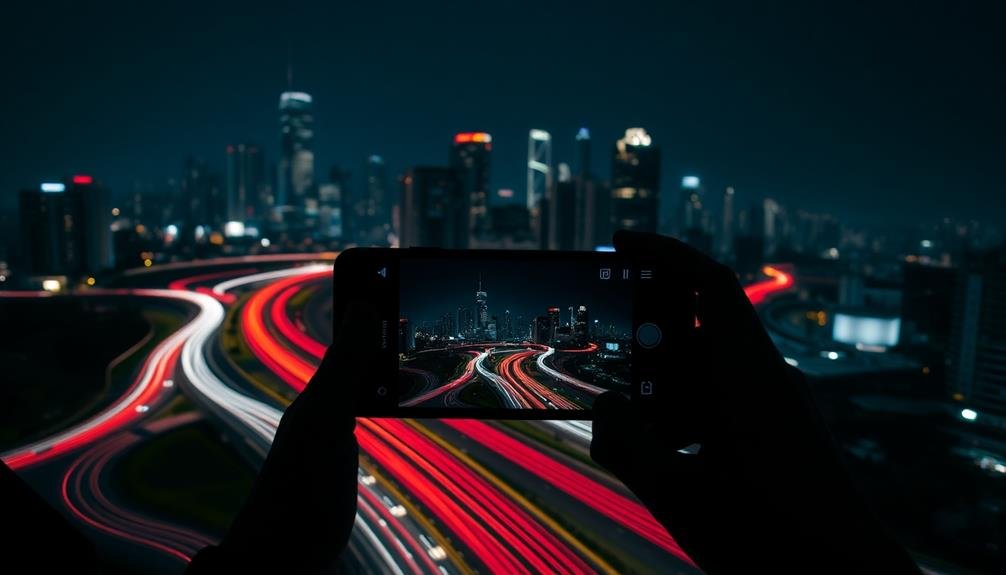
One of the most enchanting night photography techniques you can master with your mobile phone is capturing car light trails. This method transforms ordinary traffic into mesmerizing streaks of light, adding dynamism to your urban nightscapes.
To achieve this effect, you'll need to use your phone's manual or pro mode, allowing for longer exposure times. Find a safe spot overlooking a busy road or intersection. Set your phone on a stable surface or use a tripod to eliminate camera shake.
Adjust your camera settings: lower the ISO to reduce noise, set a small aperture for depth of field, and choose a slow shutter speed (typically 10-30 seconds). As cars pass by, their lights will create stunning trails across your image.
Consider these elements to enhance your light trail photos:
- Leading lines from road markings
- Interesting foreground elements like street signs
- Contrasting stationary lights from buildings
- Reflections on wet surfaces
- Curved roads for more dynamic trails
Experiment with different angles and compositions to find the most enthralling view. With practice, you'll soon be creating professional-looking light trail images using just your mobile phone, elevating your night photography skills to new heights.
Leverage Moonlight for Ambiance
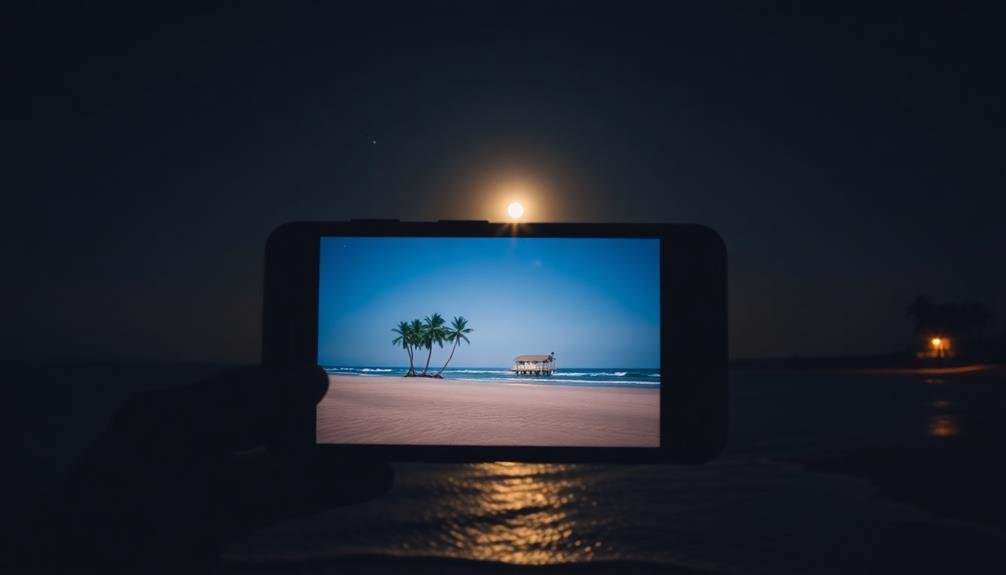
While artificial light sources can create stunning effects, natural moonlight offers a unique ambiance that's hard to replicate. To leverage moonlight in your mobile photos, you'll need to plan ahead and be patient.
Check the lunar calendar to find nights with a full or near-full moon, and choose locations with minimal light pollution. Set your phone's camera to manual mode or use a third-party app that allows longer exposures. Aim for shutter speeds between 10-30 seconds, depending on the moon's brightness.
Use a tripod or stable surface to keep your phone steady during the long exposure. To avoid camera shake, use your phone's timer or a remote shutter release. Experiment with composition by including silhouettes of trees, buildings, or landscapes against the moonlit sky.
The moon's soft light can create beautiful reflections on water or add an ethereal glow to fog and mist. For added interest, try capturing star trails by using even longer exposures of several minutes. Remember to focus manually on distant objects, as autofocus may struggle in low light conditions.
With practice, you'll be able to create enchanting night scenes that showcase the moon's natural beauty.
Play With Reflections

Reflections can transform ordinary night scenes into enchanting images. When you're out at night with your mobile phone, look for opportunities to capture reflections in various surfaces. Water is an obvious choice, but don't overlook other reflective surfaces like glass buildings, car hoods, or even puddles on the street.
To make the most of reflections in your night photography:
- Use a slow shutter speed to smooth out water reflections
- Experiment with different angles to find the best reflection
- Focus on the reflection itself, not just the subject
- Try partial reflections for a more abstract look
- Incorporate light sources to create interesting patterns
When shooting reflections at night, stability is essential. Use a tripod or rest your phone on a stable surface to avoid camera shake. If your phone has a night mode, activate it to capture more detail in low-light conditions.
Don't be afraid to adjust your exposure manually to balance the brightness of the reflection with the rest of the scene. Remember, reflections often appear darker than the original subject, so you may need to compensate for this in your settings.
With practice, you'll develop an eye for spotting and capturing stunning reflections that add depth and interest to your night photos.
Master Long Exposure Techniques

Long exposure photography can transform your nighttime mobile shots into stunning works of art. To master this technique, you'll need a tripod or stable surface to keep your phone steady during longer exposures. Many modern smartphones have built-in long exposure modes, but if yours doesn't, download a third-party app like Slow Shutter Cam or NightCap Camera.
Start with exposures of 1-2 seconds to capture light trails from moving cars or create a silky effect on flowing water. For more dramatic results, try exposures of 10-30 seconds to blur clouds or smooth out ocean waves.
When shooting cityscapes, use longer exposures to create streaks of light from passing vehicles, adding dynamic energy to your urban scenes.
Experiment with different ISO settings; lower ISOs produce less noise but require longer exposures. Balance your exposure by adjusting aperture and shutter speed.
Don't forget to focus manually, as autofocus may struggle in low light. Finally, use your phone's timer or a remote shutter release to avoid camera shake when starting the exposure.
With practice, you'll soon be capturing mesmerizing long exposure shots that elevate your nighttime mobile photography.
Create Light Paintings
Embracing creativity, light painting offers a unique way to add artistic flair to your nighttime mobile photography. This technique involves using light sources to "paint" in the air while your camera captures a long exposure.
To get started, you'll need a tripod or stable surface for your phone, a long exposure app, and various light sources like flashlights, glow sticks, or LED strips.
Set up your shot in a dark location and use your app's long exposure settings, typically 10-30 seconds. As the camera captures the scene, move your light source to create patterns, shapes, or words.
Experiment with different colors, speeds, and movements to achieve diverse effects. Remember, anything illuminated will appear in your final image, so plan your movements carefully.
Here are some light painting ideas to inspire you:
- Write words or draw shapes in the air
- Outline objects or people with light
- Create spirals or zigzags for abstract designs
- Use different colored lights for a rainbow effect
- Incorporate sparklers for a magical touch
With practice, you'll master this enthralling technique, transforming ordinary night scenes into extraordinary works of art using just your mobile phone and some creative lighting.
Embrace Silhouettes
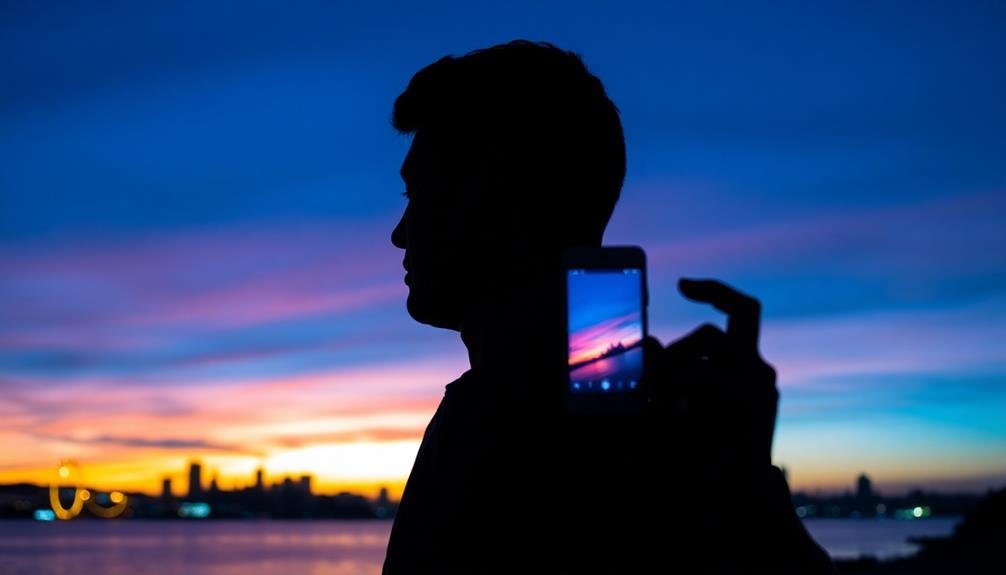
Silhouettes can transform ordinary night scenes into striking, dramatic images. To capture enchanting silhouettes with your mobile phone, position your subject between you and a bright light source, such as the setting sun, city lights, or a well-lit building. Confirm your subject has a distinct, recognizable shape to create a powerful visual impact.
Turn off your phone's flash and adjust the exposure by tapping on the brightest part of the screen. This will underexpose your subject, creating a dark silhouette against the bright background. Experiment with different angles and compositions to find the most interesting shapes and perspectives.
For added depth, try incorporating multiple silhouettes at varying distances from the camera. You can also play with partial silhouettes by allowing some light to illuminate parts of your subject, creating a more mysterious and intriguing effect.
Don't be afraid to get creative with your silhouettes. Use props, gestures, or unique locations to tell a story or evoke emotion.
Use LED Light Panels

LED light panels offer you versatile, portable lighting solutions for your nighttime mobile photography.
You'll find these panels invaluable for their adjustable color temperature, allowing you to fine-tune the mood and atmosphere of your shots.
With compact, battery-powered options available, you can easily carry these panels to any location and instantly enhance your low-light photos.
Adjustable Color Temperature
To take your night photography up a notch, consider investing in LED light panels with adjustable color temperature.
These versatile tools allow you to fine-tune the warmth or coolness of your lighting, mimicking various light sources and creating different moods in your photos. You'll have precise control over the color temperature, typically ranging from 3200K (warm) to 5600K (cool).
Adjustable color temperature offers several benefits for your night photography:
- Matching ambient light: Blend seamlessly with existing light sources
- Creating atmosphere: Set the mood by adjusting warmth or coolness
- Balancing skin tones: Achieve natural-looking portraits in any setting
- Highlighting subjects: Draw attention to specific areas with contrasting temperatures
- Enhancing depth: Use warm and cool tones to add dimension to your shots
When using adjustable color temperature, experiment with different settings to find the perfect balance for your scene.
Start with a neutral temperature and make small adjustments until you achieve the desired effect.
Remember, warmer tones can create a cozy, intimate atmosphere, while cooler tones often evoke a more modern or clinical feel.
Portable Lighting Solutions
For capturing stunning night shots with your mobile device, portable LED light panels are essential tools. These compact, lightweight units provide powerful illumination that can transform your nighttime photography. You'll find various sizes and intensities available, allowing you to choose the right panel for your needs.
When using LED panels, position them strategically to create depth and dimension in your shots. Experiment with placing the light at different angles to highlight specific subjects or create dramatic shadows. You can also use multiple panels to achieve more complex lighting setups, mimicking professional studio techniques.
Many LED panels offer adjustable brightness and color temperature, giving you precise control over your lighting. This flexibility allows you to match the ambient light or create contrast for artistic effect. Some panels even come with built-in diffusers or color filters, expanding your creative possibilities.
Don't forget to take into account battery life when selecting a portable LED panel. Opt for models with long-lasting batteries or those that can be charged via USB for extended shooting sessions.
With practice, you'll master the art of using portable LED panels to elevate your mobile night photography, capturing images that stand out from the crowd.
Explore Colored Gels

Experimenting with colored gels can transform your night photos, adding depth and mood to your mobile shots. These thin, translucent sheets come in various colors and can be placed over your phone's flash or external light sources. By using gels, you'll create unique lighting effects that can dramatically alter the atmosphere of your nighttime images.
When working with colored gels, consider the following techniques:
- Layer multiple gels for custom color blends
- Use contrasting colors to create visual interest
- Experiment with warm and cool tones for different moods
- Try split lighting with two different colored gels
- Combine gels with other light sources for complex effects
To get started, purchase a set of colored gels designed for mobile photography. You can easily attach them to your phone's flash using small clips or tape.
As you shoot, pay attention to how the colored light interacts with your subject and background. Adjust the intensity of your flash to fine-tune the effect, and don't be afraid to mix and match colors for unique results.
Incorporate Handheld Light Sources

You can elevate your nighttime mobile photography by incorporating handheld light sources.
Try using flashlights to create dramatic shadows or light trails for unique effects.
Experiment with your phone's screen as a soft illumination source, or use LED strips to add colorful ambiance to your shots.
Flashlights for Creative Effects
Flashlights and other handheld light sources offer a world of creative possibilities for night photography with your mobile device. You can use them to illuminate specific subjects, create light trails, or add unique lighting effects to your compositions.
By experimenting with different angles, colors, and intensities, you'll reveal new dimensions in your nighttime mobile photography.
Try these creative techniques with flashlights:
- Light painting: Move the light source during a long exposure to "draw" in your image
- Rim lighting: Position the light behind your subject to create a glowing outline
- Color gels: Place colored filters over your flashlight for dramatic color effects
- Silhouettes: Backlight your subject with a strong flashlight beam
- Texture highlighting: Use a side-angled light to emphasize surface details
Remember to adjust your camera settings to accommodate the additional light source.
Experiment with different exposure times and ISO settings to achieve the desired effect. You can also combine multiple light sources for more complex and interesting results.
Don't be afraid to get creative and push the boundaries of what's possible with your mobile device and a simple flashlight.
Phone Screens as Illumination
The humble phone screen, often overlooked as a light source, can be a powerful tool for illuminating night photos. You've got a versatile light right in your pocket, so why not put it to use? Start by adjusting your screen's brightness to its maximum setting. This will give you the most light to work with.
For portraits, position the screen close to your subject's face. The soft glow can create a flattering, ethereal effect. Try different angles to play with shadows and highlights. You can even use color by displaying a solid hue on your screen, adding a unique tint to your subject.
For still life shots, place the phone screen behind or beneath objects to create a backlit effect. This works particularly well with translucent items like glasses or leaves. Experiment with distance to control the intensity of the light.
Don't forget about your phone's flashlight feature. It's more directional than the screen and can be used to spotlight specific areas of your composition. Combine it with the screen for layered lighting effects.
LED Strips for Ambiance
Occasionally, LED strips emerge as the unsung heroes of night photography, offering a versatile and portable lighting solution for your mobile shots.
These flexible strips can be easily wrapped around objects or placed strategically to create enchanting ambient light. They're available in various colors, allowing you to experiment with different moods and atmospheres in your photos.
When using LED strips for night photography, consider these creative applications:
- Frame your subject with a soft glow by placing strips behind or around them
- Create light trails by moving the strips during a long exposure shot
- Use colored strips to add depth and dimension to landscapes or cityscapes
- Highlight architectural features by outlining buildings or structures
- Simulate neon signs for a retro or urban vibe in your photos
To get the most out of LED strips, experiment with different intensities and colors.
You can adjust the brightness to achieve the desired effect, from subtle accents to bold statements.
Don't forget to play with the strips' placement – try positioning them at various angles and distances from your subject to create unique lighting patterns and shadows.
With practice, you'll master the art of using LED strips to elevate your night photography game.
Maximize Golden Hour Lighting
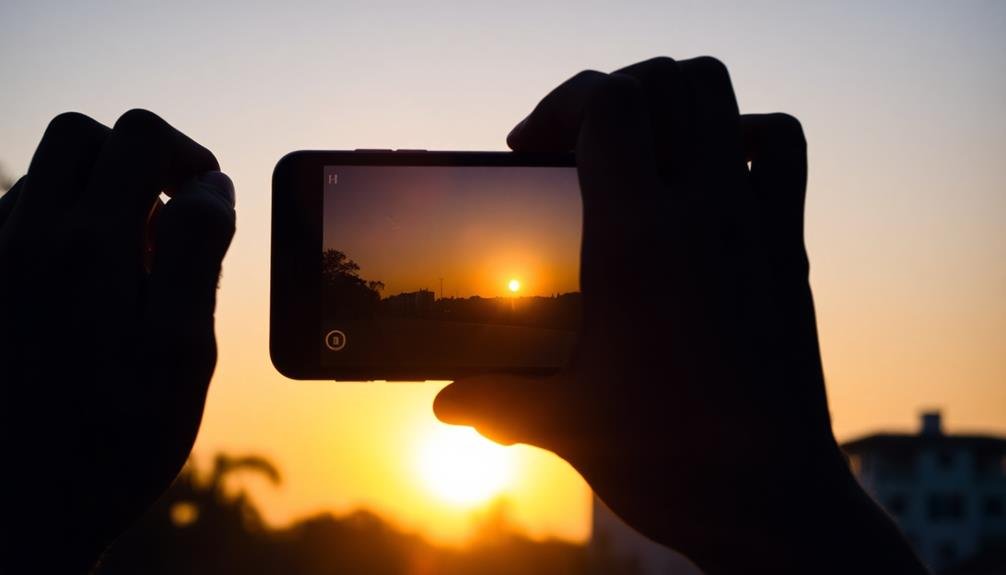
During the golden hour, nature's soft, warm light offers a unique opportunity for stunning mobile photography. To maximize this fleeting moment, position your subject facing the sun to capture the warm glow on their skin.
Alternatively, shoot with the sun behind them for a beautiful backlit effect, creating a halo around their silhouette.
Use your phone's HDR mode to balance the bright sky with darker foreground elements. Experiment with portrait mode to create a shallow depth of field, separating your subject from the background.
For landscape shots, include foreground elements to add depth and interest to your composition.
Don't forget to adjust your white balance to enhance the golden tones. Many mobile editing apps offer presets specifically designed for golden hour shots. Boost the warmth slightly in post-processing to emphasize the magical quality of this light.
If you're shooting cityscapes, look for reflective surfaces like windows or water that capture the golden light.
Harness Architectural Lighting

To elevate your night photography, take advantage of architectural lighting in your urban surroundings.
You can create striking compositions by framing your subjects with illuminated buildings or structures, adding depth and interest to your shots.
Additionally, you'll find opportunities for dramatic shadow play and vibrant color effects by positioning your camera to capture the interplay of artificial lights on various surfaces.
Frame With Illuminated Structures
Illuminated structures offer a unique opportunity to frame your night photos with enchanting architectural elements. Use bridges, buildings, or monuments as your canvas to create stunning compositions. Position yourself to capture these illuminated structures in a way that draws the viewer's eye to your main subject.
Look for symmetry and leading lines in architectural lighting to guide the viewer's gaze. You can use lit-up archways, columns, or staircases to create a natural frame around your subject. Don't be afraid to experiment with different angles and perspectives to find the most enthralling composition.
Here are some ideas for framing with illuminated structures:
- Use a brightly lit doorway to frame a person or object
- Capture a cityscape through the gaps in a lit-up bridge
- Frame a landmark between two illuminated skyscrapers
- Utilize glowing street lamps to create a tunnel effect
- Incorporate illuminated fountains or water features as a foreground frame
Remember to adjust your exposure settings to balance the bright lights with the darker surroundings.
Play with long exposures to capture light trails and add dynamic movement to your framed shots. By mastering the art of framing with illuminated structures, you'll elevate your night photography to new heights.
Capture Dramatic Shadow Play
Architectural lighting at night doesn't just illuminate structures; it creates dramatic shadow play that can transform your mobile photos. To capture these striking contrasts, look for buildings with interesting lighting designs. Seek out facades with spotlights, uplighting, or intricate patterns cast by decorative fixtures.
Position yourself to frame the most compelling shadows. You'll often find the best results by shooting from an angle, rather than head-on. This approach emphasizes the depth and texture created by the interplay of light and shadow. Experiment with different perspectives, including low angles that elongate shadows across the ground.
Adjust your camera settings to preserve shadow details. Lower your exposure slightly to maintain the dark areas while preventing highlights from blowing out. Use HDR mode if available, as it can help balance the extreme contrasts in night scenes.
Don't forget to include human elements. Silhouettes of people walking through dramatically lit areas can add scale and intrigue to your compositions.
Exploit Colorful Building Lights
Colorful illumination transforms ordinary buildings into stunning subjects for night photography. You'll find that architectural lighting can add vibrant hues and dramatic contrasts to your mobile shots. Seek out buildings with interesting lighting designs, as they often provide ready-made compositions.
When shooting, experiment with different angles to capture the most striking views of the illuminated structures. Try low angles to emphasize the building's height, or look for reflections in nearby water bodies or windows. Use your phone's HDR mode to balance the bright lights with darker areas.
Consider these techniques to exploit colorful building lights:
- Frame the building with surrounding elements
- Capture light trails from passing cars
- Include silhouettes of people for scale
- Focus on interesting architectural details
- Combine multiple lit buildings in one shot
Don't be afraid to adjust your camera's exposure settings manually. Underexposing slightly can intensify colors and prevent overblown highlights.
Play with white balance to enhance or alter the mood of the scene. Remember, the key is to let the building's unique lighting guide your composition and create an enchanting nighttime image.
Enhance With Phone Flashlight
With your phone's built-in flashlight, you can dramatically enhance your night photos. This simple tool offers versatile lighting options for various nighttime scenes. Use it to illuminate nearby subjects, creating a spotlight effect that draws attention to specific elements in your composition.
For portraits, hold the flashlight at an angle to create dramatic shadows and highlights on faces. Experiment with different distances between the flashlight and your subject. Closer positioning produces harsher light, while moving farther away softens the illumination.
Try bouncing the light off nearby surfaces like walls or reflective objects to achieve a diffused, more natural look. For creative effects, cover the flashlight with colored cellophane or tissue paper to add a tinted glow to your images.
When photographing larger scenes, use the flashlight to "paint" light onto specific areas during a long exposure. This technique allows you to selectively brighten certain elements while maintaining the overall night atmosphere.
Remember to adjust your camera settings to compensate for the added light source. Increase your shutter speed or lower your ISO to prevent overexposure when using the flashlight up close.
Frequently Asked Questions
What Camera Settings Are Best for Night Photography on Smartphones?
You'll want to use manual mode for night shots. Lower your ISO, slow down the shutter speed, and use a wider aperture. Don't forget to stabilize your phone with a tripod for crisp, clear images.
How Can I Reduce Noise in Low-Light Mobile Photos?
To reduce noise in low-light mobile photos, you'll want to steady your phone, use night mode, lower ISO, increase exposure time, and shoot in RAW. Don't forget to clean your lens and avoid digital zoom.
Are Tripods Necessary for Night Photography With Smartphones?
While tripods aren't absolutely necessary, they're highly recommended for night photography with smartphones. You'll get sharper images and can use longer exposures. If you don't have one, try stabilizing your phone against a solid surface.
Which Smartphone Models Excel at Night Photography?
You'll find the iPhone 12 Pro, Google Pixel 5, and Samsung Galaxy S21 Ultra excel at night photography. They've got advanced night modes, larger sensors, and AI-powered processing. Don't forget the Huawei P40 Pro for its impressive low-light capabilities.
How Do I Protect My Phone From Moisture During Nighttime Shoots?
You'll want to use a waterproof case or bag for your phone. Keep silica gel packets handy to absorb moisture. Avoid sudden temperature changes, and wipe your device with a microfiber cloth. Don't forget to protect your lens too.
In Summary
You've now got a toolkit of night lighting tricks to elevate your mobile photos. From street lights to neon signs, you're ready to capture stunning nighttime shots. Don't forget to play with reflections and light trails. Remember, your phone's flashlight can be a powerful tool. Experiment with different techniques, and you'll soon be creating eye-catching nighttime images that stand out. Keep practicing, and watch your night photography skills soar.


Leave a Reply