
RAW photography on your mobile device opens up pro-level image quality and creative control. Unlike JPEGs, RAW files capture all sensor data, giving you greater flexibility in post-processing. You'll preserve more details in highlights and shadows, allowing for extensive adjustments without quality loss. To get started, enable RAW capture in your phone's camera settings or use a third-party app. Choose a RAW editing app that suits your workflow, then master exposure, white balance, and color grading techniques. With practice, you'll harness the full potential of your phone's camera, creating stunning images that rival those from traditional DSLRs. Discover how to elevate your mobile photography to new heights.
Understanding RAW Format
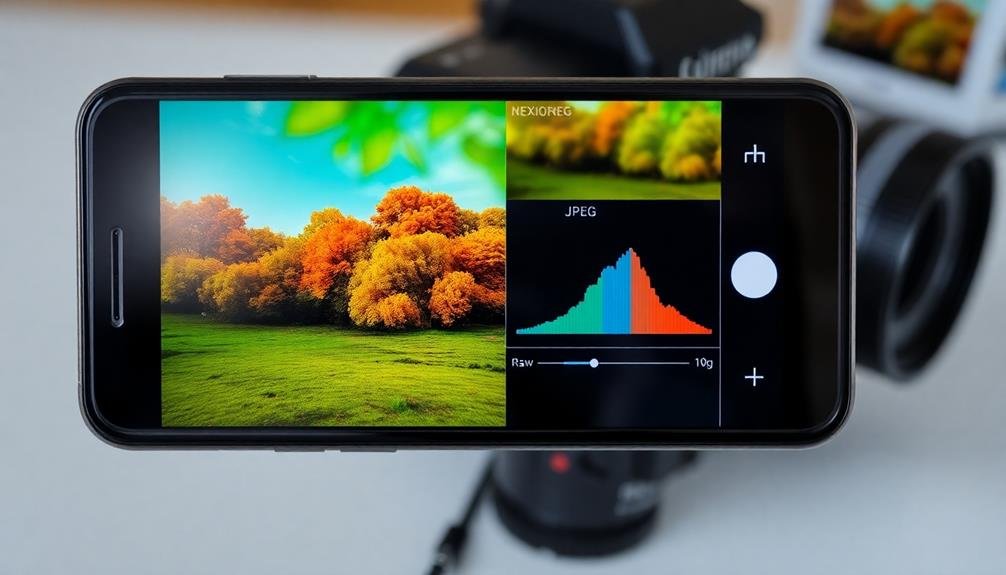
RAW photo formats are the digital equivalent of photographic negatives, capturing all the data your camera's sensor records. Unlike JPEG files, which compress and process image data, RAW files preserve the original information, giving you greater control over the final image.
When you shoot in RAW, you're storing uncompressed and unprocessed data. This means you'll have more flexibility in post-processing, allowing you to adjust white balance, exposure, and color with minimal loss of quality.
RAW files also contain a wider dynamic range, preserving details in both highlights and shadows that might be lost in JPEG compression.
However, RAW files come with trade-offs. They're considerably larger than JPEGs, taking up more storage space on your device. They also require processing before they can be shared or printed, as most devices and platforms don't support RAW viewing natively.
To work with RAW files on your mobile device, you'll need a compatible camera app and editing software. Many high-end smartphones now offer RAW capture capabilities, and there are numerous apps available for processing these files on the go.
Benefits of RAW Photography
Now that you understand what RAW files are, let's explore why they're so valuable for mobile photographers. RAW images capture considerably more data than standard JPEG files, giving you greater flexibility in post-processing.
You'll have more control over white balance, exposure, and color adjustments without degrading image quality. RAW files preserve highlight and shadow details that might be lost in compressed formats. This extended dynamic range allows you to recover seemingly overexposed or underexposed areas, salvaging shots that would otherwise be unusable.
You'll also benefit from increased color depth, enabling more precise color grading and smoother tonal shifts. Another advantage is the ability to apply non-destructive edits. You can experiment with different processing techniques without permanently altering the original image data.
This freedom encourages creativity and lets you revisit your work with fresh perspectives. RAW photography also future-proofs your images. As editing software improves, you can reprocess older RAW files to take advantage of new algorithms and features, potentially enhancing your past work.
While RAW files require more storage space and processing power, the benefits often outweigh these minor drawbacks for serious mobile photographers.
Enabling RAW on Your Smartphone
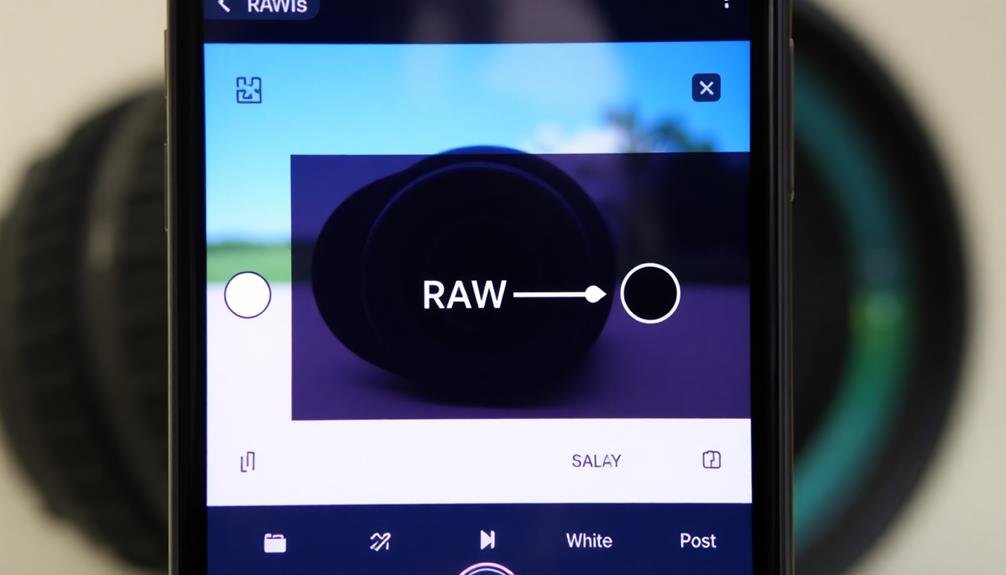
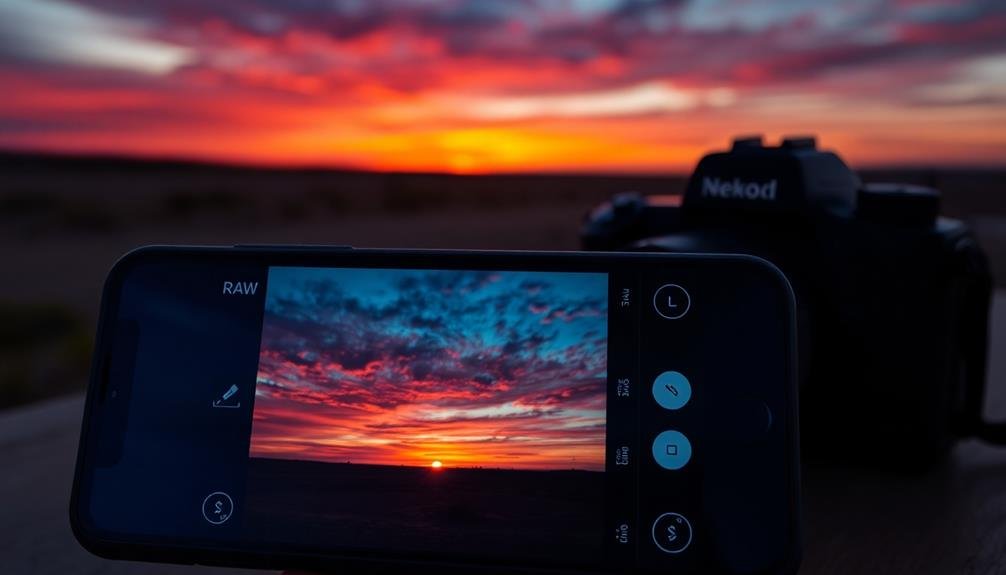
Before diving into advanced editing techniques, you'll need to confirm your smartphone is set up to capture RAW images. Most modern smartphones support RAW photography, but you'll often need to enable it manually. For Android devices, head to your camera app's settings and look for an option to save images in RAW format. On iPhones, you'll need to use a third-party app like Halide or ProCam to shoot in RAW.
Once enabled, you'll typically see a RAW indicator in your camera interface. Remember that RAW files are considerably larger than JPEGs, so make sure you have enough storage space. Here's a quick comparison of popular smartphones and their RAW capabilities:
| Brand | Model | RAW Support |
|---|---|---|
| Apple | iPhone 12+ | Yes |
| Samsung | Galaxy S20+ | Yes |
| Pixel 5+ | Yes |
Keep in mind that not all camera modes support RAW capture. It's usually limited to the main camera in standard photo mode. After enabling RAW, take a test shot and check your gallery to confirm you're capturing RAW files alongside JPEGs.
Choosing the Right RAW Apps

When selecting RAW editing apps for your mobile device, you'll find numerous options available on both iOS and Android platforms.
Popular choices include Lightroom Mobile, Snapseed, and VSCO, each offering unique features and interfaces.
As you explore these apps, consider factors like editing capabilities, user-friendliness, and integration with your existing workflow to find the best fit for your needs.
Popular RAW Editing Apps
A sea of options awaits you in the world of mobile RAW editing apps. To help you navigate this landscape, we've compiled a list of popular and powerful tools that'll elevate your mobile photography game.
First, let's look at some top contenders:
| App Name | Platform | Key Features |
|---|---|---|
| Lightroom Mobile | iOS, Android | Adobe ecosystem, cloud sync |
| Snapseed | iOS, Android | Intuitive interface, selective edits |
| VSCO | iOS, Android | Film-inspired presets, social sharing |
| Darkroom | iOS | Advanced color grading, batch editing |
| RNI Films | iOS, Android | Analog film simulations, RAW support |
Each app offers unique strengths. Lightroom Mobile excels in professional-grade editing and seamless integration with desktop workflows. Snapseed provides powerful tools in a user-friendly package, perfect for quick edits on the go. VSCO stands out with its artistic filters and community features. Darkroom impresses with its intuitive color tools and iOS-optimized performance. RNI Films caters to photographers seeking authentic film looks.
When choosing your RAW editing app, consider factors like your editing style, desired features, and workflow preferences. Don't hesitate to try multiple apps to find the one that best suits your needs.
Features to Consider
The selection process for your ideal RAW editing app hinges on understanding key features that align with your workflow and creative vision.
Look for apps offering non-destructive editing, allowing you to revert changes without affecting the original file. Robust exposure and color correction tools are essential, including sliders for highlights, shadows, contrast, and white balance adjustments.
Consider apps with advanced features like selective editing, which lets you apply adjustments to specific areas of your image. Noise reduction and sharpening tools can greatly enhance image quality, especially in low-light shots. Lens correction features help address distortion and vignetting issues common in mobile photography.
Evaluate the app's interface and user experience. An intuitive layout with customizable workspaces can streamline your editing process.
Check for cloud integration and syncing capabilities if you work across multiple devices. Some apps offer presets or filters, which can speed up your workflow and provide creative inspiration.
Lastly, consider the app's export options. Look for the ability to save in various formats and resolutions, as well as easy sharing to social media platforms or cloud storage services.
Mastering Exposure in RAW

Three key elements form the foundation of mastering exposure in RAW: ISO, shutter speed, and aperture. When shooting RAW on your mobile device, you'll have greater control over these settings, allowing for more precise adjustments in post-processing.
ISO determines your camera's sensitivity to light. In RAW, you can push ISO higher without introducing as much noise as you'd in JPEG. This flexibility is especially useful in low-light situations.
Shutter speed controls motion blur and light intake. With RAW, you can recover details in slightly over or underexposed areas, giving you more freedom to experiment with longer exposures or freeze action.
Aperture affects depth of field and light intake. While most mobile devices have fixed apertures, understanding this concept helps you make informed decisions about composition and focus.
To master exposure in RAW, experiment with different combinations of these settings. Use your device's histogram to guarantee you're capturing maximum detail in highlights and shadows.
Perfecting White Balance
White balance is essential for accurate color representation in your RAW photos, and understanding color temperature is the first step to mastering it.
You'll find that manual white balance adjustments give you precise control over the warmth or coolness of your images.
For quicker edits, you can also explore preset white balance options tailored to common lighting situations, such as daylight, cloudy, or tungsten.
Understanding Color Temperature
Color temperature plays an essential role in achieving accurate and pleasing colors in your RAW photos. It's measured in Kelvin (K) and represents the hue and intensity of a light source.
Lower temperatures (2000-3000K) produce warm, orange-yellow tones, while higher temperatures (6000-7000K) create cooler, blue tones.
When shooting RAW, you'll have more flexibility to adjust color temperature in post-processing. However, understanding it during capture can help you make better decisions.
Pay attention to your light sources: natural daylight is around 5500K, while indoor tungsten lighting is about 2700K. Fluorescent lights can vary widely, often producing a greenish cast.
To use color temperature creatively, try these techniques:
- Warm up portraits by lowering the temperature for a flattering glow.
- Cool down landscapes to enhance blue skies and water.
- Match the temperature to the time of day for realistic scenes.
- Intentionally mismatch temperature for artistic effects.
Manual White Balance Adjustments
While auto white balance can be convenient, mastering manual white balance adjustments will give you ultimate control over your RAW photos' color accuracy.
By adjusting the white balance manually, you'll guarantee that whites appear truly white and other colors are rendered correctly, regardless of lighting conditions.
To perfect your white balance in RAW photos:
- Use a gray card or white balance tool for precise calibration
- Adjust the temperature slider to balance warm and cool tones
- Fine-tune the tint slider to remove unwanted color casts
- Experiment with presets for different lighting scenarios
- Pay attention to skin tones as a reference for natural-looking results
When adjusting white balance manually, start by identifying the light source in your image.
Natural daylight, artificial indoor lighting, and mixed lighting situations all require different approaches.
You'll want to warm up images shot in cool light and cool down those captured in warm light.
Preset White Balance Options
For those new to manual white balance adjustments or pressed for time, preset white balance options offer a quick and effective solution. Most RAW editing apps provide a range of presets tailored to common lighting situations.
You'll typically find options like Daylight, Cloudy, Shade, Tungsten, and Fluorescent.
To use these presets, simply select the one that best matches your shooting conditions. Daylight is ideal for outdoor scenes on sunny days, while Cloudy works well in overcast situations. Shade is perfect for images captured in shadowy areas with cooler tones.
For indoor shots, Tungsten compensates for the warm, orange glow of traditional light bulbs, and Fluorescent counteracts the greenish tint of fluorescent lighting.
Don't hesitate to experiment with different presets to see which one yields the most natural-looking results. Sometimes, an unexpected choice can lead to a more pleasing image.
Harnessing Dynamic Range

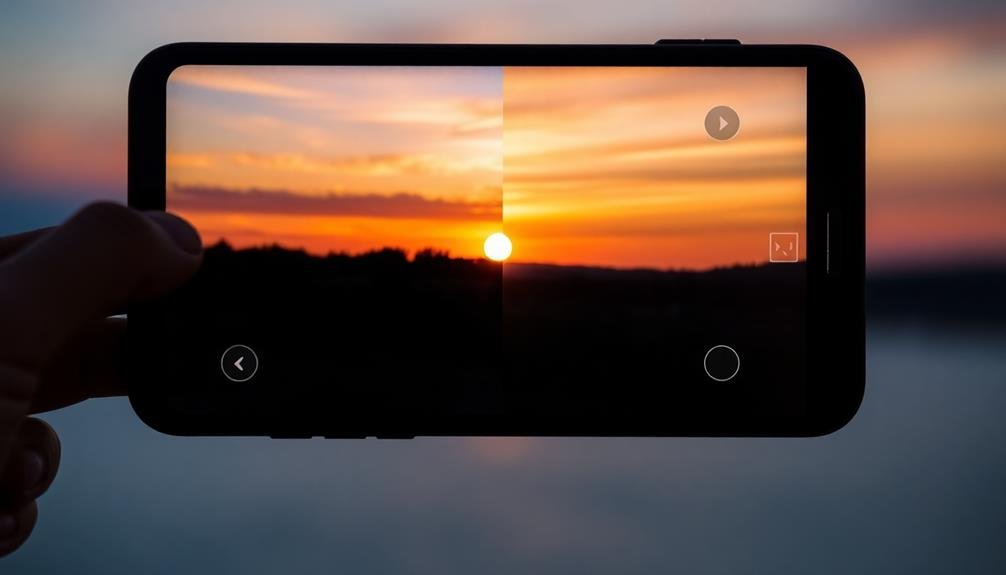
Dynamic range stands out as one of the most significant advantages of RAW photography. It refers to the span between the darkest and brightest parts of an image that your camera can capture.
When you shoot in RAW, you'll have more flexibility to adjust exposure and recover details in both shadows and highlights during post-processing.
To harness the full potential of dynamic range in your mobile RAW photos:
- Expose for the highlights to prevent overexposure
- Use HDR mode for high-contrast scenes
- Experiment with exposure bracketing
- Leverage histogram tools to check exposure
- Apply local adjustments in editing to balance exposure
By capturing RAW files, you're preserving more data from your camera's sensor. This allows you to push and pull exposure levels without degrading image quality as drastically as with JPEG files.
You'll find that you can rescue details in seemingly blown-out skies or bring out information in dark shadows that would otherwise be lost.
Noise Reduction Techniques

In the domain of mobile RAW photography, noise reduction techniques play an essential role in enhancing image quality. As you edit your RAW files, you'll encounter various types of noise that can degrade your images. Understanding these noise types and how to address them will greatly improve your final results.
To effectively reduce noise, you'll need to balance detail preservation with smoothing. Start by identifying the primary noise source in your image:
| Noise Type | Characteristics | Reduction Technique |
|---|---|---|
| Luminance | Grainy texture | Selective smoothing |
| Chrominance | Color speckles | Color blending |
| Hot pixels | Bright spots | Spot removal |
| Banding | Striped patterns | Gradient adjustments |
| Long exposure | Overall graininess | Stacking/averaging |
Apply noise reduction selectively, focusing on areas with less detail like skies or shadows. Use your editing app's noise reduction sliders cautiously, as excessive smoothing can lead to loss of texture and detail. For best results, combine multiple techniques and experiment with different settings. Don't forget to zoom in to 100% view to assess the effectiveness of your noise reduction efforts accurately.
Sharpening RAW Images

Photographers know that sharpening is an essential step in RAW image processing. When you're working with RAW files on your mobile device, you'll need to apply sharpening to bring out the details and crispness in your images.
Start by adjusting the overall sharpness, then fine-tune with local adjustments for specific areas.
Here are five key tips for sharpening RAW images on your mobile device:
- Use a light touch: Over-sharpening can introduce artifacts and noise
- Focus on edges: Sharpen the edges of objects rather than entire areas
- Adjust radius: Smaller radius for fine details, larger for broader areas
- Mask selectively: Apply sharpening only to areas that need it
- Balance with noise reduction: Too much sharpening can amplify noise
Remember that sharpening should be one of the last steps in your editing process. It's best to apply it after you've made other adjustments like exposure, contrast, and color corrections.
Pay attention to how sharpening affects different parts of your image, such as textures, faces, and landscapes. With practice, you'll develop an eye for achieving the perfect balance of sharpness without compromising the natural look of your photos.
Color Grading for Impact
Color grading is a powerful tool that can transform the mood and impact of your RAW photos. When you're working with RAW files on your mobile device, you'll have more control over color adjustments than with standard JPEGs.
Start by adjusting the white balance to set the overall tone of your image. Then, fine-tune the hue, saturation, and luminance of individual colors to create your desired look.
Experiment with split-toning to add subtle color casts to your highlights and shadows, enhancing the depth and atmosphere of your photos. Don't shy away from using color curves to precisely adjust the brightness and contrast of specific color channels.
For a cinematic feel, try emulating popular film looks by adjusting the RGB curves.
Remember that color grading isn't just about making your images pop; it's about conveying emotion and storytelling. Use cooler tones for a calming effect or warmer hues to create a sense of warmth and comfort.
Pay attention to color harmony and consider using complementary colors to make your subject stand out. With practice, you'll develop your unique color grading style that'll set your mobile photography apart.
RAW Editing Workflow Tips
Begin your RAW editing workflow by organizing your files for easy access and efficient processing.
Once you've sorted your images, focus on fine-tuning the exposure to bring out the details in highlights and shadows.
You'll then want to adjust the color balance and saturation to achieve your desired look, taking advantage of the increased color information available in RAW files.
Organize Your RAW Files
Numerous RAW files can quickly overwhelm your device's storage and make finding specific images challenging. To streamline your workflow and keep your RAW files organized, implement a systematic approach.
Create a dedicated folder structure for your RAW images, separating them by date, location, or project. Use descriptive file names that include relevant information like the date, event, or subject.
Consider implementing a rating system to quickly identify your best shots. Many mobile editing apps allow you to flag or star your favorite images, making it easier to locate them later.
Regularly back up your RAW files to cloud storage or an external hard drive to protect your work and free up space on your device.
Here are five essential tips for organizing your RAW files:
- Use consistent naming conventions
- Create a logical folder structure
- Implement a rating system
- Tag images with relevant keywords
- Regularly backup and archive older files
Fine-tune Exposure and Color
Once you've organized your RAW files, it's time to plunge into the editing process. Start by adjusting the exposure, which is essential for bringing out the best in your RAW image. Use the exposure slider to brighten or darken the overall image, guaranteeing you don't lose detail in the highlights or shadows.
Next, fine-tune the white balance to correct any color casts and achieve a natural look. Pay attention to the highlights and shadows sliders, which allow you to recover detail in overexposed or underexposed areas. Adjust the contrast to add depth and dimension to your image.
Use the clarity slider sparingly to enhance mid-tone contrast and texture. For color adjustments, start with the vibrance and saturation sliders. Vibrance increases the intensity of muted colors while preserving skin tones, while saturation affects all colors equally.
Use the HSL (Hue, Saturation, Luminance) panel to target specific color ranges for more precise adjustments. Don't forget to check your histogram throughout the editing process to verify you're maintaining a balanced exposure.
Exporting for Social Media
After perfecting your RAW photo edits, it's time to share your masterpiece with the world. When exporting for social media, you'll need to take into account each platform's specific requirements and limitations. Most social media sites compress images, so you'll want to strike a balance between quality and file size.
Start by choosing the right file format. JPEG is widely supported and offers good compression. Next, adjust your image size to match the platform's ideal dimensions. For instance, Instagram prefers 1080×1080 pixels for square posts.
Take note of these tips when exporting for social media:
- Use sRGB color profile for consistent colors across devices
- Adjust sharpening to compensate for compression artifacts
- Apply a subtle vignette to draw attention to the subject
- Save multiple versions for different platforms
- Include relevant metadata and tags
Don't forget to check your export settings for quality. A setting between 80-90% usually provides a good balance between file size and image quality.
RAW Storage and Management

With your stunning RAW edits ready for social media, it's important to contemplate how you'll store and manage these valuable files. RAW images take up considerably more space than JPEGs, so you'll need a robust storage solution.
Consider using cloud storage services like Google Drive, Dropbox, or iCloud to keep your files accessible and backed up.
Organize your RAW files systematically. Create folders based on date, location, or event to easily locate specific images later. Use consistent naming conventions for your files, including the date and a brief description. This will help you quickly identify images without opening them.
Implement a regular backup routine to protect your work. Use external hard drives or network-attached storage (NAS) devices for local backups. Sync these backups with your cloud storage for added security.
Consider using digital asset management (DAM) software like Adobe Lightroom or Capture One to catalog and tag your RAW files. These tools allow you to add metadata, keywords, and ratings to your images, making them easier to search and sort.
Regularly review and cull your RAW library to free up space and maintain a streamlined collection. Delete subpar shots and keep only your best work.
Overcoming RAW File Limitations

While RAW files offer unparalleled flexibility in editing, they come with their own set of challenges. To overcome these limitations and make the most of your mobile RAW photography, you'll need to adopt specific strategies and tools.
First, address the increased file size by investing in ample storage or utilizing cloud solutions. You'll also need to manage your device's processing power, as RAW files demand more resources. To combat this, consider batch processing or using a dedicated editing device.
To fully leverage RAW's potential, familiarize yourself with advanced editing techniques:
- Exposure adjustments
- White balance correction
- Shadow and highlight recovery
- Noise reduction
- Sharpening and clarity enhancement
Learn to use specialized RAW editing apps that offer more extensive tools than standard photo editors. Don't shy away from experimenting with different editing styles to find your unique look.
Lastly, overcome compatibility issues by converting RAW files to more universal formats like JPEG or TIFF when sharing or printing.
Frequently Asked Questions
Can RAW Photography Improve the Quality of Selfies and Portrait Shots?
Yes, RAW photography can enhance your selfies and portraits. You'll capture more detail, have greater control over exposure, and enjoy improved editing flexibility. It's especially beneficial in challenging lighting conditions, allowing you to fine-tune your shots later.
How Does RAW Affect Battery Life When Shooting on a Smartphone?
Shooting in RAW can drain your battery faster. You'll use more processing power and storage space, which increases energy consumption. If you're planning a long photo session, consider bringing a portable charger or limiting RAW usage.
Are There Any Legal Considerations When Using RAW Files Commercially?
When using RAW files commercially, you'll need to take into account copyright laws and licensing agreements. Make certain you have the right to use and distribute the images. It's wise to consult a legal expert for specific advice on your situation.
Can RAW Files Be Directly Shared or Viewed on Social Media Platforms?
You can't directly share RAW files on most social media platforms. They're typically too large and not supported. You'll need to convert them to more common formats like JPEG before posting for others to view.
How Do Weather Conditions Impact RAW Photography on Mobile Devices?
Weather conditions greatly affect your RAW photos on mobile devices. You'll capture more detail in challenging light, like overcast days or sunsets. You're also better equipped to handle high-contrast scenes and recover highlights or shadows during editing.
In Summary
You've now got the tools to elevate your mobile photography to pro levels with RAW. Don't be intimidated by the learning curve; it's worth the effort. Experiment with exposure, perfect your editing workflow, and manage your files effectively. Remember, RAW gives you unparalleled control over your images. As you practice, you'll find your photos improving dramatically. Embrace the power of RAW, and watch your mobile photography skills soar to new heights.


Leave a Reply