
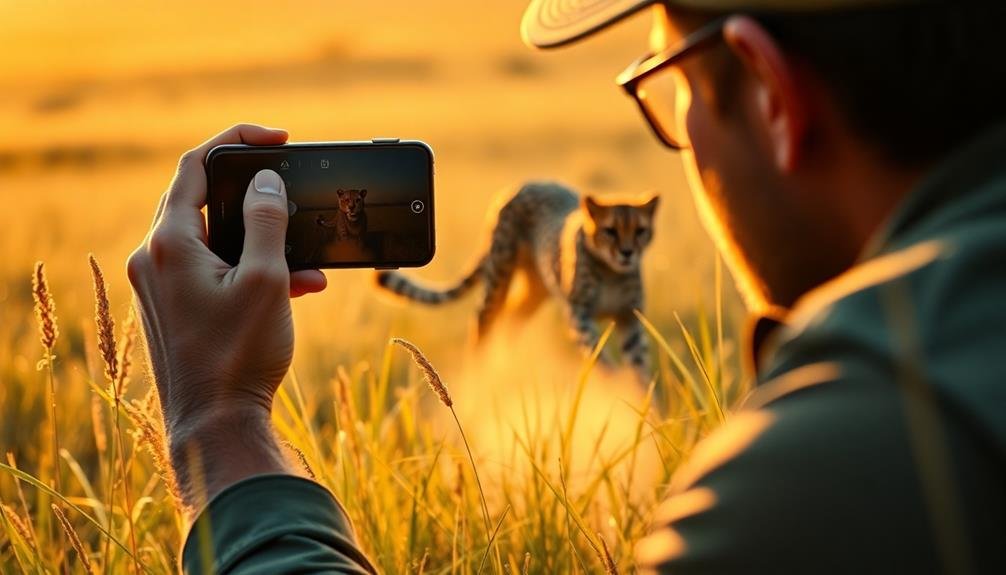
To capture stunning RAW wildlife photos on your mobile device, focus on seven key settings. Enable RAW capture mode for maximum post-processing flexibility. Adjust ISO to balance sensitivity and noise. Set shutter speed to freeze or blur motion as desired. Choose appropriate white balance for accurate colors. Use exposure compensation to fine-tune challenging lighting situations. Apply composition techniques like the Rule of Thirds for visually appealing shots. Finally, utilize burst mode to increase your chances of capturing the perfect moment. Mastering these settings will elevate your mobile wildlife photography, but there's even more to explore in the world of smartphone nature shots.
Enable RAW Capture Mode
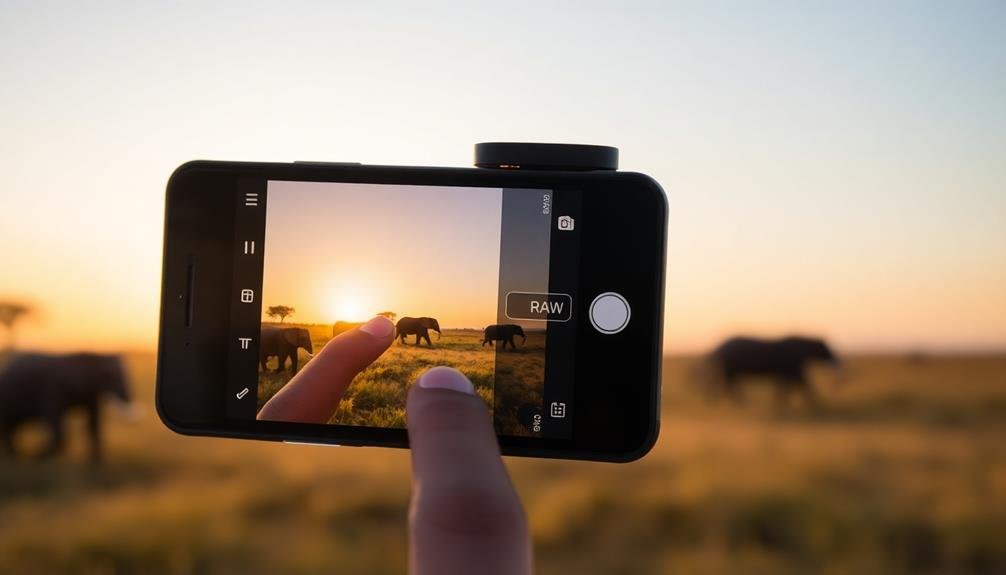
The first step to capturing stunning wildlife photos on your mobile device is enabling RAW capture mode. This feature allows you to capture uncompressed, unprocessed image data directly from your phone's camera sensor. RAW files contain more information than standard JPEG images, giving you greater flexibility in post-processing.
To enable RAW capture, navigate to your camera app's settings. Look for an option labeled "RAW" or "Pro Mode." If you can't find it, your device mightn't support RAW capture natively. In this case, consider downloading a third-party camera app that offers RAW functionality.
Once enabled, you'll notice larger file sizes and potentially slower shooting speeds. Don't let this deter you; the benefits far outweigh these minor inconveniences. RAW files preserve details in highlights and shadows that would be lost in JPEG compression, allowing you to recover seemingly unusable shots.
When shooting wildlife, RAW becomes particularly valuable. It helps you maintain image quality in challenging lighting conditions and gives you the freedom to adjust white balance, exposure, and color without degrading the image.
Set ISO for Optimal Sensitivity
Diving into ISO settings, you'll find an essential tool for balancing light sensitivity and image quality in wildlife photography. For mobile shooters, understanding and adjusting ISO is vital for capturing crisp, well-exposed images of animals in various lighting conditions.
Start with the lowest ISO possible, typically 100 or 200, to minimize noise and maintain image quality. In bright daylight, this lower setting will suffice. As light diminishes, gradually increase your ISO. For cloudy days or shaded areas, try ISO 400-800. In low-light situations like dawn or dusk, you may need to push to ISO 1600 or higher.
Remember, higher ISO values introduce more noise, potentially reducing image sharpness. Modern smartphones handle higher ISOs better than older models, but it's still wise to find the sweet spot for your device. Experiment in different lighting conditions to determine the highest usable ISO that maintains acceptable image quality.
When shooting fast-moving wildlife, you might need to compromise by using a higher ISO to achieve faster shutter speeds. This trade-off can help freeze motion and prevent blur, even if it slightly increases noise.
Adjust Shutter Speed for Motion
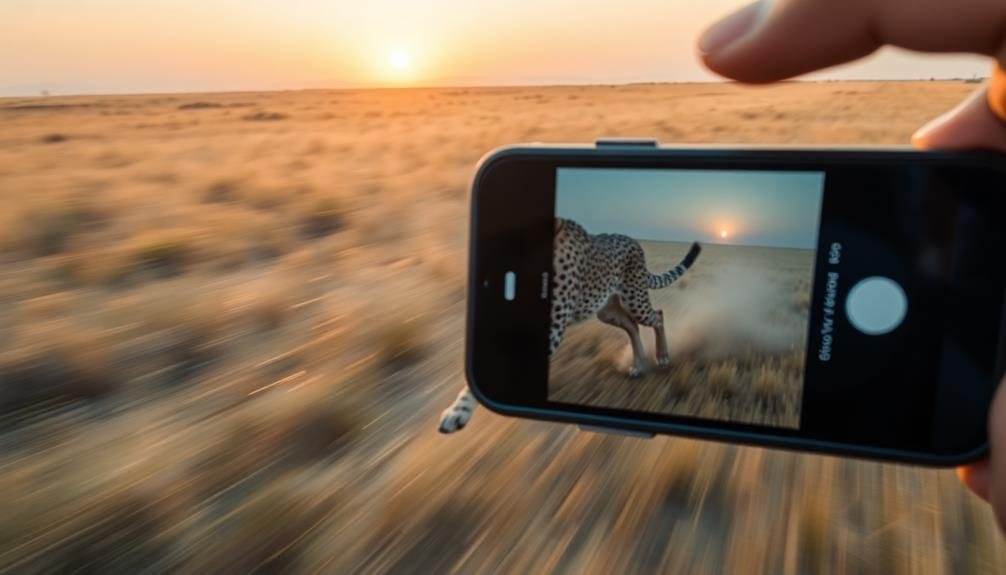
Mastering shutter speed is essential for capturing wildlife in motion. When shooting RAW on your mobile device, you'll need to adjust this setting manually to freeze action or create artistic blur. For sharp, crisp images of fast-moving animals, use a faster shutter speed of at least 1/1000th of a second. This will help you capture fleeting moments, like birds in flight or predators chasing prey.
If you're aiming for a sense of motion in your wildlife photos, opt for slower shutter speeds. Try 1/30th to 1/60th of a second to create intentional blur, showcasing an animal's movement. This technique works well for running herds or flowing water in natural habitats.
Remember, slower shutter speeds require a steady hand or a mobile tripod to avoid unwanted camera shake. Experiment with different shutter speeds to achieve various effects. Use 1/250th of a second for general wildlife portraits, ensuring sharpness while allowing some environmental movement.
In low-light situations, you may need to compromise by using slower shutter speeds and increasing your ISO to maintain proper exposure. Always consider your subject's speed and behavior when selecting the appropriate shutter speed for your wildlife shots.
Choose Appropriate White Balance

Choosing the right white balance is essential for capturing accurate colors in your wildlife photos. When shooting in RAW on your mobile device, you'll have more flexibility to adjust white balance in post-processing. However, it's still vital to get it as close as possible in-camera for better results.
To select the appropriate white balance, consider the lighting conditions you're shooting in. Most mobile cameras offer preset options like daylight, cloudy, shade, and tungsten. If you're unsure, start with the auto white balance setting and adjust as needed.
Here are some tips to help you choose the right white balance:
- Use daylight setting for sunny outdoor shots
- Switch to cloudy or shade for overcast conditions
- Opt for tungsten when shooting in artificial indoor lighting
- Experiment with custom white balance for challenging light situations
- Pay attention to the color temperature of your surroundings
Experiment With Exposure Compensation

Experimenting with exposure compensation is an essential skill for mobile wildlife photographers shooting in RAW. It allows you to fine-tune your camera's exposure settings to capture the perfect shot in challenging lighting conditions. Most mobile devices offer exposure compensation features, typically ranging from -2 to +2 EV in 1/3 stop increments.
When shooting wildlife, you'll often encounter high-contrast scenes or backlit subjects. In these situations, try underexposing by 1/3 to 2/3 stops to preserve highlight details. For darker subjects against bright backgrounds, increase exposure compensation to reveal more details in the shadows.
Remember, RAW files offer greater flexibility in post-processing, so don't be afraid to push your exposure adjustments further than you'd with JPEG.
Start by taking a test shot and examining the histogram. If it's skewed to either side, adjust your exposure compensation accordingly. For fast-moving subjects, bracket your exposures by taking multiple shots with different compensation values. This technique increases your chances of capturing the perfect exposure.
As you gain experience, you'll develop an intuitive sense of when and how much to adjust your exposure compensation for various wildlife scenarios.
Focus on Composition Techniques
While capturing wildlife on your mobile device, you'll want to master key composition techniques.
Start by applying the Rule of Thirds, imagining a 3×3 grid over your frame and placing your subject along these lines or at their intersections.
Additionally, incorporate the Leading Lines technique by using natural elements in the environment to guide the viewer's eye towards your main subject.
Rule of Thirds
The Rule of Thirds is a fundamental composition technique that can transform your wildlife photos from ordinary to extraordinary. It's a simple yet powerful concept that divides your frame into a 3×3 grid, creating nine equal sections. By placing your subject along these lines or at their intersections, you'll create more balanced and visually appealing images.
To effectively use the Rule of Thirds in your wildlife photography:
- Enable the grid overlay in your phone's camera app
- Position your subject off-center, along the grid lines
- Place the animal's eyes at one of the intersection points
- Use negative space to create a sense of movement or direction
- Experiment with different placements to find the most dynamic composition
Don't be afraid to break this rule occasionally, but it's an excellent starting point for composing your shots.
When photographing moving animals, leave space in the direction they're heading to create a sense of motion. For stationary subjects, try positioning them in the lower thirds to showcase their habitat.
Leading Lines Technique
Leading lines serve as powerful visual elements that guide the viewer's eye through your wildlife photographs. When shooting wildlife with your mobile device, look for natural lines in the environment that can lead towards your subject. These could be paths, tree branches, rivers, or even the horizon.
To use leading lines effectively, position your subject at the end of the line or where lines intersect. This draws attention to your wildlife subject and creates a sense of depth in your image. You can also use diagonal lines to add dynamism to your composition.
Don't limit yourself to straight lines; curved or S-shaped lines can add a sense of flow and grace to your wildlife photos.
When you're framing your shot, try different angles to maximize the impact of leading lines. Sometimes, getting low or moving to the side can reveal stronger lines you hadn't noticed before.
Utilize Burst Mode Effectively
When shooting wildlife with your mobile device, you'll want to make the most of burst mode.
By anticipating animal movements and holding down the shutter button, you're increasing your chances of capturing that perfect moment.
Later, you can review and select the best shots from the rapid-fire sequence, ensuring you don't miss any essential action.
Anticipate Animal Movement
Anticipating animal movement, wildlife photographers can greatly increase their chances of capturing that perfect shot. By studying animal behavior and patterns, you'll be better prepared to predict their next move. This skill is essential when shooting with a mobile device, as you're often working with limited zoom and slower shutter speeds.
To improve your ability to anticipate animal movement:
- Observe the animal's body language and posture
- Learn about species-specific behaviors and habits
- Watch for environmental cues that might trigger movement
- Pay attention to the direction of the animal's gaze
- Practice patience and stay alert for sudden changes
When you've identified potential movement, position yourself accordingly. If you're expecting a bird to take flight, frame your shot with extra space in the direction it's likely to fly. For predators, be ready to capture the moment they pounce on their prey.
Increase Capture Chances
How can you make the most of your mobile device's burst mode for wildlife photography? Burst mode is a powerful tool that greatly increases your chances of capturing the perfect shot.
To use it effectively, first enable burst mode in your camera settings or by holding down the shutter button. When you're ready to shoot, anticipate the action and start your burst just before the expected peak moment.
Don't be shy with the number of shots you take. Wildlife can be unpredictable, so it's better to have too many options than too few.
After shooting, review your burst sequence carefully. Look for subtle differences in pose, expression, or composition that might make one frame stand out from the rest.
Remember that burst mode can quickly fill up your device's storage. To manage this, regularly transfer your photos to a computer or cloud storage.
Also, consider adjusting your burst settings to capture fewer frames per second if you're running low on space.
Select Best Shots Later
After capturing a burst of wildlife photos, you'll need to sift through them to find the best shots. This process can be time-consuming, but it's essential for selecting the most compelling images.
Use your device's built-in photo management tools or download a dedicated app to streamline the selection process.
When reviewing your burst photos, look for:
- Sharp focus on the animal's eyes
- Interesting poses or behaviors
- Unique lighting or environmental elements
- Clear separation between subject and background
- Moments that tell a story or evoke emotion
Pay attention to subtle differences between frames, as they can make a significant impact on the final image.
Don't be afraid to zoom in and examine details closely. Consider factors like composition, exposure, and overall impact when making your selections.
Frequently Asked Questions
How Does RAW Format Differ From JPEG for Wildlife Photography?
When you shoot in RAW, you'll capture more detail and have greater editing flexibility than with JPEG. RAW files retain all image data, allowing you to adjust exposure, white balance, and colors without losing quality.
What Mobile Apps Are Best for Editing RAW Wildlife Photos?
You'll find Snapseed, Lightroom Mobile, and VSCO excellent for editing RAW wildlife photos. They offer powerful tools for adjusting exposure, color, and detail. Don't forget to experiment with presets to enhance your images quickly.
Can I Use External Lenses With My Smartphone for Wildlife Photography?
Yes, you can use external lenses with your smartphone for wildlife photography. They'll enhance your phone's capabilities, allowing you to capture close-ups and wide-angle shots. Just make certain the lens is compatible with your device's model.
How Do I Handle Low-Light Situations in Mobile Wildlife Photography?
You'll want to use your phone's night mode for low-light wildlife shots. Stabilize your device, increase ISO carefully, and use longer exposures. Consider using a tripod or resting your phone on a stable surface for sharper images.
What Are the Storage Implications of Shooting Wildlife Photos in RAW?
When you shoot wildlife photos in RAW, you'll need more storage space. RAW files are larger than JPEGs, so you'll fill up your phone's memory faster. Consider using cloud storage or external drives to manage your collection.
In Summary
You're now equipped with the essential raw wildlife photo settings for your mobile device. Remember, practice makes perfect. Don't be afraid to experiment and push your limits. As you apply these techniques, you'll see your skills improve and capture stunning wildlife shots. Keep exploring, adjusting, and refining your approach. With time and patience, you'll be amazed at the professional-quality images you can create using just your smartphone.


Leave a Reply