To capture stunning silhouettes with your smartphone, start by finding a strong backlight source like a sunset or streetlamp. Position your subject between you and the light, ensuring they're framed against the brightest part of the scene. Expose for the background by tapping on the brightest area, and use HDR mode sparingly to avoid unnatural effects. Experiment with negative space to enhance composition, and don't forget to align your subject for distinct shapes. In post-processing, boost contrast to make your silhouettes pop. For added drama, try capturing motion with slower shutter speeds. These techniques will elevate your low-light photography game to new heights.
Find a Strong Backlight Source

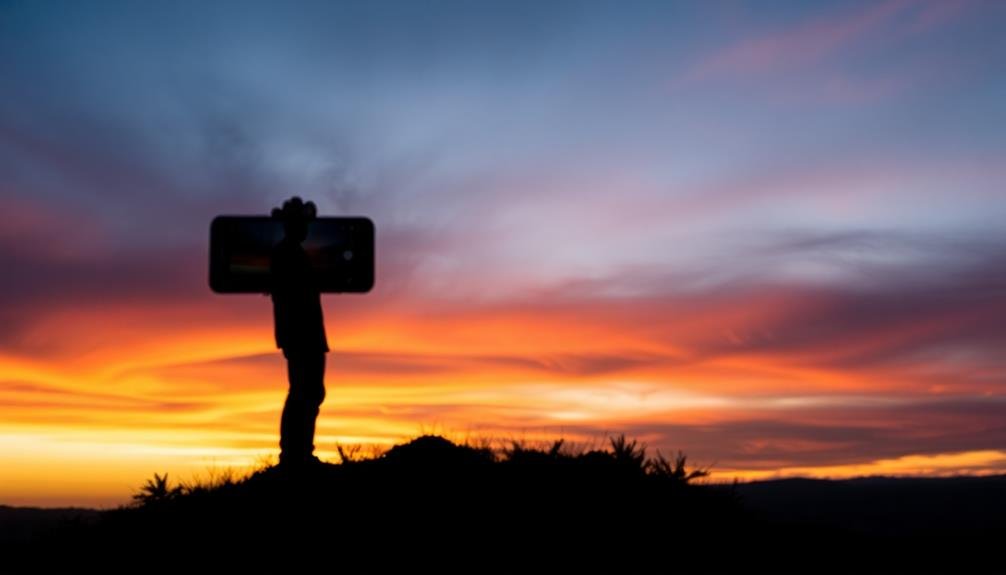
Harness the power of backlighting to elevate your low-light mobile photography. When shooting in dim conditions, finding a strong backlight source is essential for creating stunning silhouettes. Look for bright light sources like streetlamps, neon signs, or even the setting sun. Position your subject between you and the light source to create a dramatic contrast.
To maximize the effect, make sure the backlight is considerably brighter than the surrounding area. This contrast will help define your subject's outline against the luminous background. Experiment with different angles to find the most striking composition. You might need to move around or adjust your subject's position to achieve the desired effect.
Don't limit yourself to natural light sources. Man-made lights can produce equally engaging results. Try using car headlights, illuminated windows, or even a friend's smartphone flashlight as your backlight source.
Remember to expose for the highlights to preserve the silhouette effect. Most smartphone cameras allow you to tap on the brightest part of the screen to adjust exposure accordingly. This technique will darken your subject while maintaining detail in the backlit areas, resulting in a striking low-light photograph.
Position Your Subject Carefully

When positioning your subject in low-light conditions, frame them against a bright background to create a striking silhouette effect.
You'll want to utilize negative space around your subject to emphasize their form and draw attention to their outline.
Align your subject carefully to capture distinct shapes and profiles, enhancing the overall visual impact of your low-light mobile photograph.
Frame Against Bright Background
Position your subject strategically against a bright background to create striking low-light photos. This technique allows you to capture stunning silhouettes that emphasize shape and form.
Look for sources of light behind your subject, such as a sunset, city lights, or illuminated windows. The contrast between the dark subject and bright background will create a dramatic effect that draws the viewer's attention.
When framing your shot, consider these key elements:
- Composition: Place your subject off-center using the rule of thirds for a more visually appealing image.
- Negative space: Leave ample room around your subject to enhance the silhouette effect.
- Background details: Choose a background with interesting patterns or shapes to add depth to your photo.
Experiment with different angles and perspectives to find the most engaging composition. You might need to adjust your position or ask your subject to move slightly to achieve the desired effect.
Don't be afraid to get low or climb higher to find the perfect framing. Remember to tap on the brightest part of the screen to set exposure, ensuring your subject remains dark while the background stays bright.
With practice, you'll master the art of creating compelling silhouettes in low-light conditions.
Utilize Negative Space
Negative space can elevate your low-light mobile photography from ordinary to extraordinary. When creating silhouettes, strategically utilizing the empty areas around your subject can dramatically enhance your composition. Position your subject carefully, ensuring there's ample space around them to create a striking contrast with the background.
Consider the following techniques to effectively use negative space:
| Technique | Description |
|---|---|
| Rule of Thirds | Place your subject off-center |
| Leading Lines | Use empty space to guide the eye |
| Minimalism | Embrace simplicity in composition |
| Symmetry | Balance negative space on both sides |
Align for Distinct Shapes
Alignment plays a key role in creating striking silhouettes for low-light mobile photography. When positioning your subject, you'll want to guarantee they're placed against the brightest part of the background, typically the sky. This contrast is essential for achieving a well-defined silhouette.
Pay attention to the shape your subject creates and aim for easily recognizable outlines.
To make your silhouettes more impactful:
- Look for interesting angles that emphasize unique features
- Encourage your subject to strike dynamic poses
- Use props or natural elements to add visual interest
As you frame your shot, consider the rule of thirds. Place your subject off-center to create a more visually appealing composition. This technique can add depth and intrigue to your image.
Don't be afraid to experiment with different perspectives – try shooting from low angles or high vantage points to create unexpected and dramatic silhouettes.
Expose for the Background

Exposing for the background is a game-changer in low-light mobile photography. It's the key to creating stunning silhouettes that capture the essence of your subject against a vibrant backdrop. To achieve this effect, you'll need to override your phone's automatic exposure settings.
Start by tapping on the brightest part of your background on your phone's screen. This tells your camera to expose for that area, causing your subject to appear dark and silhouetted. If your phone has manual controls, try decreasing the exposure compensation to further darken the foreground.
Remember, the goal is to create a strong contrast between your subject and the background. Look for scenes with bright, colorful skies or well-lit cityscapes. The more dramatic the lighting in the background, the more striking your silhouette will be.
Don't be afraid to experiment with different angles and compositions. You might find that slightly adjusting your position can dramatically improve the contrast and overall impact of your shot.
With practice, you'll develop an eye for identifying perfect silhouette opportunities in various low-light situations.
Use HDR Mode Sparingly

HDR mode can be a useful tool in low-light situations, but you'll want to use it judiciously.
While it can help balance exposure in high-contrast scenes, HDR can sometimes produce unnatural-looking images or introduce motion blur.
If you're looking for more control, try manually bracketing your exposures and combining them in post-processing for a custom HDR effect.
When to Use HDR
As night falls and you're faced with challenging low-light scenes, it's tempting to rely on your phone's HDR mode. While HDR can be useful in certain situations, it's not always the best choice for low-light photography. Use HDR sparingly and only when the scene truly demands it.
HDR works best in high-contrast situations where you want to capture details in both bright and dark areas. Consider using HDR when:
- You're shooting landscapes with a bright sky and dark foreground
- You're capturing a subject backlit by a sunset or bright window
- You're photographing a scene with deep shadows and bright highlights
However, HDR can sometimes produce unnatural-looking images, especially in low-light conditions. It may introduce noise, blur, or ghosting effects.
Instead of relying on HDR, try adjusting your exposure manually or using night mode if your phone has one. These options often yield better results in low-light situations.
Advantages and Disadvantages
Photographers often debate the merits of HDR mode in low-light mobile photography. While it can enhance your images, it's essential to use HDR sparingly and understand its pros and cons.
HDR's main advantage is its ability to capture a wider range of tones, revealing details in both shadows and highlights that might otherwise be lost. This can be particularly useful when shooting scenes with high contrast, such as a sunset or a dimly lit room with bright windows.
HDR can also help reduce noise in low-light conditions, resulting in cleaner images.
However, HDR isn't without drawbacks. It can lead to unnatural-looking photos if overused, with colors appearing oversaturated and details appearing too sharp.
HDR can also struggle with moving subjects, potentially causing ghosting or blurring. Additionally, processing HDR images takes longer, which may drain your battery faster and slow down your shooting speed.
To make the most of HDR, use it selectively. It's ideal for static scenes with high contrast, but you'll want to avoid it for action shots or when you're aiming for a more dramatic, moody feel in your low-light photos.
Manual HDR Alternatives
While HDR mode can be useful, it's often better to explore manual alternatives for more control over your low-light photos. Instead of relying on automatic HDR, try adjusting your camera's exposure settings manually.
Start by tapping on the darkest area of your composition to set focus, then use the exposure slider to brighten the image. This technique allows you to maintain rich, deep blacks while highlighting key elements.
Another effective method is to use your phone's burst mode. Take multiple shots in quick succession, then choose the best one or combine them later in editing. This approach increases your chances of capturing a sharp, well-exposed image in challenging light conditions.
Consider these manual alternatives to HDR:
- Bracket your exposures by taking multiple shots at different exposure levels
- Use night mode or long exposure settings for more light gathering
- Experiment with manual focus to achieve the desired depth of field
Experiment With Negative Space

Embracing negative space can transform your low-light mobile photos from cluttered to enchanting. When shooting silhouettes, use the darkness to your advantage by creating a stark contrast between your subject and the background. Look for clean, uncluttered areas that'll make your subject stand out.
To experiment with negative space, position your subject against a bright sky or light source. The key is to expose for the brightest part of the scene, which will turn your subject into a dark silhouette. Move around to find interesting compositions that balance the subject with the surrounding emptiness.
Don't be afraid to leave large portions of your frame empty. This technique draws the viewer's eye to your subject and creates a sense of mystery or isolation. Try framing your subject off-center using the rule of thirds for added visual interest.
Experiment with different angles and perspectives. Shoot from low to the ground or find elevated vantage points to create unique negative space compositions.
Enhance Contrast in Post-Processing

Post-processing is your secret weapon for transforming low-light mobile photos into stunning images. When enhancing contrast in low-light shots, you'll need to strike a balance between deepening shadows and brightening highlights.
Start by adjusting the overall exposure to bring out details in the darker areas without overexposing the brighter parts.
Next, focus on fine-tuning the contrast. Most editing apps offer sliders for:
- Contrast: Increase this to create more separation between light and dark areas
- Highlights: Reduce these slightly to prevent blown-out bright spots
- Shadows: Lift these a bit to reveal more detail in dark areas
Don't be afraid to experiment with the clarity or structure sliders, which can add depth to your image.
For a more dramatic effect, try selectively adjusting contrast in specific areas using brushes or gradient tools.
Capture Motion in Silhouettes

Capturing motion in silhouettes offers a creative way to elevate your low-light mobile photography. To achieve this effect, you'll need to position your subject between you and a light source, such as a sunset or street lamp. Set your camera to manual mode and expose for the background, which will darken your subject into a silhouette.
To capture motion, use a slower shutter speed. This allows movement to be recorded as a blur, adding dynamism to your image. Experiment with different speeds to find the right balance between motion blur and recognizable shapes. Here's a guide to help you choose the right shutter speed for various subjects:
| Subject | Slow Motion | Medium Motion | Fast Motion |
|---|---|---|---|
| Person | 1/15 sec | 1/30 sec | 1/60 sec |
| Vehicle | 1/30 sec | 1/60 sec | 1/125 sec |
| Animal | 1/60 sec | 1/125 sec | 1/250 sec |
Remember to stabilize your phone using a tripod or steady surface to avoid camera shake. You can also use burst mode to capture multiple frames, increasing your chances of getting the perfect shot. Don't be afraid to get creative with your subjects – dancers, cyclists, or even falling leaves can create stunning silhouette motion shots.
Frequently Asked Questions
Can I Create Silhouettes Indoors Without Natural Light Sources?
Yes, you can create silhouettes indoors without natural light. You'll need artificial light sources like lamps or flashlights. Place your subject in front of the light and expose for the background to achieve the silhouette effect.
How Do I Prevent Lens Flare When Shooting Towards Bright Light?
To prevent lens flare when shooting towards bright light, you'll want to use a lens hood or shield the lens with your hand. You can also adjust your position slightly or use filters to reduce glare and unwanted light reflections.
What's the Best Focal Length for Capturing Silhouettes on Smartphones?
For capturing silhouettes on smartphones, you'll want to use a wide-angle lens. Most phones offer this as the default option. It's typically around 24-28mm equivalent, which allows you to include more of the background and subject.
Are There Any Apps Specifically Designed for Silhouette Photography?
You'll find several apps tailored for silhouette photography. Try "Silhouette Studio" or "Snapseed" for editing. "ProCam" and "Camera+" offer manual controls. However, most built-in camera apps can capture great silhouettes with proper technique and lighting.
How Can I Achieve Colored Silhouettes Instead of Just Black Shapes?
You can create colored silhouettes by placing colorful gels or filters over your light source. Alternatively, try shooting during sunset or sunrise when the sky's vibrant hues naturally provide a colorful backdrop for your subjects.
In Summary
You've now got the tools to create enchanting silhouettes with your smartphone. Don't be afraid to experiment with different light sources, compositions, and subjects. Remember, it's all about contrast and timing. With practice, you'll develop an eye for spotting perfect silhouette opportunities. Keep these tricks in mind, and you'll be amazed at the dramatic, mysterious images you can capture. So go out there, embrace the darkness, and let your creativity shine through your silhouettes.


Leave a Reply