
To create stunning product showcases with mobile photography, start by choosing a smartphone with a high-quality camera and multiple lenses. Master lighting techniques, using both natural and artificial sources to highlight your products effectively. Compose enchanting shots by experimenting with angles, props, and backgrounds that complement your items. Showcase scale and proportions accurately, and highlight intricate details using macro modes or clip-on lenses. Tell a story through your images by placing products in their intended settings or demonstrating their use. Finally, optimize your photos for various social media platforms to maximize engagement. With these tips, you'll be well on your way to producing professional-looking product photos using just your mobile device.
Choose the Right Smartphone

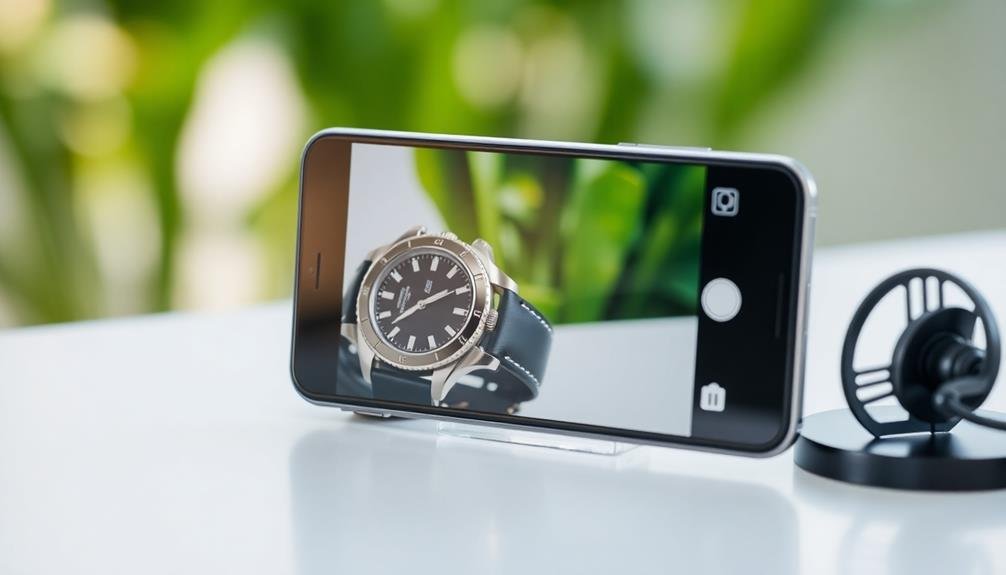
The right smartphone can make or break your product photography. When selecting a device, prioritize camera quality above all else. Look for phones with multiple lenses, including wide-angle and macro options, to capture various product angles and details. High megapixel counts aren't everything, but aim for at least 12MP for crisp, clear images.
Consider phones with advanced features like optical image stabilization (OIS) and night mode for steady shots in low-light conditions. HDR capabilities are essential for balancing shadows and highlights in product photos. Manual controls allow you to adjust settings like ISO, shutter speed, and white balance for professional-looking results.
Storage capacity is important, especially if you're shooting in RAW format. Opt for at least 128GB or choose a phone with expandable storage. Battery life matters too, as extensive photo sessions can drain power quickly.
Don't forget about the display. A high-quality, color-accurate screen helps you review and edit photos on the go. OLED or AMOLED displays often provide better color reproduction and contrast.
Lastly, verify your chosen smartphone is compatible with photo editing apps and accessories you plan to use, such as external lenses or mobile gimbals.
Master Lighting Techniques

Mastering lighting is essential for capturing stunning product photos with your smartphone.
You'll need to understand the differences between natural and artificial light sources, and how each affects your subject's appearance.
Experiment with diffusion techniques to soften harsh light and reflection methods to enhance your product's features, creating professional-looking images with minimal equipment.
Natural vs. Artificial Light
When it comes to lighting for mobile product photography, you'll need to choose between natural and artificial light sources. Both have their advantages and challenges, so understanding their characteristics will help you make the best decision for your product showcases.
Natural light offers a soft, even illumination that's ideal for creating a warm, inviting atmosphere. It's free and readily available during daylight hours. However, it's unpredictable and can change quickly, affecting your shooting consistency. You'll need to work around weather conditions and time constraints.
Artificial light gives you more control over your shooting environment. You can adjust the intensity, direction, and color temperature to achieve your desired look. It's consistent and available at any time, allowing for flexible scheduling. However, artificial lighting equipment can be expensive and may require additional space to set up.
Consider combining both light sources for the best results. Use natural light as your main source and supplement with artificial light to fill shadows or add highlights.
Experiment with different setups to find what works best for your specific products and style. Remember, the key is to create flattering, well-lit images that showcase your products effectively.
Diffusion and Reflection Techniques
Now that you've chosen your light source, it's time to refine your lighting technique. Diffusion and reflection are essential for creating soft, even lighting that showcases your products beautifully.
To diffuse light, use translucent materials like parchment paper or a white bed sheet. Place these between your light source and the product to soften harsh shadows and create a more flattering glow.
For smaller items, a DIY lightbox made from a cardboard box and white tissue paper can work wonders.
Reflection techniques help balance lighting and fill in shadows. Use white foam boards or mirrors to bounce light onto your product's darker areas. Position these reflectors opposite your main light source to achieve a more balanced exposure.
Experiment with different angles and distances for your diffusers and reflectors. You'll find that subtle adjustments can dramatically impact the final image.
Don't be afraid to combine techniques, such as using a diffused main light with a reflector for fill.
Compose Captivating Product Shots
To compose enchanting product shots with your mobile device, you'll want to explore three key techniques.
Frame your product with negative space to create visual interest and draw attention to the item.
Experiment with different light angles to highlight unique features and textures of your product.
Frame With Negative Space
Utilizing negative space in your product photography can dramatically enhance the visual appeal of your shots. It's the empty area surrounding your product that draws attention to the main subject. When you frame with negative space, you create a sense of balance and simplicity that allows your product to shine.
To effectively use negative space, position your product off-center. This creates a more dynamic composition and gives the viewer's eye room to explore the image. Experiment with different backgrounds, such as plain walls or uncluttered surfaces, to maximize the impact of negative space.
Consider the following techniques when framing with negative space:
| Technique | Description | Effect |
|---|---|---|
| Rule of Thirds | Place product along grid lines | Balanced composition |
| Minimalism | Use simple, clean backgrounds | Focuses attention on product |
| Color Contrast | Choose contrasting background colors | Makes product stand out |
| Leading Lines | Use lines to guide viewer's eye | Directs attention to product |
| Scale | Juxtapose product with larger space | Creates sense of importance |
Play With Light Angles
While framing with negative space creates balance, playing with light angles adds depth and dimension to your product shots. Experiment with various light sources and positions to highlight your product's best features.
Natural light from windows can create soft, flattering illumination, while artificial lights offer more control over intensity and direction.
Try backlighting to create a dramatic silhouette or rim light effect, emphasizing your product's shape. Side lighting can accentuate texture and contours, adding visual interest. For a polished look, use a combination of key light and fill light to reduce harsh shadows.
Don't be afraid to get creative with unconventional light sources. Use a small LED panel or even your phone's flashlight to add targeted highlights. Reflectors or white cards can bounce light into shadowy areas, revealing hidden details.
Remember to adjust your camera settings accordingly. Increase ISO in low light conditions, but be mindful of noise. Use a slower shutter speed to capture more light, but stabilize your phone to avoid blur.
Experiment with different angles and heights to find the most flattering light for your product.
Use Creative Backgrounds
Your product's background plays an essential role in creating eye-catching mobile photography. Don't settle for plain white surfaces; instead, experiment with various textures and materials to add depth and interest to your shots. Try using wooden boards, marble slabs, or textured fabrics to complement your product's aesthetics.
Consider the color palette of your background carefully. Choose hues that contrast or harmonize with your product, enhancing its visual appeal. You can create custom backgrounds using colored paper, painted boards, or even digital backdrops in post-processing apps.
Think beyond flat surfaces. Incorporate natural elements like leaves, flowers, or pebbles to add organic textures. For tech products, consider using circuit boards or metallic surfaces for a futuristic feel.
Don't forget about negative space; sometimes, a minimalist approach with ample empty space can make your product stand out.
Experiment with depth by placing your product on raised platforms or using multiple layers in your composition. This technique adds dimension and helps guide the viewer's eye to the main subject.
Remember to keep your background complementary, not overpowering, ensuring your product remains the star of the show.
Experiment With Angles
Countless angles offer unique perspectives for your product photos. Don't limit yourself to eye-level shots; explore various viewpoints to add depth and interest to your images. Try shooting from above (bird's-eye view) to showcase product details or arrangements. Alternatively, capture low-angle shots to make your products appear larger or more imposing.
Experiment with diagonal compositions to create dynamic, eye-catching images. Tilt your phone slightly to introduce interesting lines and draw the viewer's eye through the frame. Don't forget about close-ups; they're perfect for highlighting textures, patterns, or intricate features of your products.
Here's a quick guide to different angles and their effects:
| Angle | Effect | Best For | Challenges |
|---|---|---|---|
| Eye-level | Natural, relatable | Most products | Can be ordinary |
| Bird's-eye | Organizational, flat lay | Small items, collections | Requires overhead setup |
| Low angle | Powerful, imposing | Large products, architecture | Distortion of proportions |
| Dutch angle | Dynamic, unsettling | Action shots, tech products | Can be disorienting if overused |
Utilize Props and Backgrounds

Now that you've explored various angles, it's time to enhance your product photos with props and backgrounds. These elements can add context, scale, and visual interest to your images, making them more appealing to potential customers.
Choose props that complement your product without overshadowing it. For small items, consider using everyday objects like books, plants, or fabric to create a sense of scale. If you're showcasing clothing or accessories, mannequins or lifestyle props can help viewers envision the product in use.
Backgrounds play an essential role in setting the mood of your image. Opt for simple, clean backgrounds that don't distract from the main subject. Solid colors, textured surfaces, or subtle patterns can work well. You can create makeshift backgrounds using large sheets of paper, fabric, or even wooden boards.
Experiment with different combinations of props and backgrounds to find what works best for your product. Remember to maintain consistency in your styling across product lines to create a cohesive brand image.
Don't be afraid to get creative, but always make certain that your product remains the star of the show.
Edit Photos Like a Pro

Once you've captured your product shots, it's time to elevate them with professional-level editing.
You'll want to master basic editing tools like cropping, straightening, and adjusting brightness and contrast.
Apply filters judiciously to enhance your product's appeal, and fine-tune lighting adjustments to guarantee your items shine in their best light.
Master Basic Editing Tools
Diving into basic editing tools can transform your product photos from amateur snapshots to professional-looking images. Start by mastering the basics of exposure, contrast, and brightness. These fundamental adjustments can dramatically improve your photo's overall appearance. Use the exposure tool to correct over or underexposed areas, ensuring your product is properly lit.
Next, focus on color correction. Adjust the white balance to eliminate unwanted color casts and make your product's colors pop. Use saturation and vibrancy tools sparingly to enhance the product's natural hues without making them appear artificial.
Learn to crop and straighten your images for better composition. Remove distracting elements and align your product with the frame's edges. Experiment with aspect ratios to find the best fit for your intended platform.
Explore sharpening and noise reduction tools to refine image quality. Apply sharpening to enhance details, but be cautious not to overdo it. Use noise reduction to smooth out grainy areas, especially in low-light shots.
Apply Filters Effectively
With basic editing mastered, it's time to elevate your product photos using filters. Filters can enhance your images' mood, style, and overall appeal, but it's essential to use them judiciously.
When applying filters to product showcases, always prioritize accurate representation while adding a touch of creativity.
To apply filters effectively, follow these guidelines:
- Choose filters that complement your product: Select filters that enhance your item's natural colors and textures without distorting its true appearance.
- Maintain consistency: Use similar filters across your product line to create a cohesive brand aesthetic.
- Adjust filter intensity: Most apps allow you to control the filter's strength. Dial it back to achieve a subtle, professional look.
- Experiment with custom filters: Create your own filters by adjusting individual parameters like contrast, saturation, and color balance.
Perfect Lighting Adjustments
Mastery of lighting adjustments is essential for transforming your product photos from amateur snapshots to professional-grade images.
Start by understanding your phone's exposure controls. Most camera apps allow you to adjust brightness by tapping the screen and sliding up or down. For more precise control, look for manual exposure settings in your app.
Pay attention to highlights and shadows. You'll want to balance these elements to reveal product details without losing texture. Use the highlights and shadows sliders in your editing app to fine-tune these areas.
Don't be afraid to slightly reduce highlights and boost shadows to create a more balanced image.
Color temperature is another vital aspect of lighting. Adjust the warmth or coolness of your photo to match the product's true colors. Many editing apps offer white balance tools to help you achieve accurate color representation.
Lastly, consider using HDR (High Dynamic Range) mode for challenging lighting situations. This feature combines multiple exposures to capture details in both bright and dark areas, resulting in a well-balanced final image that showcases your product in its best light.
Create a Consistent Visual Style

A consistent visual style is essential for creating a cohesive and professional-looking product showcase. When you're using mobile photography to highlight your products, it's vital to maintain a uniform aesthetic across all images. This consistency helps build brand recognition and makes your showcase more visually appealing to potential customers.
To create a consistent visual style, focus on these key elements:
- Color palette: Choose a set of complementary colors that align with your brand and use them consistently in backgrounds, props, and product arrangements.
- Composition: Develop a signature framing style, whether it's centered, rule-of-thirds, or asymmetrical, and apply it across all your product photos.
- Editing techniques: Use the same filters, adjustments, and editing apps for all your images to maintain a cohesive look.
- Props and backgrounds: Select a limited set of props and backgrounds that complement your products and use them regularly in your shots.
Showcase Scale and Proportions

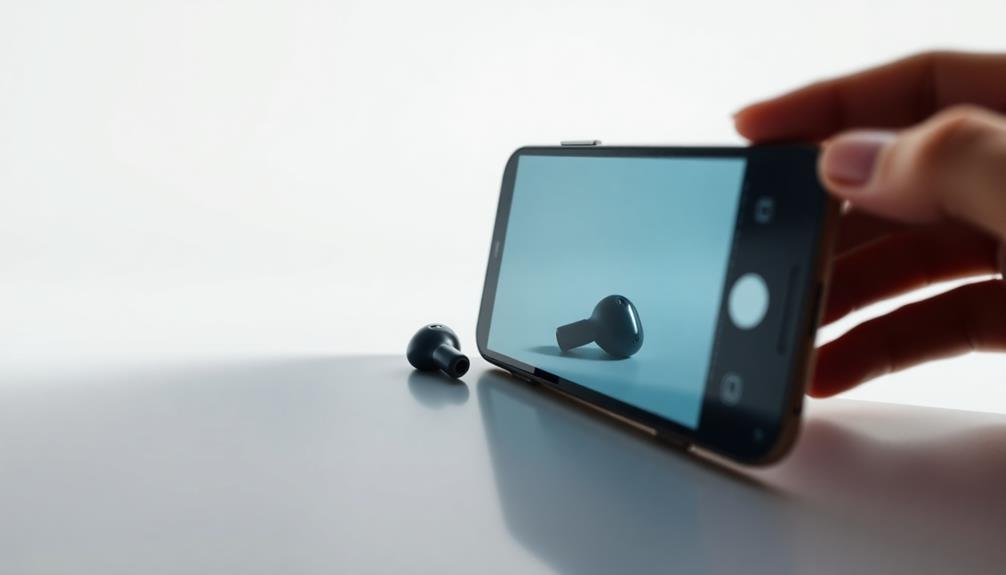
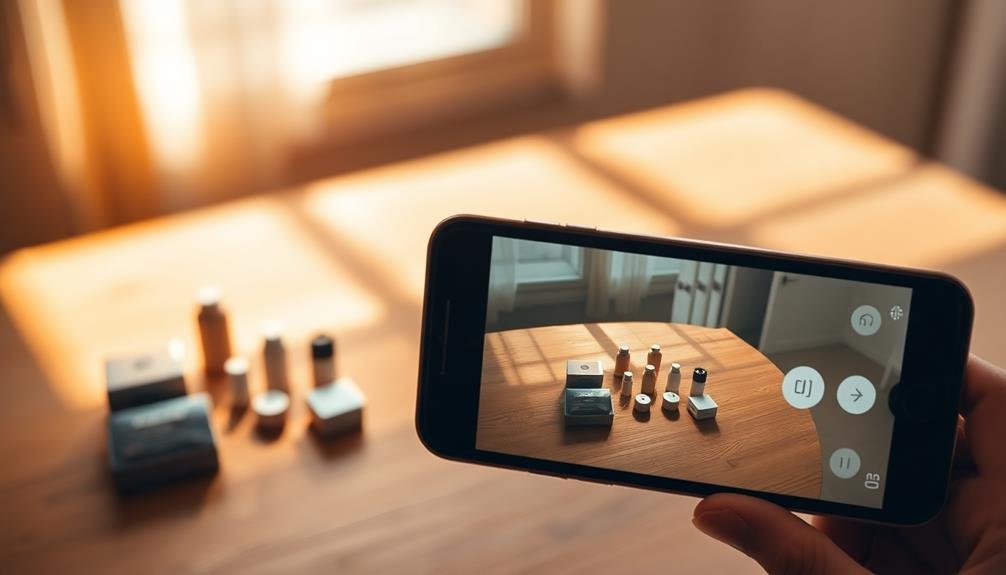
Accurately depicting scale and proportions is essential when showcasing products through mobile photography. To achieve this, use common objects for comparison. Place your product next to everyday items that most people are familiar with, like coins, credit cards, or smartphones. This gives viewers an instant reference point for size.
You can also employ forced perspective techniques to emphasize or downplay certain aspects of your product. By positioning the camera at different angles and distances, you'll create various impressions of size and scale.
Don't forget to include close-up shots that highlight intricate details, as well as wider shots that show the product in context.
When photographing multiple products together, arrange them in a way that clearly demonstrates their relative sizes. Use symmetry and alignment to create visually appealing compositions that also convey accurate proportions. If your product comes in different sizes, consider showcasing them side by side for easy comparison.
Remember to maintain consistency in your approach to scale across all product photos. This helps create a cohesive look for your showcase and guarantees that customers have a clear understanding of each product's dimensions and proportions.
Highlight Product Details
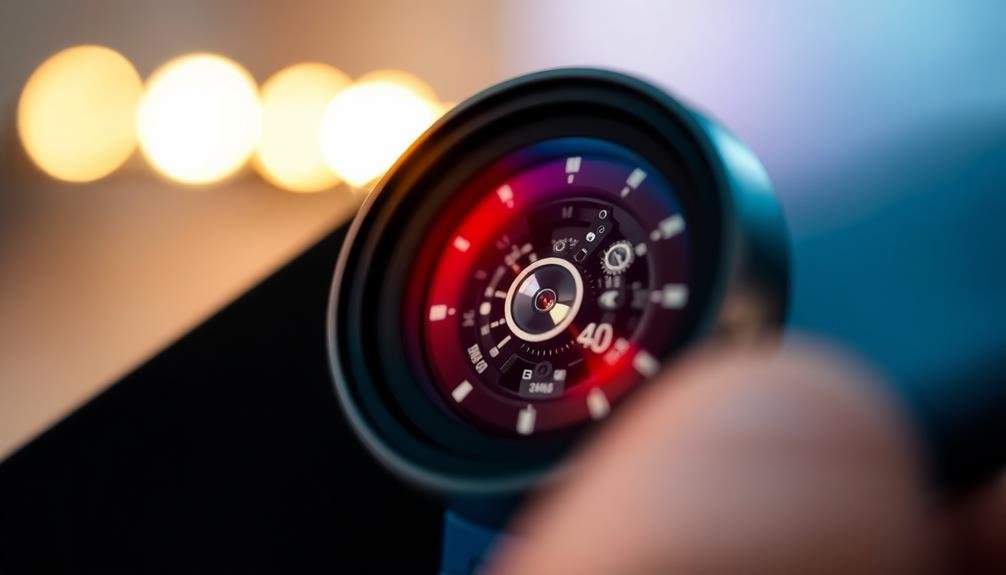
To effectively showcase your products, highlighting their unique details is essential. Your mobile camera can capture intricate features that set your items apart from the competition. Focus on textures, patterns, and small elements that make your product special.
Use macro mode or invest in clip-on lenses to get up close and personal with your product's finer points.
Lighting plays a significant role in emphasizing details. Experiment with different angles and light sources to create shadows that accentuate texture or bring out subtle color variations.
Don't be afraid to use artificial lighting to illuminate specific areas of interest.
Here are four tips to help you highlight product details:
- Use the rule of thirds to draw attention to specific features
- Experiment with depth of field to isolate important elements
- Try different angles to showcase unique perspectives
- Edit your photos to enhance contrast and sharpness
Tell a Story Through Images
Storytelling through product images can elevate your marketing from mere display to engaging narrative. To achieve this, think about the lifestyle or emotions your product represents. Create a series of images that show your product in use, highlighting its benefits and the experiences it offers.
Start by setting the scene. Capture your product in its natural environment or intended setting. If it's a coffee maker, show it in a cozy kitchen. For outdoor gear, photograph it against a stunning landscape.
Next, focus on the user experience. Showcase someone interacting with your product, emphasizing the joy or satisfaction it brings.
Don't forget to include close-ups that reveal unique features or textures. These details can add depth to your story and intrigue viewers.
Consider creating a before-and-after sequence to demonstrate your product's transformative power.
Optimize for Social Media Platforms

In light of the diverse social media landscape, optimizing your product photos for different platforms is essential. Each platform has unique image requirements and display formats, so you'll need to tailor your content accordingly.
Instagram favors square images, while Pinterest prefers vertical shots. Facebook and Twitter accommodate various aspect ratios, but they'll crop your images differently on mobile and desktop views.
To guarantee your product photos shine across all platforms:
- Create multiple versions of each image, resized and cropped to fit different social media specifications
- Use consistent filters or editing styles to maintain brand identity across platforms
- Experiment with different compositions to find what works best for each social network
- Pay attention to how your images appear in thumbnails and feeds, as well as in full-screen views
Remember to take into account the platform's audience and typical content when optimizing your photos.
For example, Instagram users expect polished, aesthetically pleasing images, while Twitter favors more immediate, candid shots. By adapting your mobile photography to each platform's unique characteristics, you'll maximize engagement and showcase your products effectively across all your social media channels.
Frequently Asked Questions
How Do I Protect My Products From Damage During Photoshoots?
You'll want to handle products carefully during photoshoots. Use protective covers, soft cloths, or gloves when necessary. Create a clean, safe workspace, and avoid stacking items. Always move products gently and store them properly between shots.
What Are the Best Apps for Scheduling and Planning Product Photoshoots?
You'll find several great apps for scheduling product photoshoots. Try Trello for project management, Asana for team collaboration, or Planoly for visual planning. Don't forget Google Calendar or Calendly for simple scheduling and time management.
How Can I Create 360-Degree Product Views Using Only a Smartphone?
You can create 360-degree product views with your smartphone by using a turntable, capturing multiple shots as you rotate the item, and stitching them together with apps like Fyuse or 3D Vista. It's a simple yet effective technique.
What's the Ideal File Format for Storing High-Quality Mobile Product Photos?
For high-quality mobile product photos, you'll want to use HEIC or RAW formats. They preserve more detail than JPEG. If you need wider compatibility, stick with JPEG but use the highest quality setting available.
How Do I Handle Reflective or Transparent Products in Mobile Photography?
To handle reflective or transparent products, you'll need to control lighting carefully. Use diffusers to soften light, experiment with angles to minimize unwanted reflections, and consider using a light tent to create even illumination around the product.
In Summary
You've now got the tools to create amazing product showcases using just your smartphone. Remember, it's not about having the fanciest equipment, but how you use what you've got. Keep practicing, experimenting, and refining your techniques. Don't be afraid to try new angles, lighting setups, or compositions. With these tips and your creativity, you'll soon be capturing eye-catching product photos that'll make your audience stop scrolling and start buying.


Leave a Reply