
To elevate your mobile filmmaking, master these top video shifts: Cut, Fade to Black, Whip Pan, Match Cut, J-Cut, L-Cut, Wipe, Dissolve, Morph, and Split Screen. Each technique serves a unique purpose, from maintaining smooth flow to creating dramatic effects. Cuts offer instant shifts, while fades signal closure. Whip pans add excitement, and match cuts create visual connections. J-cuts and L-cuts enhance dialogue flow, while wipes indicate changes in time or location. Dissolves blend scenes smoothly, morphs transform subjects, and split screens showcase multiple perspectives. By understanding and applying these shifts, you'll release new levels of storytelling power in your mobile films.
Cut Transition
The cut shift is the most basic and widely used transition in mobile filmmaking. It's simple yet effective, instantly switching from one shot to another without any visual effects.
You'll find this transition in almost every video project, as it's perfect for maintaining a smooth flow and pacing in your storytelling.
To use a cut shift effectively, you'll want to reflect on the timing and content of your shots. It works best when there's a clear change in subject, angle, or scene.
You can create visual interest by varying the composition of consecutive shots, such as cutting from a wide shot to a close-up.
When editing on your mobile device, most video editing apps offer cut shifts as the default option. You'll simply need to trim your clips and place them next to each other on the timeline.
Pay attention to the exact frame where you make the cut, as even a slight adjustment can impact the viewer's perception of the scene.
Fade to Black
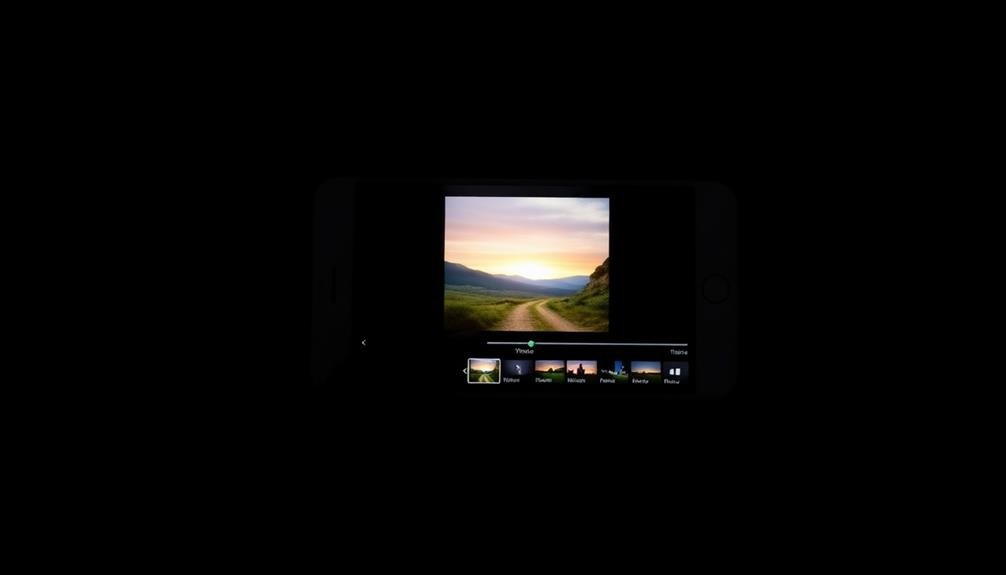
While not as common as the cut changeover, fade to black remains a powerful tool in mobile filmmaking. This shift gradually darkens the screen until it's completely black, often signaling the end of a scene or the entire video. You'll find it particularly useful when you want to create a sense of finality or closure.
To use fade to black effectively, consider its emotional impact. It can evoke a feeling of completion, melancholy, or even foreboding, depending on your content. You'll want to use it sparingly, as overuse can slow down your video's pacing and potentially disengage your audience.
In mobile filmmaking, most video editing apps offer a simple way to add this shift. You'll typically find it in the transitions menu, where you can adjust its duration to suit your needs. A shorter fade (around 0.5 seconds) works well for quick scene changes, while a longer fade (1-2 seconds) can emphasize a dramatic moment.
Whip Pan

Moving from the subtle darkness of a fade, let's explore a more dynamic shift: the whip pan. This energetic change involves quickly panning your camera from one subject to another, creating a blur of motion between shots.
It's a versatile technique that can add excitement, urgency, or comedic effect to your mobile films. To execute a whip pan, start by framing your first subject. Then, swiftly rotate your smartphone horizontally, ending on your second subject. The key is speed – the faster you move, the more blurred the change will be.
Practice varying your speed to achieve different effects. You can enhance whip pans in post-production by adding motion blur or adjusting the timing. Some mobile editing apps even offer preset whip pan changes you can apply between clips.
Whip pans work particularly well for:
- Connecting two related scenes or subjects
- Conveying rapid passage of time
- Creating a sense of disorientation or confusion
- Shifting between locations in action sequences
Match Cut

Match cuts create seamless visual connections between two different scenes, enhancing your story's flow.
You'll find this shift particularly effective when linking similar shapes, actions, or themes across shots.
Seamless Visual Connections
A filmmaker's secret weapon for creating visual continuity is the match cut shift. This powerful shift technique seamlessly connects two scenes by matching the composition, movement, or subject matter between shots. You'll find that match cuts can add depth and meaning to your mobile films, creating a smooth flow that keeps viewers engaged.
To execute a match cut, focus on finding visual similarities between your scenes. Look for shapes, colors, or actions that can bridge the gap. For example, you might shift from a close-up of a round clock to an aerial shot of a circular fountain. Or, you could match the movement of a character reaching for something in one scene with a similar action in the next.
When planning your shots, consider potential match cut opportunities. This foresight will help you capture the necessary footage to create these seamless connections. Experiment with different types of matches, such as graphic matches (based on shape or color) or action matches (based on movement).
Enhancing Story Flow
Beyond creating visual continuity, match cuts play an essential role in enhancing your story's flow. They allow you to seamlessly connect different scenes or shots that share similar visual elements or movements. By linking these scenes, you'll create a more cohesive narrative and keep your audience engaged.
To execute a match cut effectively, identify objects, shapes, or actions that appear in both your current and next shot. For example, you might shift from a close-up of a spinning basketball to an overhead shot of a rotating ceiling fan. This visual connection helps guide your viewer's attention and creates a smooth psychological shift between scenes.
Match cuts can also convey the passage of time or highlight thematic connections in your story. You can use them to draw parallels between characters, emphasize recurring motifs, or illustrate cause-and-effect relationships.
When planning your mobile film, look for opportunities to incorporate match cuts that not only look visually appealing but also serve a narrative purpose. With practice, you'll develop an eye for spotting potential match cut opportunities, elevating your storytelling and creating a more polished final product.
J-Cut and L-Cut
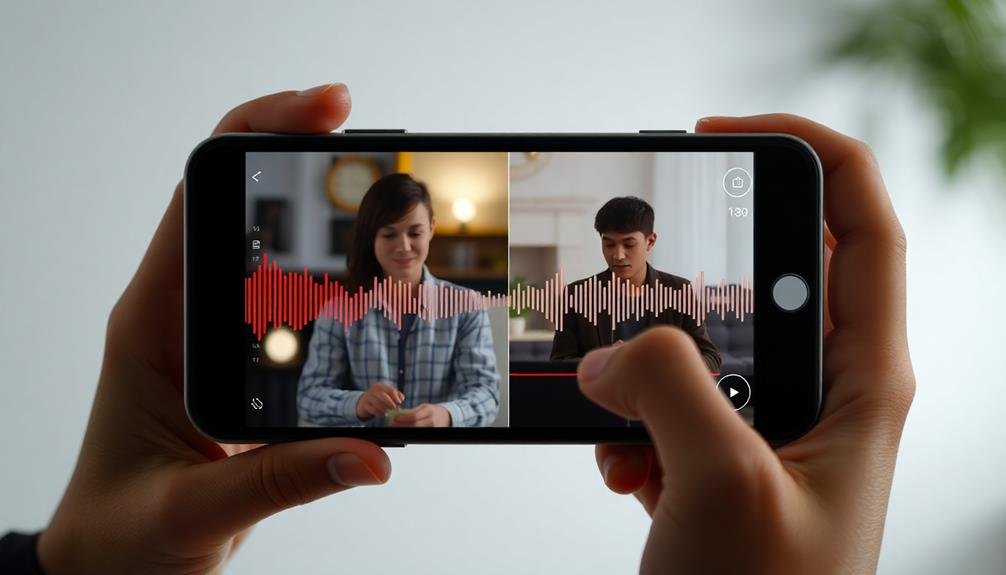
J-cuts and L-cuts are powerful audio-visual techniques that can greatly enhance your mobile filmmaking.
These shifts allow you to offset the audio and video, creating a seamless flow between scenes and adding depth to your storytelling.
You'll find that J-cuts and L-cuts are particularly effective for improving dialogue sequences, as they help maintain the audience's engagement and create a more natural conversational rhythm in your film.
Definition and Visual Impact
Filmmakers' favorite tools for smooth scene shifts, J-cuts and L-cuts offer powerful ways to enhance your mobile storytelling. These techniques involve overlapping audio and video from adjacent scenes, creating a seamless flow between shots.
J-cuts occur when you hear audio from the next scene before seeing the visuals, while L-cuts maintain the current scene's visuals as you hear audio from the upcoming scene. Both alterations provide a more natural and engaging viewing experience, mimicking how we perceive the world around us.
The visual impact of J-cuts and L-cuts includes:
- Increased narrative continuity
- Smoother pacing between scenes
- Enhanced emotional resonance
- Improved audience immersion
When using these alterations in your mobile filmmaking, focus on timing and relevance. Start with subtle overlaps of 1-2 seconds and adjust as needed.
Consider the mood you want to convey and choose appropriate audio cues to complement the visuals. Experiment with different combinations of J-cuts and L-cuts to find the perfect rhythm for your story.
Creating Smooth Scene Transitions
Creating smooth scene changes with J-cuts and L-cuts requires careful planning and execution. These techniques allow you to seamlessly shift between shots by overlapping audio and video from adjacent scenes.
For a J-cut, you'll introduce the audio from the next scene before the visual change occurs. This primes your audience for the upcoming shift, making it feel more natural. To implement a J-cut, start by overlapping the audio track of the new scene about 2-3 seconds before the visual shift.
L-cuts work in reverse, letting the audio from the current scene linger as you cut to the next visual. This technique helps maintain continuity and can create emotional resonance. To create an L-cut, extend the audio from the current scene for a few seconds after the visual has changed.
When using these shifts, pay attention to the pacing and content of your scenes. Choose moments where the overlapping audio makes sense narratively.
Practice timing your cuts to match the rhythm of your dialogue or background music. Remember, subtlety is key – use these shifts sparingly to enhance your storytelling without drawing attention to the technique itself.
Enhancing Dialogue Flow
When it comes to enhancing dialogue flow, J-cuts and L-cuts are invaluable tools in your mobile filmmaking arsenal.
These techniques allow you to create seamless shifts between scenes while maintaining natural conversation rhythm. J-cuts introduce audio from the next scene before the visual shift, while L-cuts extend the audio from the current scene into the next visual.
To effectively use J-cuts and L-cuts in your mobile films:
- Start with a J-cut to build anticipation and smooth the shift
- Use L-cuts to maintain continuity and emphasize important dialogue
- Experiment with different lengths of audio overlap for varied effects
- Combine J-cuts and L-cuts to create dynamic, engaging sequences
Zoom Transition
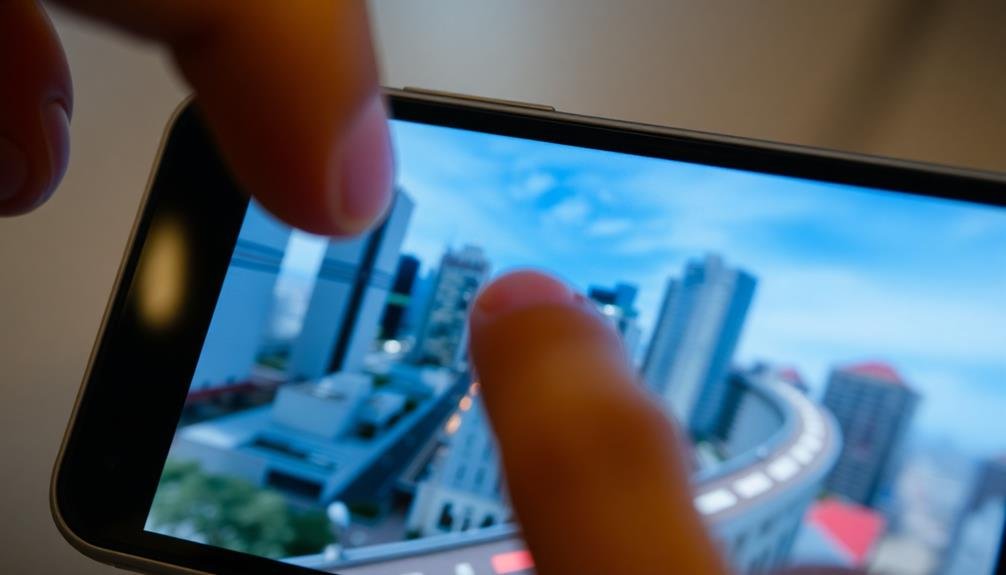
The zoom shift frequently adds dynamic energy to mobile film projects. You can use this shift to create a sense of movement or to draw attention to a specific element in your shot. To execute a zoom shift, you'll either zoom in or out during filming, then match that movement in your next clip. This technique works well when you want to emphasize a detail or reveal a broader scene.
When using a zoom shift, consider the speed and direction of your zoom. A slow zoom can build suspense or create a dreamy effect, while a fast zoom adds excitement or urgency. You can also combine zooms with pans or tilts for more complex shifts.
Remember to keep your shots steady, using a tripod or stabilizer if necessary.
Many mobile editing apps offer digital zoom shifts, which can be useful if you didn't capture the zoom during filming. However, these digital effects may reduce image quality, so use them sparingly.
Practice different zoom speeds and directions to find what works best for your story and style.
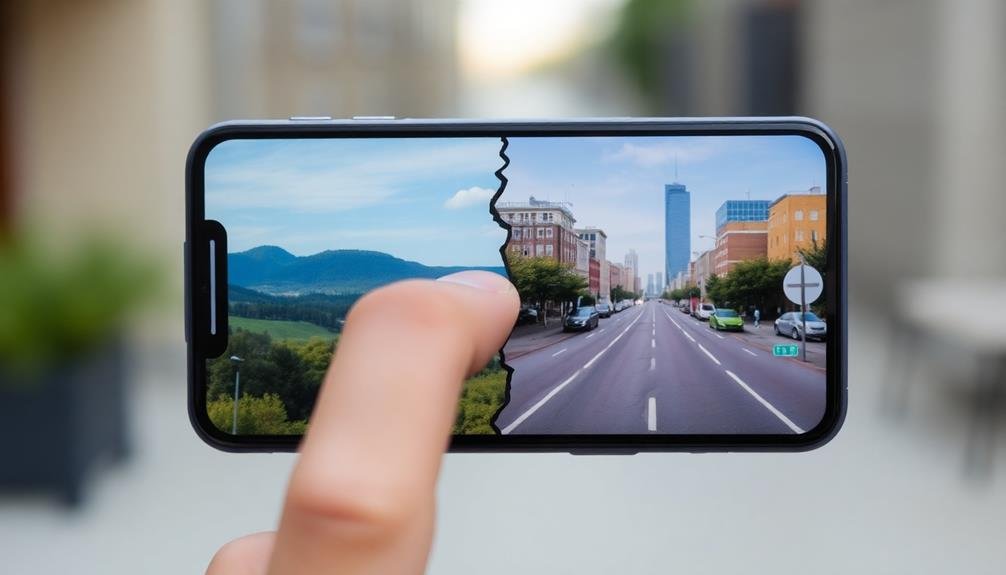
Wipe Transition

While zooms can create dynamic movement, wipes offer a different kind of visual flair. A wipe change occurs when one shot replaces another by moving across the screen in a specific direction. This change can be horizontal, vertical, or even diagonal, adding a stylish element to your mobile film.
Wipe changes are versatile and can be used to:
- Indicate a change in location or time
- Connect visually similar scenes
- Create a sense of progression or movement
- Establish a unique visual rhythm
To execute a wipe change on your mobile device, you'll need a video editing app that supports this feature. Many popular apps like iMovie, FilmoraGo, and KineMaster offer wipe changes.
When using wipes, consider the direction of movement within your shots. For example, if a character exits to the right, use a right-to-left wipe to change to the next scene.
Experiment with different wipe styles, such as clock wipes, iris wipes, or even custom shapes. However, use wipes sparingly to avoid overwhelming your audience.
When applied thoughtfully, wipe changes can add a professional touch to your mobile filmmaking projects, enhancing the overall visual storytelling experience.
Dissolve Effect

The dissolve effect is your go-to shift for smooth scene changes in mobile filmmaking.
You'll find it creates visual continuity, seamlessly blending one shot into the next without jarring cuts.
This versatile shift can also symbolize the passage of time, making it perfect for montages or indicating a change in your story's timeline.
Smooth Scene Changes
In light of its versatility and subtlety, the dissolve effect stands out as a go-to shift for mobile filmmakers seeking smooth scene changes. This alteration gently fades out one scene while simultaneously fading in the next, creating a seamless flow between shots.
You'll find it particularly useful when you want to indicate the passage of time or a change in location without jarring your audience.
To make the most of dissolve alterations in your mobile filmmaking:
- Experiment with different dissolve durations to achieve the right pacing
- Use longer dissolves for dreamy or nostalgic sequences
- Apply shorter dissolves for quick, subtle shifts between related scenes
- Combine dissolves with other effects for unique transitions
When implementing dissolves, pay attention to the visual elements in both scenes. Matching colors, shapes, or movements can enhance the smoothness of the alteration.
You'll also want to reflect on the emotional impact of the dissolve effect. It can evoke a sense of connection between scenes or create a dreamlike atmosphere.
Creating Visual Continuity
Creating visual continuity with dissolve effects goes beyond simple scene changes. It's a powerful tool that can seamlessly blend one shot into another, creating a smooth flow between scenes or ideas.
When you use dissolves effectively, you'll enhance the overall visual narrative of your mobile film.
To create visual continuity, start by choosing shots that have similar compositional elements or color palettes. This will make the shift appear more natural.
Experiment with different dissolve durations; longer dissolves can create a dreamy, ethereal effect, while shorter ones maintain a quicker pace.
Use dissolves to show the passage of time or to connect related concepts. For example, dissolve from a close-up of a clock to a wide shot of a bustling city to convey a time lapse.
You can also use this effect to blend two different locations or to smoothly shift between different perspectives of the same scene.
Symbolizing Time Passing
Dissolves excel at symbolizing the passage of time in mobile filmmaking. This shift gradually fades out one scene while fading in another, creating a smooth and seamless change.
You'll find dissolves particularly useful when you want to indicate that time has passed between scenes or to show a character's mental state shifting.
To effectively use dissolves in your mobile films, consider these key points:
- Duration: Adjust the length of the dissolve to match the pacing of your story
- Context: Use dissolves to connect thematically related scenes or ideas
- Emotion: Employ slower dissolves for a dreamlike or nostalgic feel
- Frequency: Don't overuse dissolves; reserve them for significant time jumps
When you're editing on your mobile device, most video editing apps offer dissolve shifts.
Experiment with different durations to find the right balance for your story.
Remember, a well-placed dissolve can enhance the emotional impact of your scene shifts and help your audience understand the passage of time without explicitly stating it.
Morph Transition
Morphing shifts seamlessly blend one shot into another, creating a fluid and visually striking effect. You'll find this change particularly useful when you want to emphasize a transformation or connection between two subjects. To execute a morph transition, you'll need to align key points in your start and end frames, then let the software interpolate the in-between frames.
When using morph transitions, consider the emotional impact you want to achieve:
| Emotion | Scene Type | Morph Speed |
|---|---|---|
| Excitement | Action sequences | Fast |
| Wonder | Nature transformations | Medium |
| Nostalgia | Aging characters | Slow |
| Suspense | Mystery reveals | Very slow |
| Disorientation | Surreal scenes | Variable |
To get the best results, shoot your scenes with the morph in mind. Confirm your start and end frames have similar compositions and lighting. You'll also want to minimize movement within the frame to avoid unwanted distortions. With practice, you'll be able to create stunning morph transitions that elevate your mobile filmmaking and captivate your audience.
Split Screen

Split screens offer a dynamic way to show multiple perspectives or scenes simultaneously. This shift technique divides your frame into two or more sections, each displaying different footage. It's an excellent tool for comparing and contrasting, showing cause and effect, or simply adding visual interest to your mobile film.
To create effective split screens, consider these key points:
- Composition: Carefully frame each section to guarantee visual balance.
- Timing: Sync the action or dialogue between screens for maximum impact.
- Color: Use contrasting or complementary color schemes to enhance the visual appeal.
- Content: Choose scenes that relate to or play off each other for a cohesive narrative.
When using split screens in your mobile filmmaking, pay attention to the aspect ratio of your final output. Vertical formats like those used on social media platforms can be particularly well-suited for split screen effects.
You can also experiment with asymmetrical splits or animated divisions to add extra flair to your shifts.
Frequently Asked Questions
How Can I Create Custom Transitions in Mobile Video Editing Apps?
You can create custom changes in mobile editing apps by using keyframes, masking tools, and blend modes. Try experimenting with overlays, color adjustments, and motion effects. Some apps even offer built-in change creators for unique results.
What Frame Rate Works Best for Smooth Transitions on Mobile Devices?
For smooth shifts on mobile devices, you'll want to aim for 60 frames per second (fps). This higher frame rate guarantees fluid motion and seamless shifts. If your device can't handle 60fps, 30fps is a good alternative.
Are There Any Copyright Concerns When Using Pre-Made Transition Effects?
You should be cautious about copyright when using pre-made shifts. Many effects are copyrighted, so you'll need to purchase licenses or use royalty-free options. Always check the terms and conditions before incorporating them into your work.
How Do I Ensure Consistent Color Grading Across Different Transition Styles?
To guarantee consistent color grading across changes, you'll want to use a unified color palette. Apply your grading after editing, use LUTs consistently, and adjust each clip individually to maintain cohesion throughout your entire video project.
Can Transitions Compensate for Shaky Footage in Mobile Filmmaking?
Changes can't fully compensate for shaky footage, but they can help mask it. You'll want to use quick cuts or whip pans to minimize the appearance of shakiness. However, it's better to focus on stabilizing your shots first.
In Summary
You've now got a powerful toolkit of shifts to make your mobile films stand out. Don't be afraid to experiment with these techniques; they'll add polish and professionalism to your work. Remember, less is often more when it comes to shifts. Use them thoughtfully to enhance your storytelling, not distract from it. With practice, you'll develop an instinct for when and how to use each shift effectively. Keep shooting and elevating your mobile filmmaking game!


Leave a Reply