
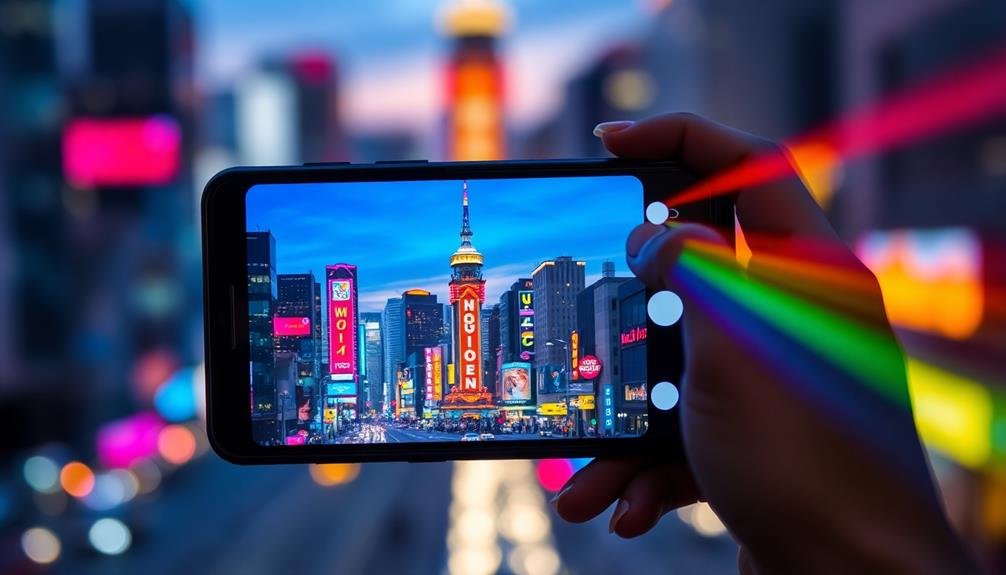
Mobile photography is all about capturing compelling stories in every shot. You'll want to master key composition techniques like the rule of thirds, leading lines, and framing within the frame. These principles help create visually appealing images that draw viewers in. Don't forget to play with perspective and lighting to set the mood. For social media-ready shots, consider platform-specific formats and aspect ratios. Candid moments often make for the most engaging storytelling, so keep your camera ready. By exploring patterns, shadows, and the golden hour, you'll elevate your mobile photography game. There's a whole world of creative possibilities waiting to be revealed through your smartphone lens.
Understanding the Rule of Thirds
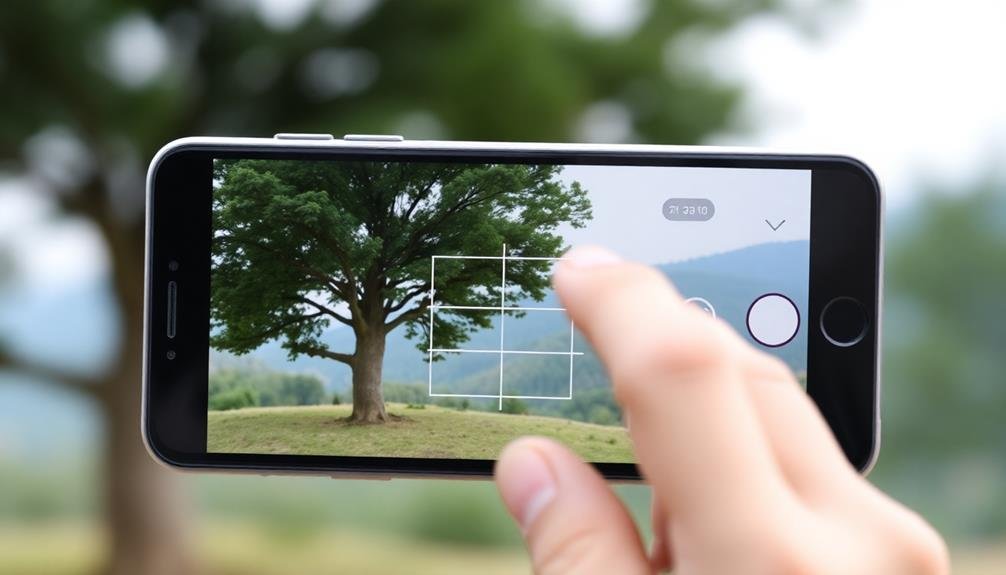
Nearly every photographer should be familiar with the rule of thirds. This fundamental composition technique divides your frame into a 3×3 grid, creating nine equal sections. The key is to place your main subject along these lines or at their intersections, rather than centering it.
When you're shooting with your mobile device, activate the grid feature in your camera settings. This overlay will help you align your shots more effectively. As you frame your image, position important elements along these gridlines or at their intersecting points. This creates a more balanced and visually appealing composition.
The rule of thirds works well for various subjects. For landscapes, try aligning the horizon with the top or bottom horizontal line. In portraits, position your subject's eyes along the upper third. For action shots, place your moving subject in the left or right third, leaving space for implied motion.
Leading Lines in Mobile Photography

Utilizing leading lines is another powerful composition technique in mobile photography. These lines guide the viewer's eye through the image, creating depth and drawing attention to your main subject.
You'll find leading lines everywhere in your surroundings – roads, fences, buildings, or even natural elements like rivers and tree branches.
To use leading lines effectively, identify strong linear elements in your scene. Position your camera so these lines lead toward your subject or a focal point of interest. Experiment with different angles to enhance the line's impact.
Try shooting from a low angle to make a path seem longer, or from above to capture the full curve of a winding road.
Don't limit yourself to straight lines; curved or circular lines can create a sense of movement and flow in your image. Remember, leading lines don't always need to be obvious; subtle lines can be just as effective in guiding the viewer's gaze.
When composing your shot, consider how the lines interact with other elements in the frame. Use them to complement the rule of thirds or create interesting patterns.
With practice, you'll develop an eye for spotting and utilizing leading lines to create more dynamic and engaging mobile photographs.
Symmetry and Balance
While leading lines guide the eye through an image, symmetry and balance create visual harmony. In mobile photography, you can use these principles to craft visually pleasing compositions that captivate viewers.
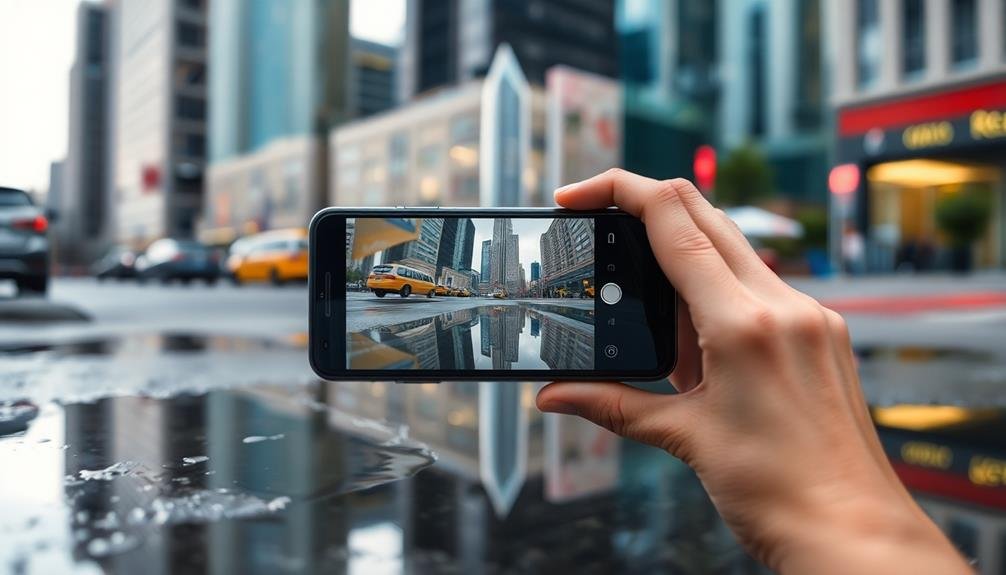
Symmetry occurs when elements on both sides of an imaginary center line mirror each other. You'll find it in architecture, reflections, and natural scenes.
To capture symmetrical shots, position your subject in the center of the frame. Use your phone's grid feature to align elements precisely. Look for reflective surfaces like water or glass to create perfect symmetry. Don't shy away from breaking symmetry slightly for added interest.
Balance, on the other hand, distributes visual weight evenly across the frame. It doesn't require perfect symmetry but rather a sense of equilibrium. You can achieve balance through color, shape, or size. Place a large object on one side and several smaller objects on the other. Experiment with negative space to balance a single subject.
When composing, consider the rule of thirds alongside symmetry and balance. Sometimes, asymmetrical balance can create more dynamic images. Trust your eye and adjust your composition until it feels right.
Framing Within the Frame
Framing within the frame is a powerful composition technique that adds depth and focus to your mobile photos. It involves using elements within your scene to create a natural border around your main subject. This technique draws the viewer's eye to the focal point while adding context and layers to your image.
To use framing effectively, look for natural elements in your environment. You can use doorways, windows, arches, or even tree branches to frame your subject. Position yourself so that these elements surround the main focus of your shot. This creates a sense of depth and can tell a more compelling story.
Here's a quick reference for framing ideas:
| Natural | Architectural | Human-made |
|---|---|---|
| Trees | Doorways | Hands |
| Leaves | Windows | Mirrors |
| Rocks | Arches | Fences |
| Clouds | Bridges | Curtains |
| Shadows | Tunnels | Vehicles |
Perspective and Point of View

When you're shooting with your smartphone, experimenting with different perspectives can dramatically transform your images.
Try getting low to the ground for a worm's-eye view or find an elevated position for a bird's-eye perspective to add intrigue to your compositions.
Don't forget to incorporate foreground elements and apply the rule of thirds to create depth and balance in your mobile photographs.
Low-Angle Versus High-Angle
Perspective can make or break a mobile photo. When it comes to low-angle versus high-angle shots, you're choosing between two powerful tools to convey different moods and messages.
Low-angle shots, taken from below the subject, make objects appear larger and more imposing. They're great for creating a sense of power, dominance, or grandeur. You'll often see this technique used in architecture photography to emphasize the height of buildings or in portraits to make subjects look authoritative.
High-angle shots, taken from above, have the opposite effect. They make subjects appear smaller and can evoke feelings of vulnerability or insignificance. This perspective is useful for capturing crowds, landscapes, or creating a bird's-eye view of a scene.
To experiment with these angles, don't be afraid to get low or climb high. Crouch down, lie on the ground, or use stairs and elevated platforms to your advantage.
Foreground Interest Techniques
Building on the idea of creating impactful images through camera positioning, let's explore foreground interest techniques. These methods add depth and context to your mobile photos, drawing viewers into the scene. By incorporating elements in the foreground, you'll create a sense of dimension and guide the viewer's eye through the image.
To effectively use foreground interest techniques:
- Look for leading lines: Find natural or man-made lines that draw the eye from the foreground to the background.
- Frame your subject: Use nearby objects like tree branches, doorways, or arches to create a natural frame around your main subject.
- Add texture: Include textured elements in the foreground, such as rocks, leaves, or fabric, to create visual interest.
- Create depth with blur: Use your phone's portrait mode or manually focus on a foreground object to blur the background, emphasizing the depth of field.
When applying these techniques, don't forget to experiment with different angles and perspectives.
You'll often find that crouching low or moving slightly to the side can dramatically change the composition and impact of your shot.
Rule of Thirds
Mastering the Rule of Thirds can dramatically improve your mobile photography composition. This technique involves dividing your frame into a 3×3 grid and placing key elements along these lines or at their intersections. Most smartphone cameras have a built-in grid feature you can enable to help with this.
When applying the Rule of Thirds, position your main subject off-center. This creates a more balanced and visually appealing image. For landscapes, align the horizon with either the top or bottom horizontal line. In portraits, place the subject's eyes along one of the upper intersections.
Don't be afraid to break this rule occasionally. Sometimes, centering your subject can create powerful symmetry or emphasize its importance. The key is understanding when to use the Rule of Thirds and when to deviate from it.
Experiment with different compositions using this technique. Move your phone around to find the most compelling arrangement.
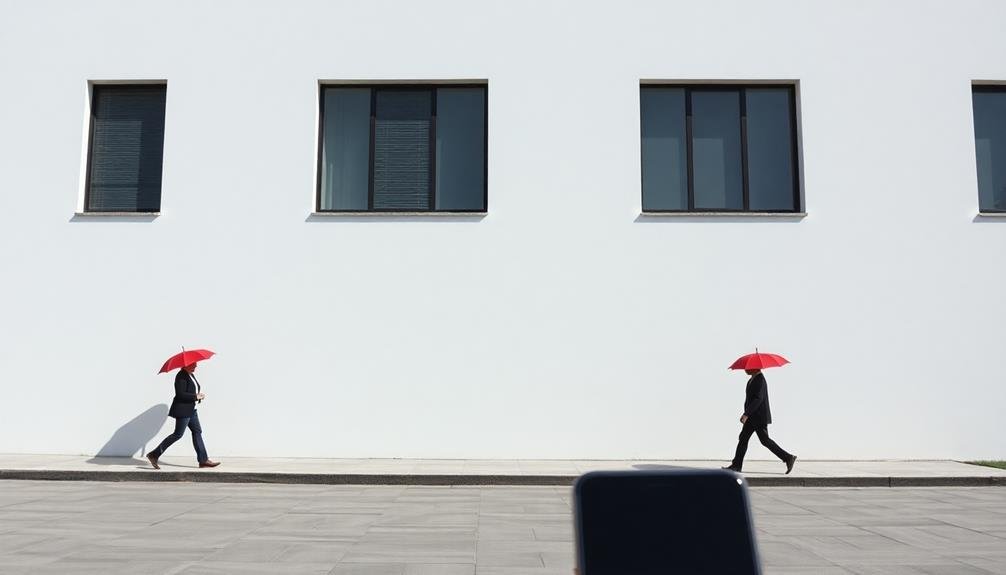
Negative Space in Compositions
Negative space, often overlooked, plays an essential role in mobile photography compositions. It's the empty area surrounding your main subject, and when used effectively, it can dramatically enhance your images.
By embracing negative space, you'll create a sense of balance, draw attention to your subject, and evoke emotion in your viewers.
To make the most of negative space in your mobile photography:
- Look for clean backgrounds: Seek out plain walls, clear skies, or uncluttered surfaces to frame your subject.
- Position your subject off-center: Use the rule of thirds to place your subject, allowing negative space to fill the rest of the frame.
- Experiment with minimalism: Sometimes, less is more. Try capturing a single subject surrounded by ample negative space for a powerful effect.
- Play with contrast: Use negative space to create stark contrasts between light and dark areas, or between colors.
Using Color for Visual Impact
Color wields immense power in mobile photography, capable of transforming ordinary scenes into eye-catching images. To harness this potential, you'll need to understand how different hues interact and affect your composition.
Start by seeking out vibrant colors in your surroundings, whether it's a bright red door or a field of yellow flowers. These bold elements can serve as focal points, drawing the viewer's eye.
Don't shy away from contrasting colors. Pairing complementary hues, like blue and orange or purple and yellow, can create striking visual tension.
You can also experiment with monochromatic schemes, focusing on various shades of a single color to create a cohesive, harmonious image.
Pay attention to the emotional impact of colors. Warm tones like reds and oranges can evoke energy and passion, while cool blues and greens often convey calmness.
Use these associations to reinforce the mood you're trying to capture.
Capturing Depth and Dimension
While flat images can be striking, adding depth and dimension to your mobile photos can elevate them to new heights. You can create a sense of space and perspective that draws viewers into your shots. To achieve this, focus on layering elements within your frame. Foreground, midground, and background components work together to give your images a three-dimensional feel.
Use leading lines to guide the eye through your composition, creating a path that leads from the foreground to the background. Natural elements like roads, rivers, or fences can serve as effective leading lines.
Experiment with different angles and viewpoints to emphasize depth. Getting low or shooting from an elevated position can dramatically alter the perception of space in your photos.
Here are four techniques to enhance depth and dimension in your mobile photography:
- Utilize foreground elements to frame your subject
- Incorporate reflections to add visual interest and depth
- Play with shadows to create contrast and dimension
- Use selective focus to blur the background and emphasize your subject
The Power of Simplicity
In the world of mobile photography, simplicity often reigns supreme. You'll find that reducing clutter and focusing on a single subject can create powerful, compelling images.
Start by identifying the main element you want to capture, whether it's a person, object, or landscape feature. Then, eliminate distractions by adjusting your composition or changing your angle.
Use negative space to your advantage. This empty area around your subject can help draw attention to the main focus and create a sense of balance.
Don't be afraid to leave large portions of your frame unoccupied; it can add drama and impact to your shot.
Experiment with minimalist color palettes. Stick to one or two dominant colors to create a cohesive, striking image.
You can also try black and white photography to strip away color distractions and emphasize form and texture.
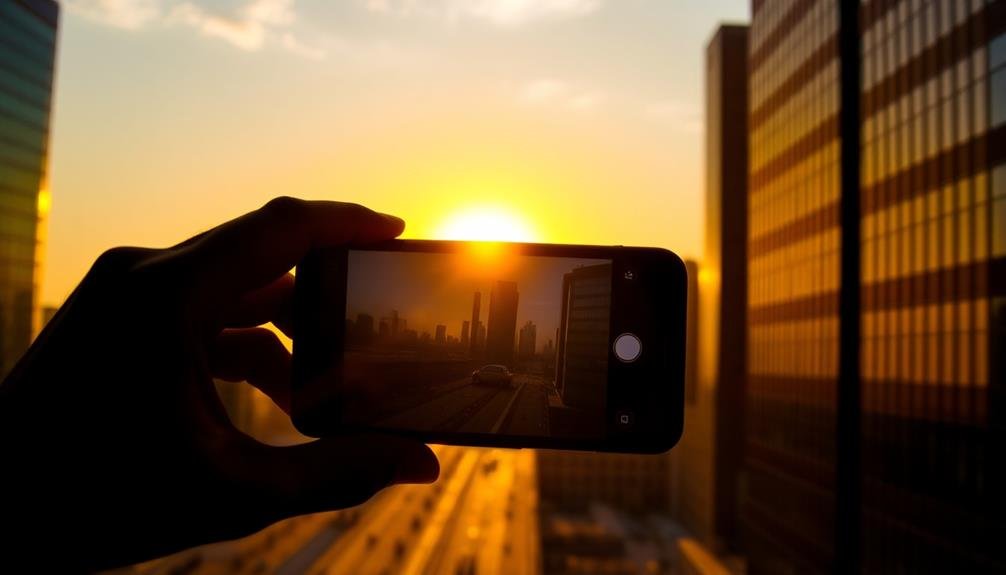
Mastering Golden Hour Shots
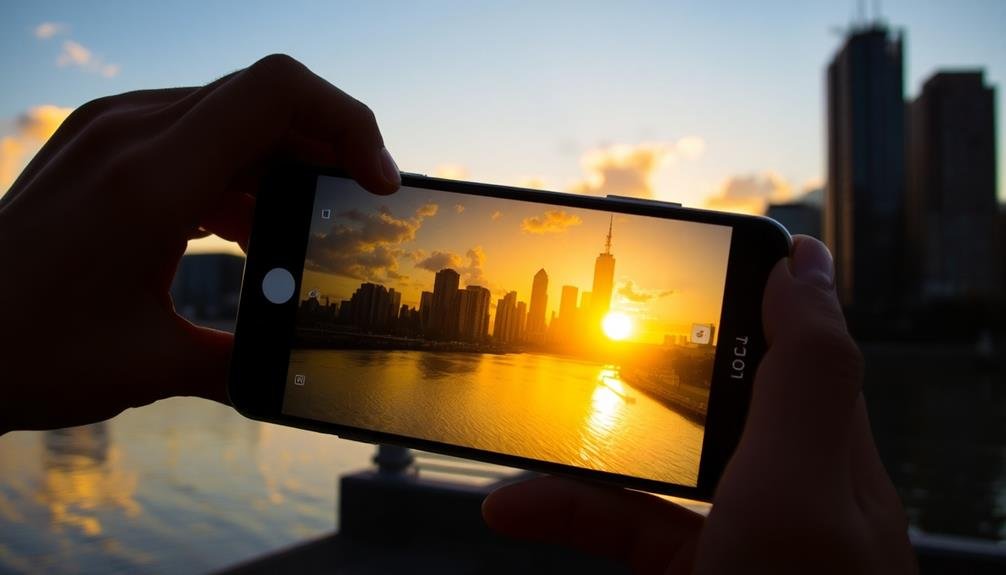
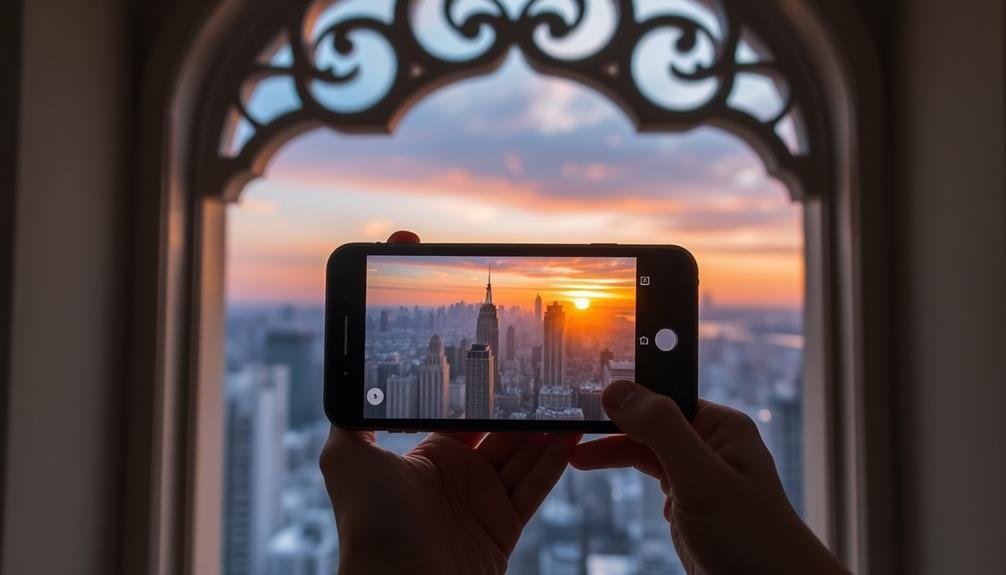
Golden hour, that magical time just after sunrise or before sunset, offers mobile photographers a prime opportunity to capture stunning images. The warm, soft light during this period can transform ordinary scenes into extraordinary ones.
To make the most of golden hour shots, you'll need to plan ahead and be ready to act quickly, as this window of opportunity is brief.
To master golden hour photography with your smartphone:
- Scout locations in advance: Identify spots with interesting subjects and compositions that'll shine in golden light.
- Use your phone's HDR mode: This helps balance the bright sky with darker foreground elements.
- Experiment with silhouettes: Position subjects against the sun for dramatic, high-contrast images.
- Play with lens flare: Incorporate the sun in your frame for creative light effects.
Remember to adjust your exposure by tapping on different parts of the screen. This helps you control how much light enters the lens, preventing overexposed skies or underexposed foregrounds.
Don't be afraid to take multiple shots with varying exposures – you can always choose the best one later. With practice, you'll develop an eye for capturing the unique qualities of golden hour light, elevating your mobile photography to new heights.
Storytelling Through Candid Moments

Capturing candid moments with your smartphone can be just as powerful as mastering golden hour shots. These unposed, spontaneous images often tell the most authentic stories. To excel at candid photography, you'll need to be observant, quick, and discreet.
Keep your camera app ready and your eyes open for interesting scenes unfolding around you. Look for genuine emotions, interactions, and everyday moments that speak volumes. Don't be afraid to take multiple shots rapidly; you can always delete the extras later.
Here's a table to inspire your candid storytelling:
| Setting | Subject | Emotion |
|---|---|---|
| Cafe | Elderly couple | Contentment |
| Park | Child with dog | Joy |
| Bus stop | Commuter | Contemplation |
To capture these fleeting moments, use burst mode or continuous shooting. Experiment with different angles and perspectives to add depth to your storytelling. Pay attention to background elements that can provide context or contrast to your subject.
Creating Mood With Lighting
Lighting plays an essential role in setting the mood for your mobile photographs.
You'll want to explore the differences between natural and artificial light sources, understanding how each can dramatically alter the atmosphere of your images.
Don't overlook the power of shadows and silhouettes, as they can add depth, mystery, and intrigue to your compositions.
Natural vs. Artificial Light
When it comes to mobile photography, understanding the interplay between natural and artificial light can dramatically elevate your images.
Natural light, such as sunlight or moonlight, offers a soft, organic quality that's hard to replicate. It's ideal for outdoor shoots and can create stunning effects during golden hour or blue hour.
On the other hand, artificial light sources like lamps, streetlights, or your phone's flash provide more control and consistency, especially in low-light situations.
To make the most of both natural and artificial light in your mobile photography:
- Experiment with different times of day to capture varying natural light intensities and colors
- Use reflectors or white surfaces to bounce natural light and fill shadows
- Combine natural and artificial light sources for creative contrasts and depth
- Learn to adjust your phone's exposure settings to balance mixed lighting scenarios
Shadows and Silhouettes
Shadows and silhouettes offer powerful tools for creating mood and depth in mobile photography. They can transform ordinary scenes into dramatic, mysterious, or even eerie compositions.
To capture compelling shadows, look for strong light sources and interesting subjects. Early morning or late afternoon sun provides long, dramatic shadows that can add texture and dimension to your images. Position yourself to capture these elongated forms, using them as leading lines or framing elements.
For silhouettes, place your subject between the camera and a bright light source. Expose for the background, allowing your subject to become a dark, featureless shape. This technique works particularly well during golden hour or against colorful sunsets. Experiment with different poses and angles to create intriguing outlines.
You can also use artificial light sources like street lamps or car headlights to create unique shadow patterns. In low-light situations, try using your phone's flash to cast sharp shadows, adding depth and contrast to your composition.
Patterns and Repetition
Patterns and repetition surround us in both natural and urban environments, offering endless opportunities for enchanting mobile photography.
You'll find them in architectural details, natural landscapes, and even everyday objects. To capture these visually striking elements effectively, train your eye to spot symmetry, geometric shapes, and recurring motifs.
When photographing patterns, consider your composition carefully. Frame your shot to emphasize the repetitive elements, and experiment with different angles to create unique perspectives.
Don't be afraid to get up close for macro shots or step back to capture a broader view of the pattern's context.
Here are four tips to enhance your pattern and repetition photography:
- Look for contrasts in color, texture, or shape to make your patterns pop
- Use leading lines to guide the viewer's eye through the repetitive elements
- Break the pattern with an unexpected element to add visual interest
- Play with symmetry and reflections to create mesmerizing compositions
Composing for Social Media Platforms
While patterns and repetition can create stunning images, it's important to reflect on how your photos will appear on social media platforms. Each platform has its own unique display requirements, so you'll need to adapt your composition accordingly.
For Instagram, focus on square or vertical formats. Aim for a 4:5 aspect ratio in vertical shots to maximize screen real estate. When composing, leave space at the top and bottom for captions and profile information.
On Facebook, horizontal images work well, but make sure your main subject is centered, as the platform may crop the sides on mobile devices.
Twitter favors landscape orientation, so compose with a 16:9 ratio in mind.
For Pinterest, vertical images stand out best, so shoot in portrait mode with a 2:3 aspect ratio.
LinkedIn prefers horizontal images for desktop viewing, but also supports square formats for mobile.
Remember to take into account negative space for text overlays and keep your compositions simple and impactful. By tailoring your shots to each platform's specifications, you'll guarantee your mobile photography shines across all social media channels.
Frequently Asked Questions
How Do I Choose the Best Smartphone for Mobile Photography?
To choose the best smartphone for mobile photography, you'll want to prioritize camera specs like megapixels, aperture, and zoom capabilities. Consider low-light performance, optical image stabilization, and manual controls. Read reviews and compare sample photos from different models.
What Are the Essential Mobile Photography Apps for Editing and Enhancing Images?
You'll want essential apps like Snapseed, VSCO, and Lightroom Mobile for editing. They offer powerful tools for adjusting exposure, color, and composition. Don't forget Instagram for quick filters and sharing your enhanced photos with others.
How Can I Protect My Smartphone Camera Lens From Scratches and Damage?
To protect your smartphone camera lens, you'll want to invest in a protective case with a built-in lens cover. You can also use lens protectors, keep your phone in a dedicated pocket, and clean it gently with microfiber cloth.
What Accessories Are Recommended for Improving Mobile Photography Results?
You'll improve your mobile photos with these accessories: a clip-on lens kit, portable LED light, mini tripod, and remote shutter. Don't forget a power bank and protective case. They'll enhance your shots and keep your gear safe.
How Do I Transfer and Backup My Mobile Photos Securely?
You'll want to use cloud storage services like Google Photos or iCloud to automatically back up your photos. You can also manually transfer them to your computer via USB or Wi-Fi. Always encrypt sensitive images for added security.
In Summary
You've now got the tools to transform your mobile photography. Remember, these techniques aren't rules, but guidelines to enhance your creative vision. As you practice, you'll develop an eye for composition that feels natural. Don't be afraid to experiment and break conventions. Your unique perspective is what'll make your photos stand out. So go out, capture the world around you, and tell your stories one frame at a time.


Leave a Reply