To clean your phone's camera lenses like a pro, start by gathering microfiber cloths, isopropyl alcohol, and compressed air. Power off your device and remove the case. Gently wipe the lenses with a dry microfiber cloth, using circular motions from the center outward. For stubborn smudges, lightly dampen the cloth with alcohol. Clean surrounding areas and inspect for residue under bright light. Avoid excess moisture to prevent damage. Establish a weekly cleaning routine to maintain peak camera performance. Don't forget to clean your front-facing camera too. These simple steps will help you capture crystal-clear photos and videos. Discover more expert techniques to keep your phone's lenses spotless.
Gather Your Cleaning Supplies
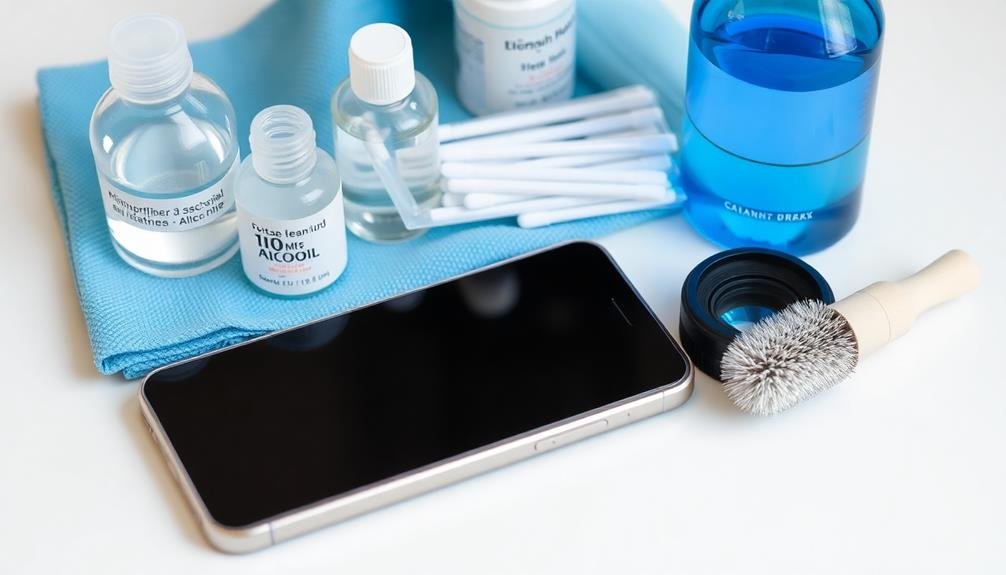
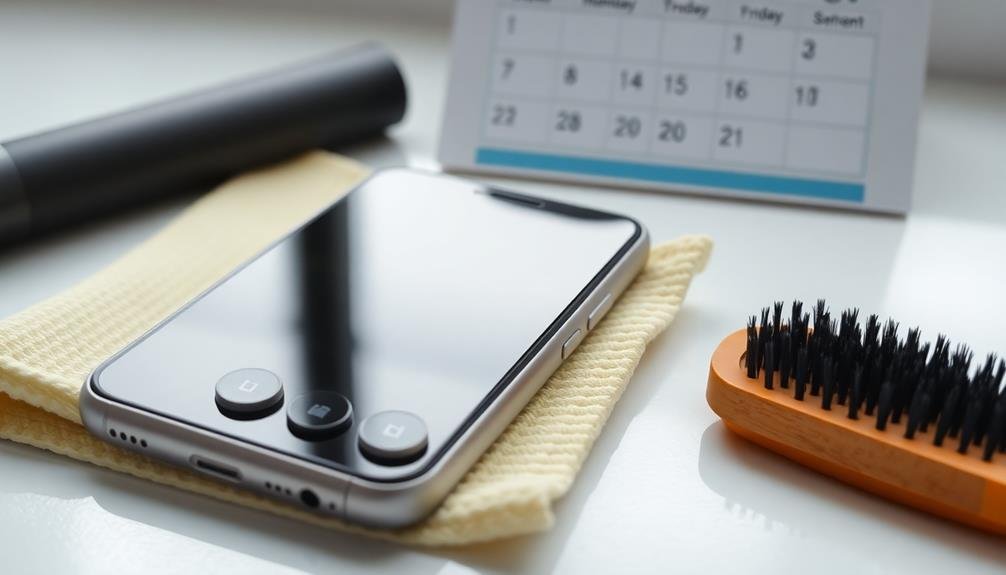
A few essential supplies are needed to clean your phone's camera lenses effectively.
First, you'll need a microfiber cloth, which is gentle on the lens and won't leave scratches or lint. Make sure it's clean and free from any debris that could potentially damage the lens.
Next, gather some distilled water. Tap water can contain minerals that may leave residue, so distilled water is your best bet.
You'll also want to have some isopropyl alcohol on hand, preferably 70% or higher concentration. This helps remove stubborn smudges and kills bacteria.
For tougher cleaning jobs, consider getting some pre-moistened lens cleaning wipes specifically designed for electronic devices. These are convenient and safe to use on your phone's camera lenses.
You might also want a can of compressed air to blow away loose dust particles before wiping.
Finally, grab a small, soft-bristled brush, like a clean makeup brush or a specialized lens cleaning brush. This will help dislodge any stubborn dirt in hard-to-reach areas around the lens.
With these supplies ready, you're well-equipped to tackle your phone's dirty camera lenses.
Power Off Your Device
Before you begin cleaning, it's crucial to power off your device. This simple step prevents any accidental inputs or damage to your phone's internal components during the cleaning process. To power off your device, press and hold the power button until the shutdown menu appears. Select the "Power Off" option and wait for your phone to completely shut down.
If you're using an iPhone, you might need to slide the power off switch on the screen. For Android devices, the process may vary slightly depending on the manufacturer, but it's generally similar. Once your device is powered off, double-check by briefly pressing the power button to verify the screen doesn't light up.
Powering off your device also helps protect against potential water damage if any cleaning solution accidentally seeps into the phone's openings. It's particularly important when cleaning around the camera lenses, as these areas often have small gaps or crevices.
Remove Phone Case
Once you've powered off your device, it's time to remove the phone case. This step is essential as it allows you to access all areas of your phone's camera lenses, including those that might be partially obscured by the case.
Carefully detach the case, starting from one corner and gently working your way around the edges. Be mindful of any buttons or ports that might catch during removal.
For phones with waterproof cases, you'll need to take extra care. These cases often have multiple layers or seals that require specific removal techniques.
Consult your case's manual or manufacturer's website for proper removal instructions to avoid damaging the waterproofing elements.
Once the case is off, inspect it for any accumulated dirt or debris, especially around the camera cutouts.
Use a soft, dry cloth to wipe down the inside of the case, paying particular attention to these areas. This prevents any grime from transferring back onto your phone when you reattach the case later.
With the case removed, you now have full access to your phone's camera lenses and surrounding areas, setting the stage for a thorough cleaning process.
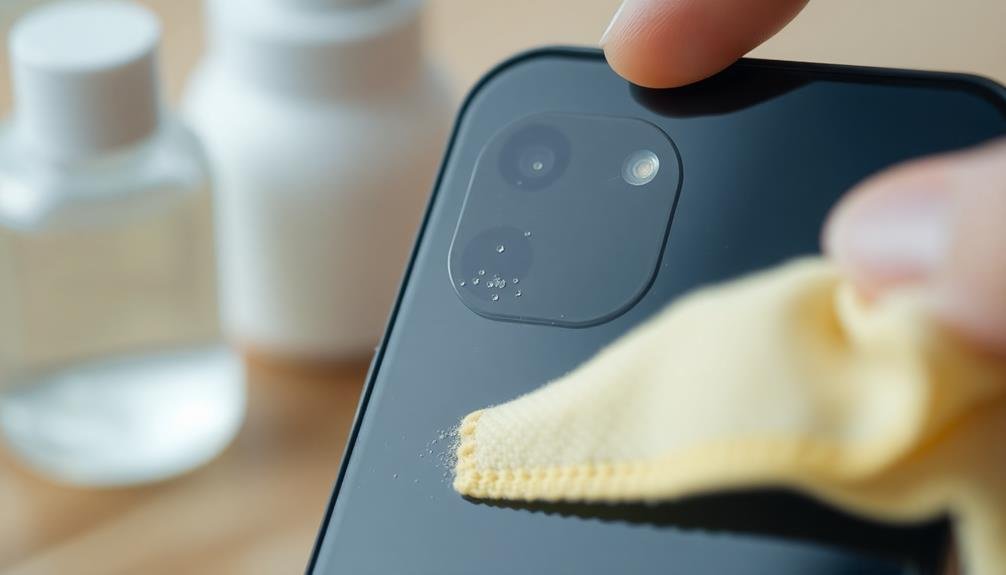
Use Microfiber Cloth
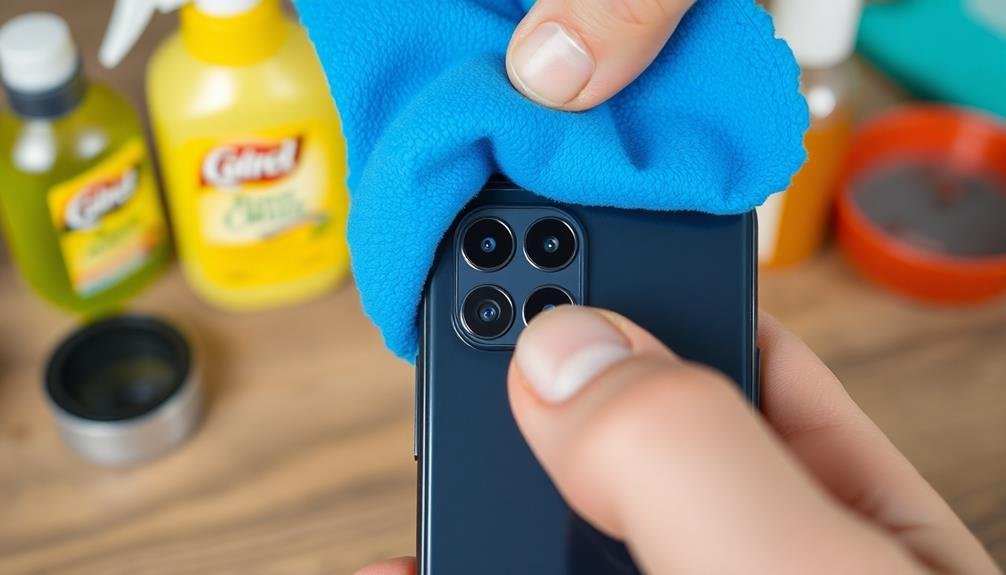
Using a microfiber cloth is the most effective and gentle way to clean your phone's camera lenses.
You'll find this method particularly useful for removing fingerprints, smudges, and light dust without risking scratches on the delicate lens surface.
Be sure to use light, circular motions as you wipe the lens to guarantee thorough cleaning without applying excessive pressure.
Gentle, Effective Cleaning Method
The most gentle and effective way to clean your phone's camera lenses is with a microfiber cloth. This soft, lint-free material won't scratch your delicate lens surface while effectively removing smudges, fingerprints, and dust.
To properly clean your phone's camera lenses using a microfiber cloth, follow these steps:
- Inspect the microfiber cloth to verify it's clean and free from debris that could scratch your lens.
- Gently breathe on the lens to create a light fog, which helps loosen any stubborn particles.
- Using circular motions, lightly wipe the lens with the microfiber cloth, starting from the center and moving outward.
- If needed, slightly dampen a corner of the cloth with distilled water for tougher smudges, but avoid using excessive moisture.
Don't apply too much pressure when cleaning, as this can damage the lens or its protective coating.
If you're dealing with particularly stubborn dirt or grime, you may need to repeat the process a few times. Remember to clean your microfiber cloth regularly to maintain its effectiveness and prevent transferring dirt back onto your lenses.
Avoid Scratching Lens Surface
Scratches on your phone's camera lens can permanently damage image quality. To avoid this, always use a microfiber cloth when cleaning your lens. These soft, lint-free cloths are specifically designed to clean delicate surfaces without causing scratches or leaving residue behind.
Never use paper towels, tissues, or your shirt to wipe your phone's camera lens. These materials can contain small abrasive particles that may scratch the lens surface. Instead, keep a small microfiber cloth in your pocket or bag for quick cleanings on the go.
When using the microfiber cloth, gently wipe the lens in a circular motion. Don't apply excessive pressure, as this can potentially damage the lens or its coating. If there's stubborn dirt or smudges, slightly dampen the cloth with distilled water or lens cleaning solution.
Avoid using household cleaners or chemicals, as they can harm the lens coating.
After cleaning, inspect the lens under good lighting to verify you've removed all smudges and debris. If you notice any scratches, it's best to have a professional assess the damage, as attempting to repair it yourself could worsen the problem.
Apply Cleaning Solution Sparingly

When it comes to applying cleaning solution to your phone's camera lens, remember that less is more.
You'll want to use just a tiny amount of solution on your microfiber cloth, as excess moisture can potentially damage your device.
Be cautious and avoid oversaturating the cloth or lens, ensuring you're not introducing unnecessary liquid to your phone's sensitive components.
Less Is More
Cleaning-solution overuse can do more harm than good when tackling your phone's camera lens.
When it comes to cleaning your device's optics, remember that less is more. You don't need to drown your lens in cleaning solution to achieve a spotless result. In fact, using too much liquid can lead to potential damage and unwanted residue.
To effectively clean your phone's camera lens while minimizing risks, follow these guidelines:
- Use a minimal amount of cleaning solution, just enough to dampen your microfiber cloth.
- Apply gentle pressure when wiping the lens, avoiding excessive force.
- Clean in a circular motion, starting from the center and moving outward.
- Allow the lens to air dry for a few seconds before using your camera.
Avoid Excess Moisture
Excessive moisture is your phone camera lens's worst enemy. When cleaning, you'll want to use just enough solution to remove dirt and grime without saturating the lens or surrounding areas. A damp microfiber cloth is often sufficient for most cleaning tasks. If you need to use a cleaning solution, apply it sparingly to the cloth rather than directly on the lens.
Remember that modern smartphones have water-resistant seals, but they're not completely waterproof. Excess liquid can seep into the device through tiny gaps around the camera module, potentially causing internal damage or fogging. To prevent this, always use minimal moisture and avoid letting liquid pool around the lens.
If you've accidentally used too much cleaning solution, immediately dry the area with a clean, dry microfiber cloth. Gently press around the edges of the lens to absorb any liquid that might've seeped in.
For stubborn smudges, it's better to make multiple gentle passes with a lightly dampened cloth than to risk oversaturating the area with cleaning solution. By being cautious with moisture, you'll keep your phone's camera lens clean and functional without risking water damage.
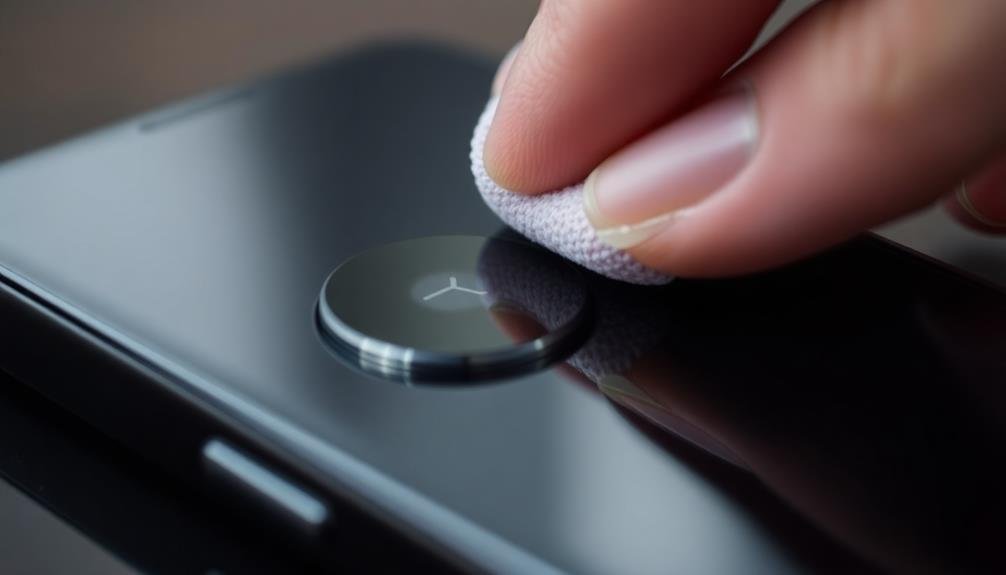
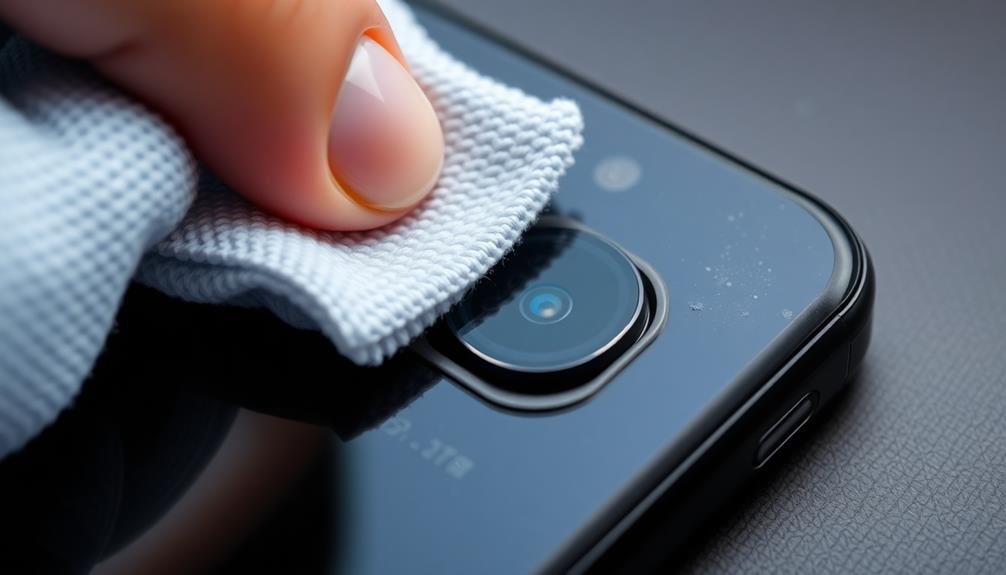
Gently Wipe in Circular Motions

Gentleness is key when cleaning your phone's camera lenses. Using a soft, lint-free microfiber cloth, apply light pressure and wipe in small circular motions. This technique helps remove smudges, fingerprints, and dust without scratching the delicate lens surface.
Start from the center of the lens and work your way outward, guaranteeing you cover the entire area.
As you clean, keep these important points in mind:
- Don't press too hard, as excessive pressure can damage the lens coating.
- Avoid using your shirt, paper towels, or tissues, which can leave lint or scratches.
- If stubborn marks persist, slightly dampen the cloth with distilled water or lens cleaner.
- Always use a clean part of the cloth to prevent redepositing dirt.
Remember to clean both the main camera lenses and the front-facing selfie camera.
For hard-to-reach areas around the lens, use a soft-bristled brush or compressed air to dislodge debris. After cleaning, inspect the lenses under good lighting to guarantee you've removed all smudges and particles.
With regular, gentle cleaning using circular motions, you'll maintain clear, sharp photos and extend the life of your phone's camera lenses.
Clean Surrounding Areas
Before cleaning the surrounding areas, you'll want to remove your phone's protective case.
Once the case is off, carefully wipe down the body of your phone, paying special attention to the areas around the camera lenses.
This step helps guarantee that any dirt or debris near the lenses doesn't interfere with your cleaning efforts or contaminate the camera area.
Remove Protective Case First
Safety first: remove your phone's protective case before cleaning the camera lenses. This step guarantees you can access all areas of the camera module and prevents cleaning solution from getting trapped between the case and the phone.
It's also an opportunity to clean the inside of the case, which can accumulate dust and debris over time.
To properly remove your case and prepare for lens cleaning:
- Gently pry off the case, starting from the corners or following the manufacturer's instructions.
- Inspect the exposed phone body for any debris or damage that may need attention.
- Clean the inside of the case with a microfiber cloth or compressed air to remove dust.
- Set the case aside in a clean, dust-free area while you work on the phone.
With the case removed, you'll have full access to the camera lenses and surrounding areas. This allows for a more thorough cleaning and helps you spot any potential issues with the camera module.
Wipe Phone Body Carefully
Cleaning the entire phone body is a crucial step before focusing on the camera lenses. You'll want to remove any dirt, dust, or debris that could potentially transfer onto the lens during the cleaning process.
Start by using a soft, lint-free microfiber cloth to gently wipe the entire surface of your phone. Pay special attention to the areas surrounding the camera lenses, as these tend to accumulate more grime.
If your phone is particularly dirty, you can slightly dampen the cloth with distilled water or a specialized electronic cleaning solution. Be careful not to use too much liquid, as excess moisture can damage your device.
Avoid using household cleaners, alcohol-based solutions, or abrasive materials, which can harm your phone's delicate components and coatings.
For hard-to-reach areas, like the edges of the camera module, use a soft-bristled brush or a clean, dry cotton swab. Gently sweep away any stubborn particles, being careful not to push them into crevices.
Once you've thoroughly cleaned the phone's body, you can move on to addressing the camera lenses themselves, knowing you've minimized the risk of recontamination during the process.
Avoid Moisture Damage
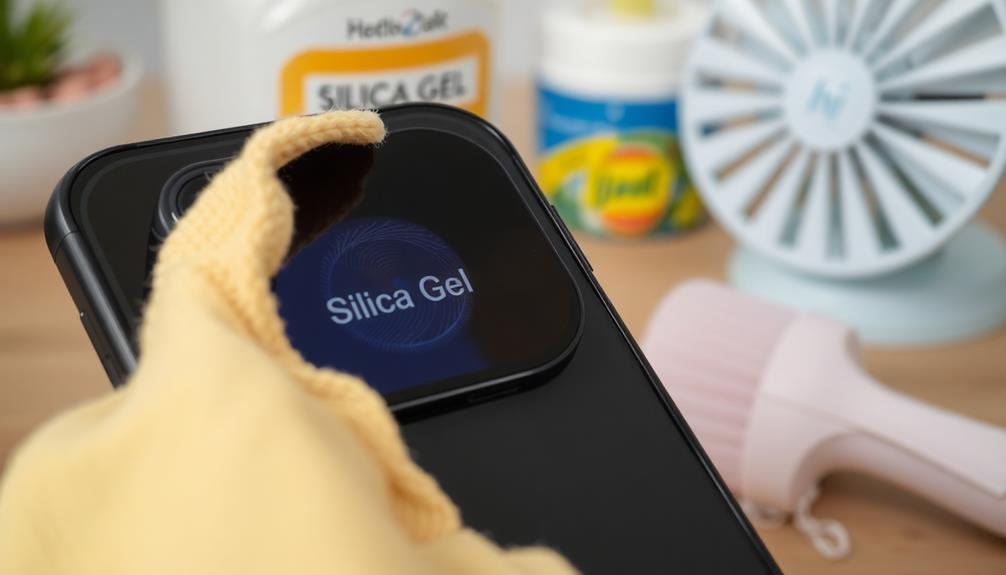
Moisture is your smartphone camera's worst enemy. It can seep into tiny crevices, causing corrosion and irreparable damage to your device's delicate components. To protect your phone's camera lenses from moisture damage, you'll need to be vigilant and take precautions.
When cleaning your camera lenses, avoid using excessive liquid or water-based solutions. Instead, opt for specialized lens cleaning wipes or a slightly dampened microfiber cloth. Be sure to wring out any excess moisture before use.
If you've accidentally exposed your phone to water or high humidity, take immediate action to prevent long-term damage.
Here's what you should do if your phone gets wet:
- Power off your device immediately
- Remove any cases or covers
- Gently pat dry with a soft, lint-free cloth
- Place your phone in a container of uncooked rice or silica gel packets for 24-48 hours
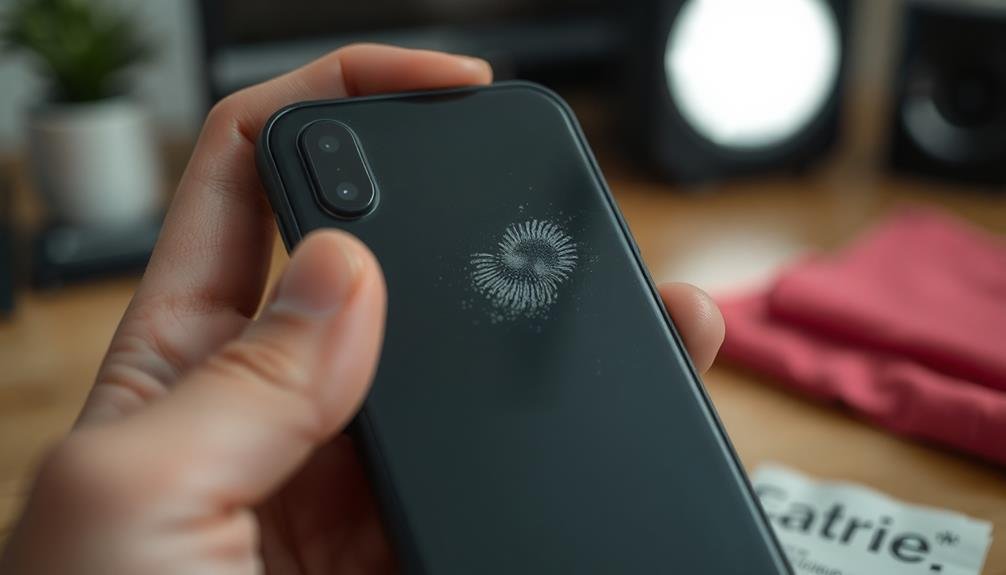
Inspect for Residue
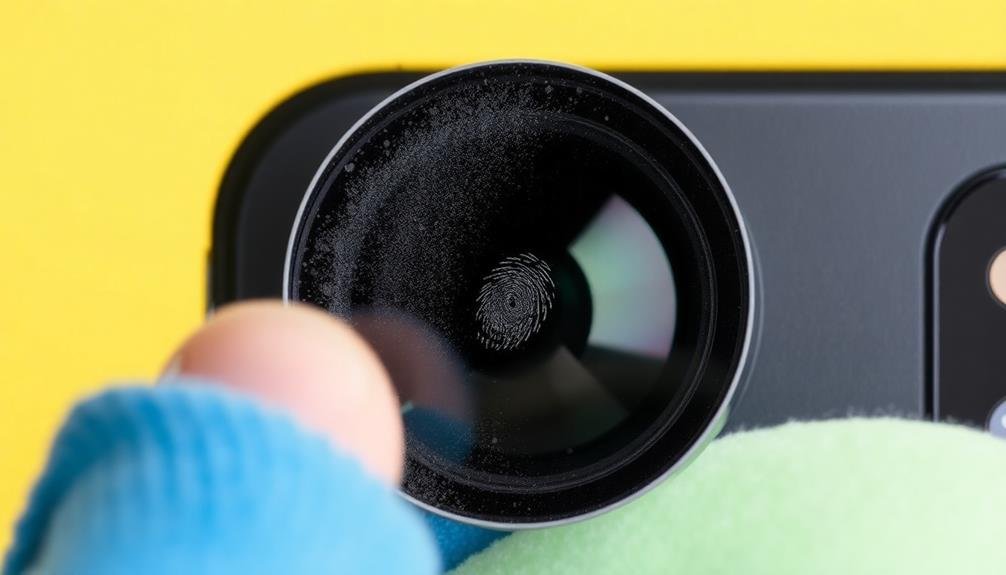
After protecting your phone from moisture, it's time to take a closer look at your camera lenses. Inspect them carefully for any residue that might be affecting your photo quality.
Hold your phone under a bright light and tilt it at different angles to spot smudges, fingerprints, or dust particles.
You'll often find oily residue from your skin, makeup, or food on the lenses. These can cause blurry or hazy images, especially in low-light conditions. Look for a thin film or tiny droplets on the surface.
Dust and lint can also accumulate, creating specks in your photos.
Don't forget to check the edges where the lens meets the phone body. Debris often collects in these crevices and can be harder to spot. If you have multiple camera lenses, inspect each one thoroughly.
For front-facing cameras, pay special attention to the top edge where it meets the screen. This area tends to collect more residue due to facial oils and makeup during selfies.
If you notice any stubborn residue, make a mental note of its location. This will help you target your cleaning efforts more effectively in the next step.
Maintain Regular Cleaning Schedule
A consistent cleaning routine is vital for maintaining your phone's camera quality. You'll want to establish a regular schedule that fits your lifestyle and usage patterns. For most users, cleaning your phone's camera lenses once a week is sufficient, but if you're in dusty environments or use your camera frequently, you might need to clean it more often.
To maintain a regular cleaning schedule:
- Set a recurring reminder on your phone or calendar
- Clean your lenses at the same time you perform other phone maintenance tasks
- Keep cleaning supplies easily accessible
- Incorporate lens cleaning into your daily routine, like before bedtime
Don't wait until you notice a decline in image quality before cleaning your lenses. By then, stubborn grime may have accumulated, making the cleaning process more difficult. Regular maintenance prevents buildup and guarantees your camera is always ready to capture high-quality images.
Remember to be gentle when cleaning your lenses. Avoid using excessive pressure or abrasive materials that could scratch the lens surface.
If you're traveling or frequently on-the-go, consider carrying a microfiber cloth or lens cleaning wipe for quick touch-ups throughout the day.
Frequently Asked Questions
Can I Use Rubbing Alcohol to Clean My Phone Camera Lens?
You shouldn't use rubbing alcohol to clean your phone's camera lens. It's too harsh and can damage the lens coating. Instead, use a microfiber cloth or lens cleaning wipes specifically designed for electronic devices. They'll safely remove smudges and dirt.
How Often Should I Clean My Phone's Camera Lens?
You should clean your phone's camera lens regularly, at least once a week. If you notice smudges or blurry photos, clean it immediately. Don't wait too long, as dirt can accumulate and affect image quality over time.
Is It Safe to Use Compressed Air on Smartphone Camera Lenses?
You shouldn't use compressed air on your smartphone's camera lenses. It's too forceful and can damage delicate components. Instead, use a soft, lint-free cloth or lens cleaning wipes designed for electronics. They'll safely remove dirt and smudges.
What Causes the Hazy Effect on Phone Camera Photos?
Your phone camera's hazy photos could be caused by a dirty lens, fingerprints, or moisture. You might also have a scratched lens or outdated software. Check your camera settings, as incorrect exposure or focus can create haziness too.
Can Scratches on the Camera Lens Be Repaired at Home?
Unfortunately, you can't easily repair scratches on phone camera lenses at home. It's best to prevent scratches with protective cases. For existing scratches, you'll likely need professional repair or lens replacement for ideal results.
In Summary
You've now got the tools to keep your phone's camera lens pristine. Remember, it's not just about clearer photos; it's about preserving your device's functionality. Don't let dirt and smudges compromise your memories. Make lens cleaning a part of your regular phone maintenance routine. With these tips, you'll guarantee your camera always performs at its best. So go ahead, snap away with confidence, knowing you're capturing life's moments in crystal-clear detail.


Leave a Reply