Transform your smartphone into a professional-grade camera with these 10 easy DIY lens hacks. You'll capture stunning macro shots using a water droplet, create wide-angle views with a plastic bottle, and achieve telephoto effects using binoculars. Add artistic flair with sunglass filters, cellophane colors, and CD light prisms. Soft focus effects are possible with plastic bags or Vaseline smears. For dramatic lens flares, experiment with reflective surfaces. These simple techniques allow you to explore various photography styles, from dreamy portraits to sharp landscapes. By mastering these creative hacks, you'll reveal a world of photographic possibilities right at your fingertips.
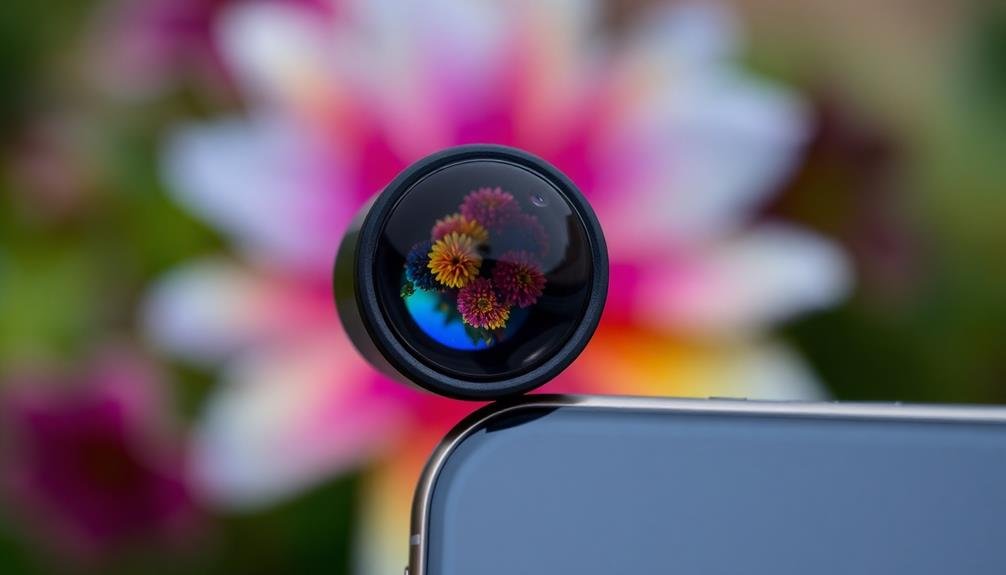
Water Droplet Macro Lens
Nature's simplest magnifier can transform your smartphone into a powerful macro camera. All you need is a single drop of water carefully placed on your phone's lens. This DIY hack creates a makeshift macro lens that allows you to capture stunning close-up shots of tiny subjects.
To create your water droplet lens, start by cleaning your phone's camera lens thoroughly. Using a dropper or your finger, carefully place a small, rounded drop of water directly on the lens. The water's surface tension will hold it in place. Make certain the drop is centered and doesn't spread too thin.
This technique works best for stationary subjects, as the water drop can be unstable. Position your phone close to your subject, usually within a few centimeters. The water droplet will magnify the image, revealing intricate details invisible to the naked eye. Experiment with different drop sizes to adjust magnification levels.
While this method can produce impressive results, be cautious. Verify your phone is water-resistant or use extreme care to prevent water damage. For a more permanent solution, consider purchasing a clip-on macro lens designed for smartphones.
Sunglass Lens Filter
Transforming your smartphone's camera with a sunglass lens filter is a quick and easy DIY hack. This technique allows you to add a unique tint to your photos, creating a stylish and professional look.
To get started, you'll need an old pair of sunglasses with removable lenses. Carefully remove one of the lenses from the frame. Hold it up to your phone's camera lens and experiment with different angles to see how it affects the image. You can secure the sunglass lens to your phone using a small piece of tape or putty, making sure not to obstruct the camera's view.
Different colored sunglass lenses will produce varied effects. Brown lenses can add warmth to your photos, while blue lenses can create a cool, calming atmosphere. Green lenses work well for nature shots, enhancing the vibrancy of foliage. For a dramatic look, try using a polarized lens to reduce glare and enhance contrast in your images.
This DIY filter works especially well for landscape and outdoor photography. It can help reduce harsh sunlight and create more balanced exposures.
Experiment with different types of sunglasses to find the perfect filter for your photography style.
Plastic Bottle Wide-Angle Adapter
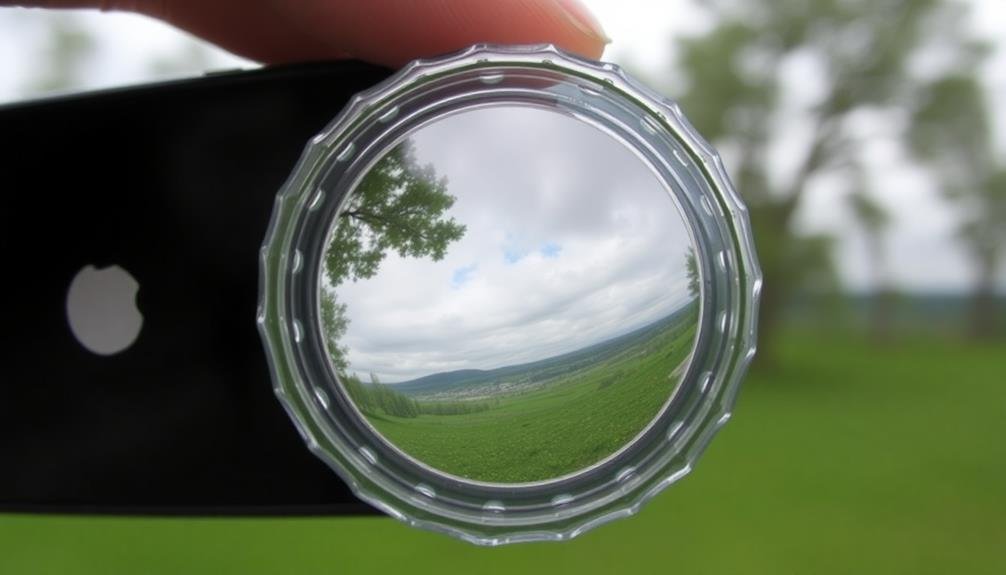
Tinkerers can create a wide-angle lens adapter for their smartphone using a simple plastic bottle. This DIY hack expands your phone's field of view, allowing you to capture more of a scene in a single shot.
To make this adapter, you'll need a clear plastic bottle, scissors, and some tape.
Start by cutting out a small circular piece from the bottle's side, about the size of your phone's camera lens. Smooth the edges to prevent scratches on your device.
Next, carefully cut a larger circle around the first one, leaving a rim of plastic. This rim will help attach the adapter to your phone.
Clean both sides of the plastic thoroughly to guarantee clear images. Then, position the adapter over your phone's camera lens and secure it with tape.
You'll notice an immediate widening of your camera's view when you look through it.
While this DIY lens won't match the quality of professional wide-angle lenses, it's a fun and cost-effective way to experiment with your phone's photography capabilities.
Try using it for landscape shots or group photos where you need to fit more into the frame.
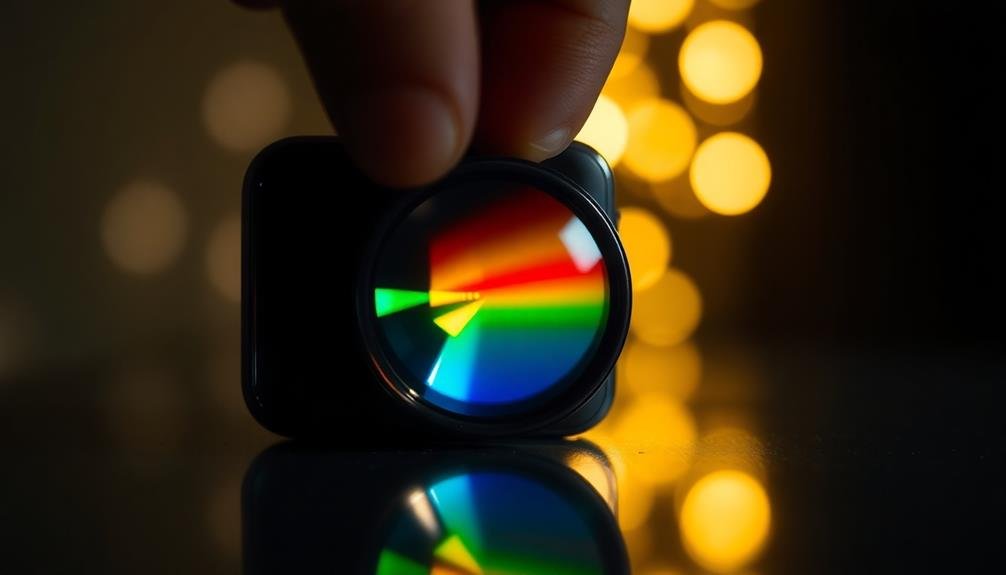
CD Fragment Light Prism

Ever wondered how to add a dreamy, prismatic effect to your smartphone photos? Search no further than your old CD collection.
By using a small fragment of a CD as a makeshift prism, you'll create stunning light effects that'll transform your images.
To create this DIY lens hack, carefully break a CD into small pieces. Choose a fragment about the size of your phone's camera lens. Secure it over your lens using tape, ensuring it doesn't obstruct the camera's view.
When you're ready to shoot, angle your phone to catch the light just right. You'll see rainbow-like effects and light dispersion in your photos.
This technique works best in bright, natural light. Experiment with different angles and subjects to achieve various effects.
Try capturing:
- Sunlight streaming through trees, creating dappled rainbow patterns
- City lights at night, transformed into colorful starbursts
- Portraits with ethereal, multicolored highlights
- Landscapes with dreamy, prismatic skies
Binocular Telephoto Hack
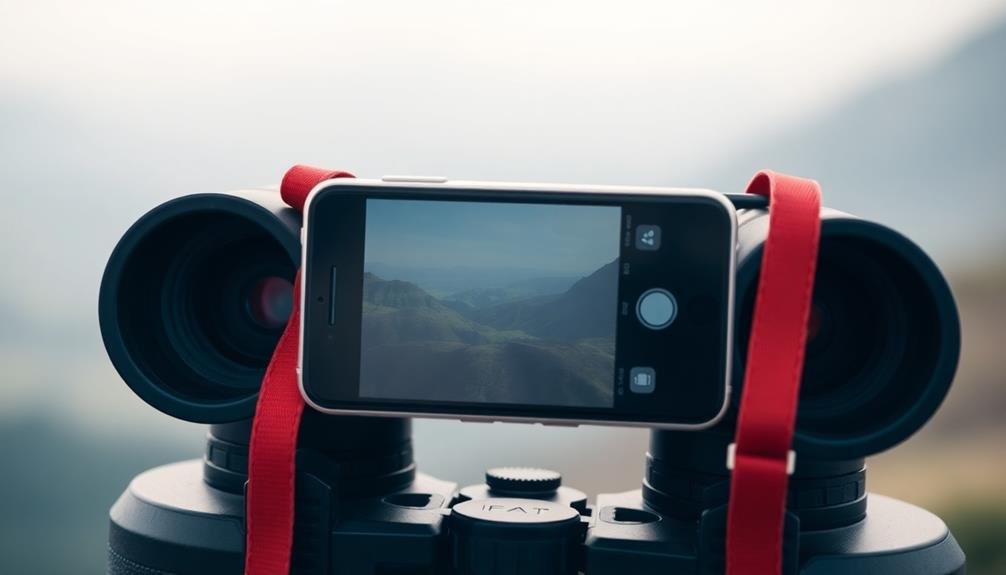
With just a pair of binoculars and your smartphone, you can create a powerful telephoto lens for distant subjects. This hack allows you to capture detailed shots of far-away objects without investing in expensive camera equipment.
To set up this DIY telephoto lens, align your phone's camera with one of the binocular's eyepieces. You'll need to hold the phone steady or use a tripod for best results. Experiment with the distance between your phone and the binoculars to find the best focus point.
This technique works best for stationary subjects like landscapes, buildings, or wildlife at rest. It's particularly useful for birdwatching or capturing details of distant architecture.
Keep in mind that image quality may vary depending on your phone's camera and the binoculars' magnification power. For clearer shots, clean both your phone's lens and the binocular's eyepiece before use. You can also try using the binoculars' focus wheel to fine-tune your image.
Remember that this setup might reduce light entering your camera, so bright conditions are ideal for the best results.
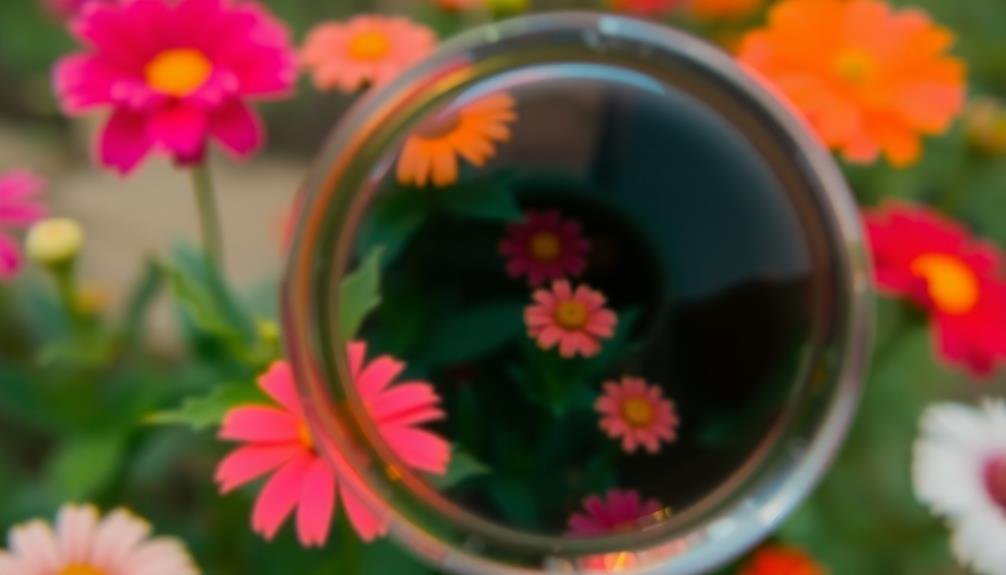
Magnifying Glass Close-Up Shots
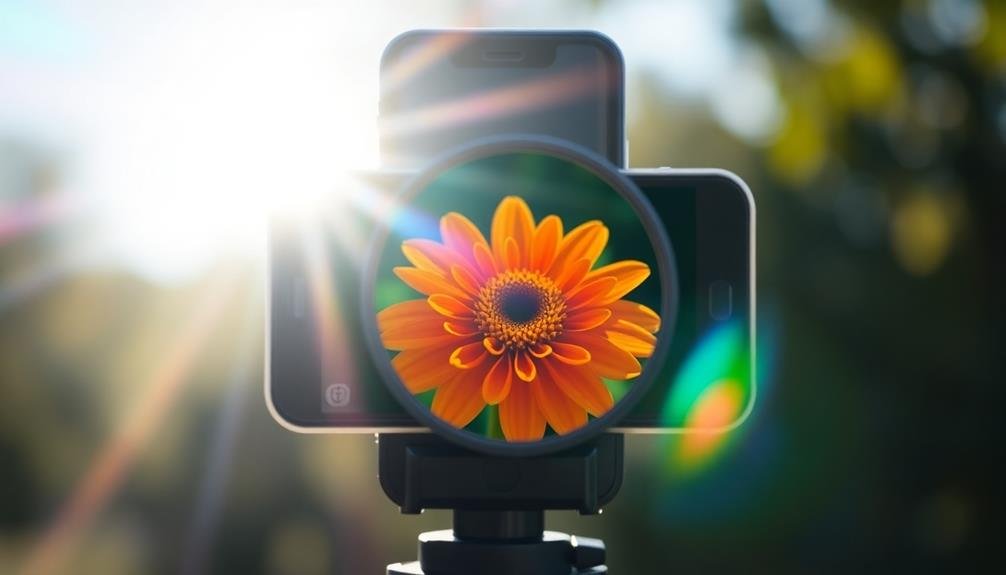
While binoculars can bring distant subjects closer, a magnifying glass lets you capture the tiny details right in front of you. This simple tool can transform your phone into a makeshift macro lens, perfect for photographing small objects or intricate textures.
To use this hack, hold a magnifying glass between your phone's camera and the subject. You'll need to experiment with the distance between the lens, magnifying glass, and object to find the sweet spot for focus.
For the best results, try these tips:
- Use a small, handheld magnifying glass for easier maneuvering
- Stabilize your phone with a tripod or stable surface to reduce shake
- Verify proper lighting, as the magnifying glass may cast shadows
- Experiment with different angles to capture unique perspectives
Plastic Bag Soft Focus Effect
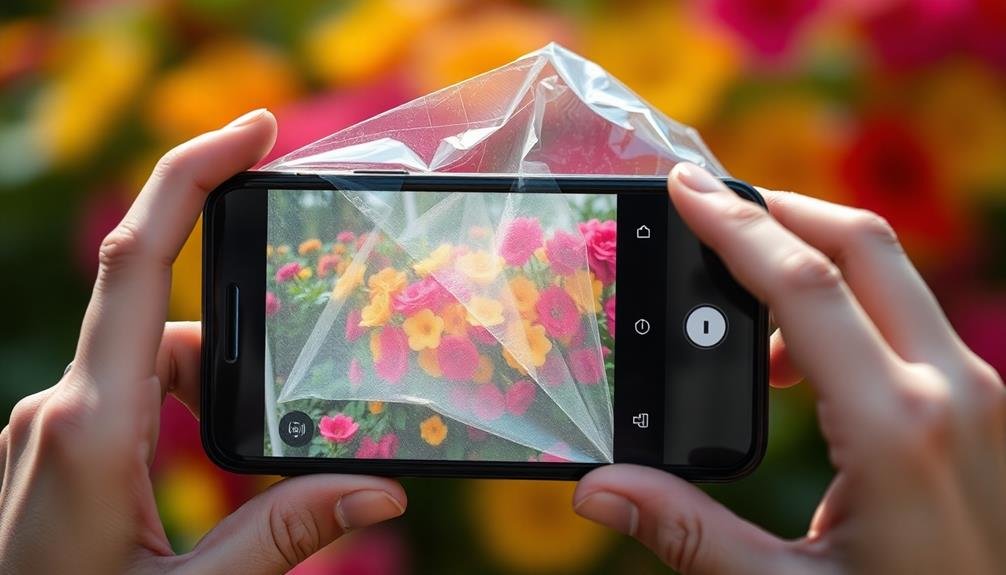
A simple plastic bag can transform your smartphone photos, giving them a dreamy, soft-focus effect. This DIY hack is perfect for creating ethereal portraits or adding a romantic touch to landscape shots.
To achieve this look, you'll need a clean, transparent plastic bag and a rubber band.
Start by cutting a small square from the plastic bag, about 2-3 inches wide. Stretch this piece over your phone's camera lens, securing it with a rubber band. Make sure the plastic is taut but not too tight. The slight distortion and texture of the plastic will create a diffused, soft-focus effect.
Experiment with different thicknesses of plastic and varying degrees of stretch to alter the intensity of the effect. You can also try using colored plastic bags for a tinted, vintage look.
When shooting, tap to focus on your subject as usual, but be aware that the overall image will appear slightly blurred and dreamy.
This technique works best in well-lit environments and for subjects that don't require sharp details. It's particularly effective for portraits, flowers, and atmospheric landscape shots.
Remember to remove the plastic when you're done to avoid accidentally taking blurry photos later.
Vaseline Smear Dream-Like Images
You can create dreamy, ethereal images using a simple Vaseline smear technique on your phone's lens.
To achieve this effect, you'll need a small amount of Vaseline and a clear plastic wrap or filter to protect your camera.
Apply a thin layer of Vaseline to the plastic wrap, then secure it over your phone's lens for soft, dream-like photos of landscapes, portraits, or city lights.
Soft-Focus Effect Technique
For a dreamy, ethereal look in your smartphone photos, the Vaseline soft-focus technique offers a simple yet effective solution. This DIY hack creates a dreamy, hazy effect that's perfect for portraits or landscapes.
To achieve this effect, you'll need a small amount of Vaseline and a clear plastic filter or a piece of cellophane.
Start by applying a thin layer of Vaseline to the edges of your plastic filter, leaving the center clear. Carefully place this filter over your phone's camera lens, ensuring it doesn't touch the actual lens. When you take a photo, you'll notice a soft, glowing effect around the edges, while the center remains sharp.
Here's what you can expect from this technique:
- A subtle, misty halo surrounding your subject
- Softened harsh lines and textures in the background
- A romantic, vintage-inspired atmosphere
- Enhanced depth and dimension in your images
Experiment with different Vaseline application patterns and thicknesses to create varying levels of softness. You can also try colored Vaseline for tinted effects.
Remember to clean your filter thoroughly after use to prevent any residue from affecting your phone's lens.
Materials and Application
Creating dream-like images with the Vaseline smear technique requires just a few simple materials.
You'll need a small amount of Vaseline, a clear plastic filter or a UV filter for your phone's lens, and a clean cloth for application and removal.
To apply the technique, start by cleaning your phone's lens and the filter thoroughly.
Then, using your fingertip or a cotton swab, apply a thin layer of Vaseline around the edges of the filter.
Be careful not to get any Vaseline on the center of the filter or your phone's lens.
For a more subtle effect, use less Vaseline; for a stronger dreamy look, apply more.
Once you've applied the Vaseline, carefully attach the filter to your phone's lens.
As you take photos, you'll notice a soft, ethereal glow around the edges of your images.
This effect works particularly well for portraits and landscapes, adding a romantic or nostalgic feel to your shots.
After you're done shooting, remove the filter and clean both it and your phone's lens thoroughly to prevent any residue from affecting future photos.
Creative Photo Ideas
Inspiration abounds when it comes to creating dream-like images with the Vaseline smear technique.
You'll find that this simple hack can transform ordinary scenes into ethereal masterpieces. By strategically applying Vaseline to parts of your DIY lens filter, you're able to create a soft, dreamy effect that's perfect for portraits, landscapes, and abstract photography.
To get started, consider these creative photo ideas:
- Capture a portrait with the subject's eyes in sharp focus while the rest of the image has a dreamy, blurred quality.
- Photograph a cityscape at night, using the Vaseline smear to turn streetlights into glowing orbs of light.
- Create a surreal nature scene by blurring the edges of flowers or trees, leaving only the center in focus.
- Shoot a beach sunset with a hazy, romantic atmosphere by smearing the top and bottom of your lens filter.
Experiment with different patterns and amounts of Vaseline to achieve various effects.
You'll quickly discover that this technique offers endless possibilities for artistic expression.
Don't be afraid to combine the Vaseline smear with other DIY lens hacks for even more unique results.
Cellophane Color Filter Trick
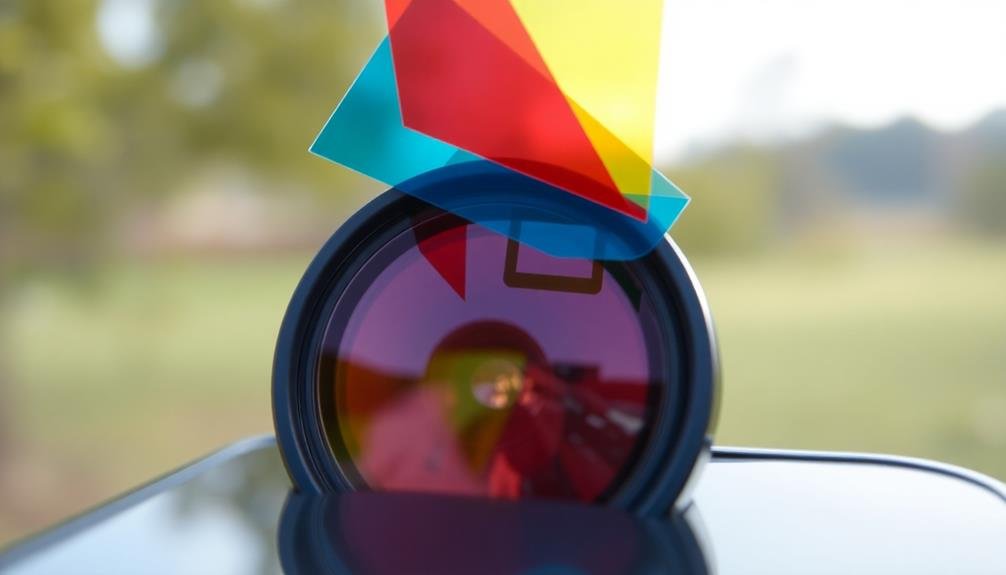
You'll need colored cellophane, scissors, and a small rubber band to create your own phone lens color filters.
Cut the cellophane into small circles slightly larger than your phone's camera lens, and secure them with the rubber band.
Materials and Preparation
For this simple yet effective cellophane color filter trick, you'll need just a few common household items. Gather colored cellophane sheets, scissors, clear tape, and a rubber band. You'll also want to have your smartphone handy for testing and adjusting your DIY filter.
Before you begin, decide which colors you'd like to experiment with. Red, blue, and green are popular choices, but don't be afraid to try other hues or even combine multiple colors for unique effects. Cut the cellophane into small squares slightly larger than your phone's camera lens. This will allow for easy attachment and removal.
To prepare your workspace:
- Clear a flat surface and lay out your materials.
- Verify your phone's camera lens is clean and free of smudges.
- Have a variety of subjects nearby to test your filters on.
- Set up proper lighting to see the true effects of your color filters.
Once you've got everything ready, you're all set to start creating your custom color filters.
Creating Color Filters
Immerse yourself in creating your DIY color filters with the cellophane sheets you've prepared. Cut small circles from the colored cellophane, ensuring they're slightly larger than your phone's camera lens. Carefully place a cellophane circle over the lens, securing it with a small piece of clear tape on one edge. This allows you to easily flip the filter on and off.
Experiment with different colors to achieve various effects. Red filters can enhance sunsets and warm tones, while blue filters can intensify sky colors and create a cooler atmosphere. Green filters work well for nature shots, enhancing foliage and grass. For a more subtle effect, try layering two complementary colors.
Don't limit yourself to single colors; create gradient filters by cutting half-circles of different colors and combining them. This technique can produce stunning split-color effects in your photos.
You can also try creating patterns or shapes within your filters for unique, artistic results. Remember to clean your lens before and after using these DIY filters to maintain image quality.
With practice, you'll discover endless creative possibilities using these simple cellophane color filters.
Application and Effects
Now that you've created your DIY cellophane color filters, it's time to explore their application and effects. These simple yet effective filters can transform your phone photography, adding depth, mood, and artistic flair to your shots. By placing the cellophane over your phone's camera lens, you'll instantly see a world of color possibilities.
Experiment with different colors and combinations to achieve various effects. Red filters can add warmth and drama to sunset shots, while blue filters can enhance the coolness of water scenes. Green filters work wonders for nature photography, intensifying foliage and creating a lush atmosphere. For a dreamy, ethereal look, try layering multiple colors or using pastel shades.
Here are four creative ways to use your DIY color filters:
- Capture a cityscape at night with a blue filter for a futuristic, cyberpunk vibe.
- Shoot portraits with a warm orange filter to create a sun-kissed glow.
- Add a purple filter to floral close-ups for a surreal, otherworldly effect.
- Use a yellow filter to enhance the golden hour and make landscapes pop.
Remember to adjust your camera settings to compensate for the reduced light transmission through the filter.
With practice, you'll master the art of using these DIY color filters to elevate your mobile photography game.
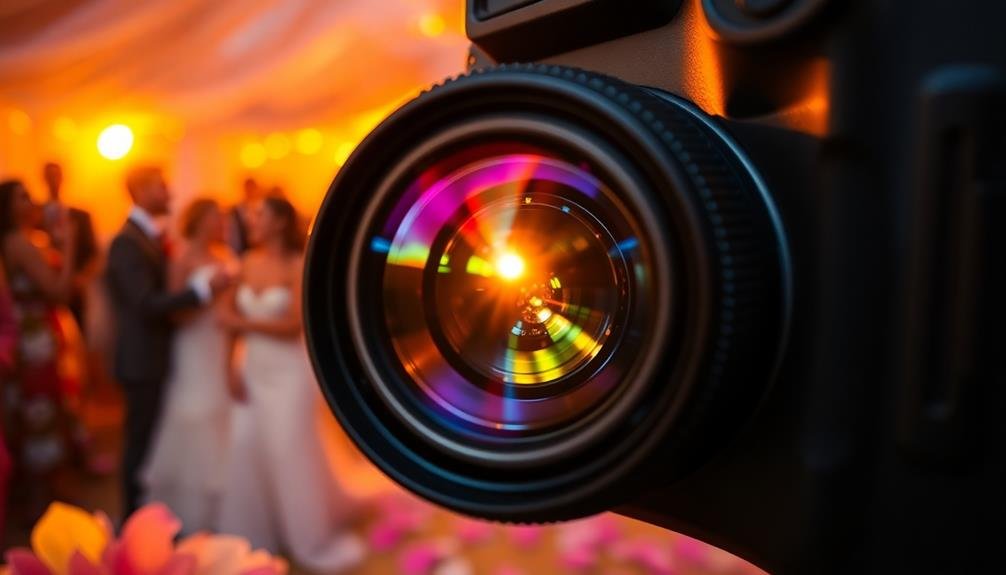
Reflective Surface Lens Flares
In the world of DIY phone photography, reflective surface lens flares offer a creative way to add drama and interest to your shots. You can easily create these effects using everyday objects like mirrors, CDs, or even tin foil. By strategically placing these reflective surfaces near your phone's camera, you'll capture stunning light streaks and starbursts that add depth and intrigue to your images.
To achieve the best results, experiment with different angles and distances between your phone and the reflective surface. You'll find that slight adjustments can dramatically alter the flare's appearance. Try using multiple reflective surfaces to create complex, layered effects that'll make your photos stand out.
Here's a quick guide to common reflective surfaces and their effects:
| Surface | Effect | Best for | Tips |
|---|---|---|---|
| Mirror | Sharp, defined flares | Portraits, landscapes | Tilt slightly for control |
| CD | Rainbow-like streaks | Abstract shots | Rotate for varied colors |
| Tin foil | Soft, diffused glow | Dreamy scenes | Crinkle for texture |
| Glass | Subtle highlights | Architectural shots | Use with bright light |
Frequently Asked Questions
Can These DIY Hacks Damage My Phone's Camera or Lens?
DIY camera hacks could potentially damage your phone's lens or camera if not done carefully. You'll want to avoid using abrasive materials or adhesives near the lens. It's best to stick with removable, non-invasive modifications for safety.
How Do I Clean My Phone's Camera After Using These Hacks?
To clean your phone's camera after using hacks, you'll want to gently wipe the lens with a microfiber cloth. If there's stubborn residue, use a small amount of lens cleaner. Don't forget to clean the camera housing too.
Are There Any Safety Precautions to Consider When Using These Techniques?
When using DIY camera techniques, you should always be careful with small parts and adhesives. Don't let them near your eyes or mouth. Make certain you're working in a well-ventilated area and avoid damaging your phone's original lens.
Which Hack Works Best for Low-Light or Nighttime Photography?
For low-light or nighttime photography, you'll find the "water droplet" hack works best. Place a small water droplet on your phone's lens to create a makeshift macro lens. It'll enhance light gathering and improve focus in dark conditions.
Can These DIY Lens Hacks Be Used With All Smartphone Models?
You'll find most DIY lens hacks work with various smartphone models. However, compatibility can vary depending on your phone's camera placement and size. It's best to check specific hack requirements before trying them on your device.
In Summary
You've now got a toolkit of creative DIY lens hacks to elevate your smartphone photography. Don't be afraid to experiment and combine these techniques for unique effects. Remember, great photos aren't just about expensive gear—it's your artistic vision that truly matters. So grab your phone and start exploring these unconventional methods. You'll be surprised at how professional your shots can look with just a little ingenuity and everyday objects.


Leave a Reply