
To achieve smooth handheld video, start with proper grip techniques. Hold your camera with both hands, keeping elbows close to your body for stability. Use physical supports like monopods or mini tripods for added steadiness. Practice slow, controlled movements and breathe steadily to minimize shake. Wide-angle lenses can help reduce noticeable camera motion. For smartphones, consider using a gimbal stabilizer or tripod adapter. In post-production, software tools can further enhance stability. Higher frame rates often yield smoother results. By combining these methods, you'll greatly improve your footage quality. Explore each technique to find the perfect balance for your shooting style.
Proper Grip Techniques

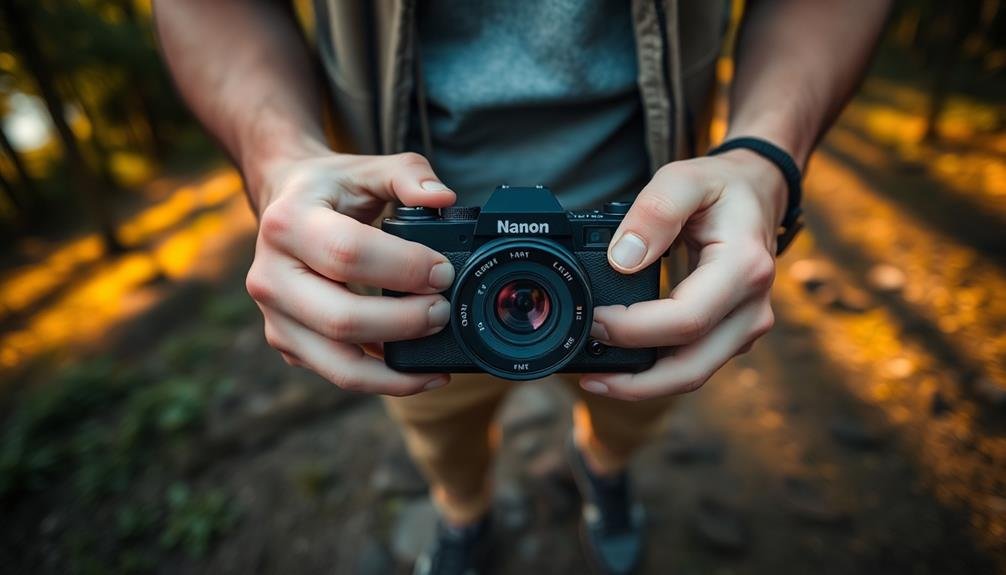
When it comes to handheld video stabilization, mastering proper grip techniques is essential. Your hands are your first line of defense against shaky footage, so it's imperative to hold your camera correctly.
Start by gripping the camera with both hands, keeping your elbows close to your body for added support. Place your right hand on the side of the camera, with your index finger on the shutter button and your thumb on the back. Your left hand should cradle the lens from underneath, providing balance and allowing for smooth zooming and focusing.
For smaller cameras or smartphones, use the "triangle method." Form a triangle with your arms by holding the device with both hands and keeping your elbows tucked in. This creates a stable base for your shots.
When using a larger camera, adopt the "three-point stance." Plant your feet shoulder-width apart, tuck your elbows in, and press the viewfinder against your eye. This distributes your body weight evenly and minimizes movement.
Remember to relax your grip slightly to avoid tension-induced shakes. Practice these techniques regularly to make them second nature, ensuring smoother footage in various shooting scenarios.
Two-Handed Holding Method

The two-handed holding method is a cornerstone technique for achieving stable handheld footage. This approach involves gripping your camera or smartphone with both hands, distributing the weight evenly and minimizing shake.
To employ this method effectively, position your elbows close to your body for added support. This creates a stable triangle between your arms and torso, reducing unwanted movement.
When using the two-handed technique, place your right hand on the grip or side of the device, with your index finger resting on the record button. Your left hand should cradle the bottom of the camera or support the lens if you're using a larger setup.
Keep your movements slow and deliberate, using your body as a natural shock absorber. For added stability, you can press the device against your face if it has a viewfinder.
If you're using a smartphone, hold it in landscape orientation and keep your thumbs free to adjust settings or zoom as needed. Practice this method regularly, and you'll find that it greatly improves the smoothness of your footage, especially when combined with other stabilization techniques like proper breathing and maintaining a wide stance.
Elbows-In Stance

To master the elbows-in stance, you'll want to focus on proper arm positioning.
Keep your elbows tucked close to your body, creating a stable triangle between your arms and torso.
This technique greatly reduces camera shake by minimizing unwanted arm movement and providing a more solid foundation for your shots.
Proper Arm Positioning
Stability begins with proper arm positioning when shooting handheld video. To achieve ideal results, tuck your elbows close to your body, creating a triangular shape with your arms and torso. This stance provides a solid foundation for your camera, reducing unwanted movement.
Hold your camera with both hands, placing one hand on the body and the other supporting the lens. Keep your grip firm but not tense, as excessive tension can lead to shaky footage. Position the camera close to your face, using the viewfinder or LCD screen for framing. This proximity helps anchor the camera and minimizes arm fatigue during extended shoots.
If your camera has a flip-out screen, use it to your advantage. Holding the camera at chest level with the screen flipped out allows you to maintain a more natural and comfortable posture. This position can be especially useful for low-angle shots or when filming in crowded areas.
Remember to breathe steadily and avoid holding your breath, as this can cause unnecessary body movement.
Practice these arm positioning techniques regularly to develop muscle memory and improve your overall handheld video stability.
Reducing Camera Shake
Camera shake reduction begins with mastering the elbows-in stance. To achieve this, tuck your elbows close to your body, creating a stable triangle between your arms and torso. This position minimizes unnecessary movement and provides a solid foundation for handheld shooting.
As you hold your camera, keep your grip firm but not tense. Distribute the camera's weight evenly between both hands, with one hand supporting the lens and the other on the camera body. Use your dominant eye to look through the viewfinder, pressing it gently against your face for added stability.
When filming, breathe steadily and avoid holding your breath, which can cause tension and shakiness. Instead, try to time your shots between breaths for maximum stability. If possible, lean against a wall or sturdy object to further reduce body movement.
For longer takes, consider adopting a wider stance with your feet shoulder-width apart. This lower center of gravity enhances overall stability.
Remember to move smoothly when panning or tilting, using your entire body rather than just your arms. Practice these techniques regularly to develop muscle memory and improve your handheld video stability.
Breathing Control for Stability
Your breath plays an essential role in achieving stable handheld video footage. Proper breathing techniques can greatly reduce unwanted camera movements, resulting in smoother shots. To improve your stability, practice controlled breathing before and during filming.
Start by taking slow, deep breaths to relax your body and steady your hands. As you begin recording, maintain a consistent breathing pattern. Inhale slowly through your nose and exhale gently through your mouth. Time your shots with your breath cycle, pressing the record button at the end of an exhale when your body is most still.
For longer takes, use the "half-breath" technique. Take a partial breath and hold it briefly while filming. This method helps minimize chest movements that can cause camera shake. If you need to pan or tilt, do so during the exhale phase of your breath.
Remember to stay relaxed and avoid tensing your muscles, as this can lead to tremors. Practice these breathing techniques regularly, and you'll notice a considerable improvement in your handheld video stability.
Combine proper breathing with other stabilization methods for even better results.
Using Physical Supports

When you're looking to enhance your handheld video stability, physical supports can be game-changers.
Monopods and mini tripods offer portable options for steady shots, allowing you to set up quickly in various locations.
For more advanced stabilization, you might consider shoulder rigs and cages, which distribute the camera's weight and provide multiple points of contact for increased control.
Monopods and Mini Tripods
Frequently overlooked, monopods and mini tripods offer excellent support for handheld video stabilization. These compact tools provide a sturdy base for your camera, reducing shake and improving overall footage quality. Monopods are particularly useful for on-the-go shooting, allowing you to quickly set up and move between locations. Mini tripods, on the other hand, excel in stationary shots and tight spaces.
When choosing between monopods and mini tripods, consider your shooting style and environment. Here's a comparison of their key features:
| Feature | Monopod | Mini Tripod |
|---|---|---|
| Portability | Highly portable | Compact and portable |
| Setup time | Quick | Slightly longer |
| Stability | Moderate | High |
| Versatility | Good for moving shots | Best for static shots |
| Weight capacity | Higher | Lower |
To maximize stability with a monopod, extend your stance and use your body as a counterbalance. For mini tripods, verify all legs are securely positioned and adjust the head for precise framing. Both tools can greatly enhance your handheld video quality, so experiment with different techniques to find what works best for your shooting style.
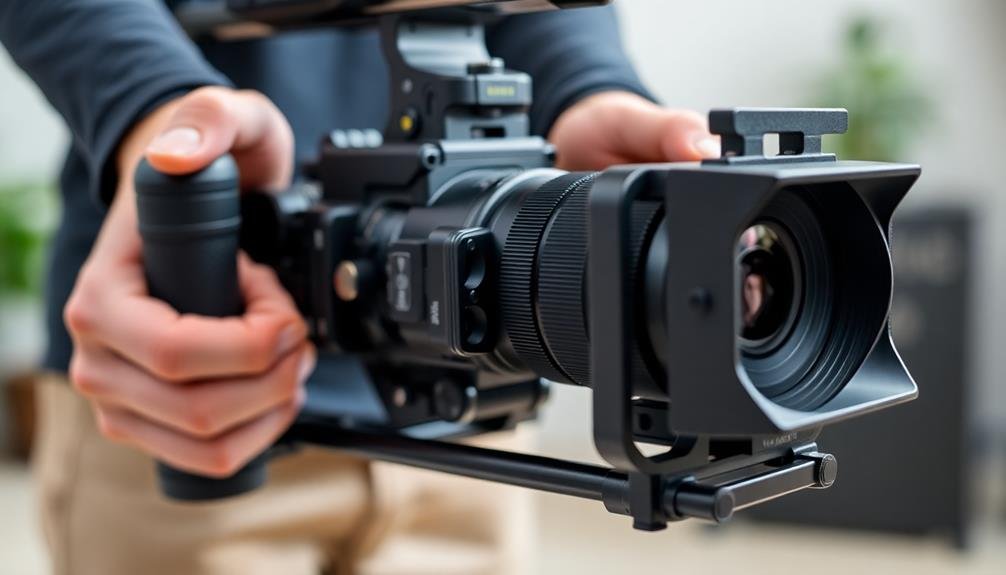
Shoulder Rigs and Cages
Shoulder rigs and cages are the unsung heroes of handheld video stabilization. These versatile tools distribute the weight of your camera across your body, reducing fatigue and minimizing shake.
Shoulder rigs typically consist of a padded shoulder pad, handles, and a mounting plate for your camera. They allow you to brace the camera against your body, creating a more stable shooting platform.
Cages, on the other hand, are rigid frames that encase your camera, providing protection and additional mounting points for accessories. When combined with a shoulder rig, cages offer even more stability and versatility. You can attach external monitors, microphones, and lights directly to the cage, creating a thorough filming setup.
When choosing a shoulder rig or cage, consider your camera's size and weight. Opt for adjustable rigs that can accommodate different shooting styles and body types. Look for rigs with multiple handle positions to find the most comfortable grip.
For cages, verify they're compatible with your specific camera model and have ample access to ports and controls. Remember, while these tools can greatly improve stability, they may add bulk to your setup.
Practice with your rig or cage to find the best balance between stability and maneuverability for your shooting needs.
Smartphone Gimbal Stabilizers
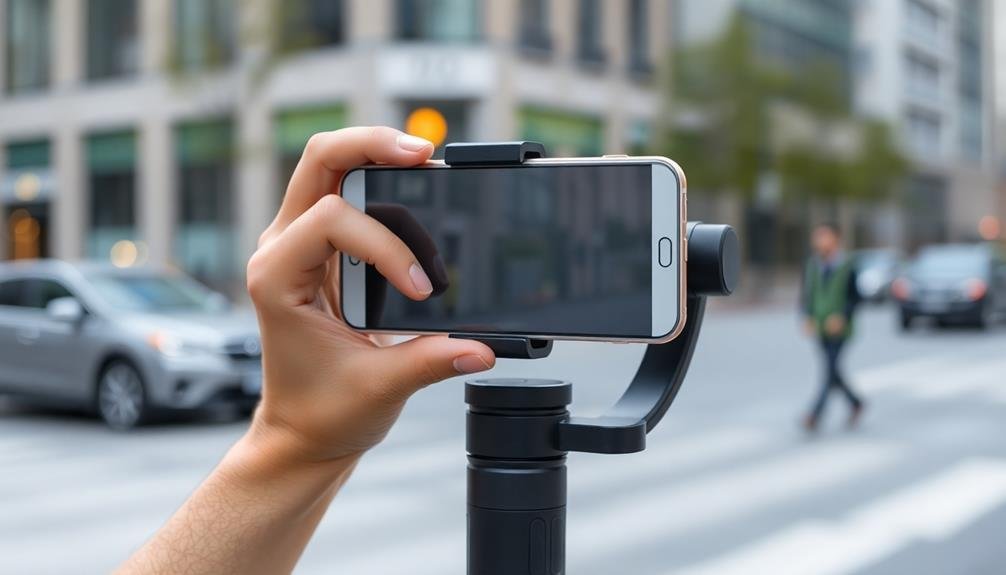
Smartphone gimbal stabilizers have revolutionized mobile videography. These compact devices use motorized axes to counteract hand movements, resulting in smooth, professional-looking footage. You'll find that most smartphone gimbals offer 3-axis stabilization, covering pan, tilt, and roll movements.
When choosing a gimbal, consider its compatibility with your smartphone's size and weight. Look for features like object tracking, time-lapse modes, and panorama functions to expand your creative possibilities. Many gimbals come with dedicated apps that reveal additional controls and shooting modes.
You'll appreciate the portability of smartphone gimbals, as they're typically lightweight and fold down for easy transport. Battery life is essential, so opt for a model that can last through your shooting sessions. Some gimbals double as charging banks for your phone, which can be a lifesaver during long shoots.
While using a gimbal, remember to practice proper technique. Move slowly and deliberately, and use the joystick or buttons for precise camera movements. With practice, you'll be able to achieve cinematic shots that were once only possible with expensive equipment.
OIS and EIS Technologies

Built-in stabilization technologies have become standard features in modern smartphones and cameras. Two primary types you'll encounter are Optical Image Stabilization (OIS) and Electronic Image Stabilization (EIS).
OIS uses physical hardware components, such as gyroscopes and floating lens elements, to counteract hand movements and vibrations. This method is particularly effective for reducing small, rapid movements and works well in low-light conditions.
EIS, on the other hand, relies on software algorithms to analyze and correct video shake. It crops the image slightly and uses the extra pixels around the edges to adjust for movement. While EIS doesn't require additional hardware, it can sometimes result in a slight loss of image quality or field of view. Many devices now combine both OIS and EIS for enhanced stabilization.
When using a device with these technologies, you'll notice smoother footage without the need for external stabilizers. However, they're most effective for minor movements and may not completely eliminate more significant shakes or jerky motions.
To maximize their benefits, try to maintain a steady hand and use additional stabilization techniques when possible.
Tripod Adapters for Smartphones

When it comes to tripod adapters for smartphones, you'll find a range of popular models like the Manfrotto PIXI or Joby GripTight ONE.
It's essential to check your phone's dimensions and case compatibility before selecting an adapter.
Popular Adapter Models
While exploring tripod adapters for smartphones, you'll find several popular models that stand out in the market.
The Manfrotto PIXI Mini Tripod Kit is a compact option that includes both a tripod and a universal smartphone clamp. It's lightweight and portable, making it ideal for travel vloggers.
For those seeking versatility, the Joby GripTight ONE GorillaPod Stand offers flexible legs that can wrap around objects, providing stability on uneven surfaces. It's compatible with most smartphone models and can also function as a handheld grip.
The Ulanzi ST-02S Phone Tripod Mount is another top choice, featuring a cold shoe mount for attaching accessories like microphones or lights. Its aluminum construction guarantees durability, while the adjustable clamp fits various phone sizes.
If you're looking for a budget-friendly option, consider the Amazon Basics Smartphone Tripod Mount. It's simple yet effective, with a universal design that accommodates most smartphones and standard tripod threads.
For those who prioritize stability, the Square Jellyfish Jelly Grip PRO offers a spring-loaded clamp and ball head for precise adjustments. It's compatible with both smartphones and small cameras, providing flexibility for different shooting scenarios.
Compatibility Considerations
How can you guarantee your smartphone tripod adapter will fit your device? Start by checking your phone's dimensions, including its width, height, and depth. Most adapters specify their compatible phone sizes, so compare these to your device's measurements.
Don't forget to account for any protective cases you use.
Consider the adapter's clamping mechanism. Spring-loaded clamps offer versatility, accommodating various phone sizes. However, they may not secure larger or heavier devices as effectively.
Screw-tightened clamps provide a more secure grip but can be less convenient to adjust.
Pay attention to the adapter's mounting options. Some are designed specifically for standard 1/4-inch tripod screws, while others offer multiple attachment methods.
If you plan to use your adapter with different stabilization devices, look for one with versatile mounting capabilities.
Check if the adapter interferes with your phone's buttons, ports, or cameras. Some models feature cutouts or adjustable positioning to avoid obstructing these vital areas.
Benefits of Adaptation
Once you've found a compatible tripod adapter for your smartphone, you'll access a world of benefits for your video stabilization efforts.
These adapters allow you to mount your phone securely on any standard tripod, instantly improving your video's stability and quality. You'll eliminate hand-shake and achieve smoother pans and tilts, resulting in more professional-looking footage.
Tripod adapters also free up your hands, enabling you to focus on other aspects of your shoot, like adjusting lighting or directing subjects.
You'll gain the ability to capture long-exposure shots and time-lapses with ease, expanding your creative possibilities. Many adapters feature adjustable grips, accommodating phones of various sizes and even allowing you to attach additional accessories like microphones or lights.
Handheld Stabilizing Rigs
Designed to enhance video stability, handheld stabilizing rigs offer a versatile solution for filmmakers and videographers. These devices come in various forms, from simple shoulder mounts to more complex systems with multiple points of contact. They work by distributing the camera's weight across your body, reducing the impact of hand tremors and sudden movements.
You'll find that handheld rigs often feature adjustable components, allowing you to customize the setup to your body type and shooting style. Some popular options include chest rigs, which provide a stable platform by anchoring the camera to your torso, and cage systems that offer additional mounting points for accessories like monitors and microphones.
When choosing a stabilizing rig, consider factors such as the weight of your camera, the type of shots you typically capture, and your budget. Lightweight rigs are ideal for run-and-gun situations, while heavier setups might be better suited for controlled environments.
Remember that practice is key to mastering any rig. Spend time familiarizing yourself with the equipment to achieve smooth, professional-looking footage consistently. With the right handheld stabilizing rig, you'll greatly improve your video quality and expand your creative possibilities.
Slow and Steady Movement

To achieve smoother handheld footage, you'll need to master slow and steady movement techniques.
Start by controlling your breathing, keeping it calm and regulated to minimize body sway.
As you move, focus on maintaining fluid camera motion, avoiding jerky movements or sudden changes in direction.
Control Your Breathing
Controlling your breathing is a fundamental yet often overlooked technique for achieving smooth handheld video. Your breath can greatly impact the steadiness of your shots, especially when using longer focal lengths or shooting in low light conditions.
To minimize camera shake, adopt a rhythmic breathing pattern. Inhale slowly through your nose, hold your breath briefly, and then exhale gently through your mouth. Time your shots with your breath cycle, taking footage during the natural pause between exhales and inhales when your body is most still.
Practice diaphragmatic breathing, which involves breathing deeply from your abdomen rather than your chest. This technique helps reduce upper body movement and provides a more stable foundation for your camera.
When filming for extended periods, be mindful of your breathing to maintain consistency. If you're holding your breath to steady a shot, remember to resume normal breathing afterward to avoid fatigue.
For critical shots, consider using the "shooting on the exhale" technique. Start recording as you begin to exhale slowly, capitalizing on the natural stability this provides.
With practice, you'll find that controlled breathing becomes an instinctive part of your filming process, resulting in markedly smoother footage.
Maintain Smooth Camera Motion
While breathing control forms the foundation of stability, smooth camera motion is the next step in capturing professional-looking handheld footage. You'll want to move your camera slowly and deliberately, avoiding sudden jerks or rapid changes in direction. Think of your body as a human dolly, gliding through space with purpose.
To maintain smooth motion, practice these techniques:
| Technique | Description |
|---|---|
| Walk heel-to-toe | Reduces vertical bounce |
| Bend your knees | Acts as a natural shock absorber |
| Use your core | Engage abdominal muscles for stability |
| Pivot from the hips | Allows for fluid panning movements |
When panning or tilting, start and end your movements gradually. This creates a more polished look and prevents abrupt starts and stops that can be jarring to viewers. If you need to change directions, do so in a wide arc rather than a sharp turn.
Wide-Angle Lens Benefits

Wide-angle lenses offer significant advantages for handheld video stabilization. When you're shooting with a wider field of view, camera shake and movements become less noticeable to viewers. This inherent property of wide-angle lenses helps create smoother-looking footage, even without additional stabilization techniques.
You'll find that wide-angle lenses allow you to capture more of the scene, which can be particularly useful when filming in tight spaces or trying to include more context in your shots. This increased coverage also gives you more flexibility in post-production, as you can crop or reframe your footage without losing too much quality.
Another benefit is that wide-angle lenses typically have shorter focal lengths, which means you can use slower shutter speeds without introducing noticeable motion blur. This allows you to maintain proper exposure in low-light situations without sacrificing stability.
When using a wide-angle lens, you'll need to be mindful of distortion, especially at the edges of the frame. However, this distortion can sometimes be used creatively to add a unique perspective to your shots.
Post-Production Stabilization Software

Post-production stabilization software has become a game-changer for videographers looking to smooth out shaky footage. These powerful tools allow you to fix unstable video after it's been shot, saving time and effort during filming. Popular options include Adobe After Effects, DaVinci Resolve, and Final Cut Pro X, each offering advanced stabilization features.
When using post-production software, you'll typically import your footage and apply a stabilization effect. The software analyzes the video, tracking movement and applying corrections to reduce shake. You can often adjust parameters like smoothness, crop margin, and motion type to fine-tune the results.
While these tools are impressive, they're not without limitations. Heavily stabilized footage may exhibit warping or distortion, especially with extreme camera movements. You might also lose some image quality or frame edges due to cropping.
To get the best results, combine post-production stabilization with good shooting techniques. Remember that stabilization software works best on footage that's not excessively shaky. It's a powerful tool in your arsenal, but shouldn't be relied upon as a substitute for proper filming techniques. Use it to enhance your already well-shot footage for professional-looking results.
Optical Zoom vs. Digital Zoom

Two types of zoom are commonly found in video cameras: optical and digital. Optical zoom uses the camera's lens to magnify the image, maintaining quality as you zoom in. It's the preferred method for professional-quality footage, especially when shooting from a distance.
Digital zoom, on the other hand, simply enlarges the pixels in the image, often resulting in a loss of quality and increased graininess.
When it comes to video stabilization, optical zoom has a clear advantage. As you zoom in, you'll notice:
- Less camera shake due to the physical lens movement
- Sharper, clearer images even at high magnifications
- Reduced need for post-production stabilization
Digital zoom, while convenient, can exacerbate stability issues. It amplifies any hand movements or vibrations, making your footage appear shakier.
If you're using a camera with digital zoom, you'll want to rely more heavily on other stabilization techniques, such as using a gimbal or applying post-production software.
Whenever possible, opt for optical zoom to achieve the best balance between magnification and stability in your handheld video footage.
Frame Rate Considerations

When contemplating frame rates for handheld video stabilization, you'll need to balance smooth motion with realistic appearance. Higher frame rates, such as 60fps or 120fps, can greatly improve stabilization results by capturing more information between frames. This extra data allows stabilization algorithms to work more effectively, reducing jitter and producing smoother footage.
However, extremely high frame rates may look unnatural to viewers accustomed to traditional 24fps or 30fps content. You'll want to reflect on your intended audience and playback platform when choosing a frame rate. For action-packed scenes or sports footage, higher frame rates can be beneficial for both stabilization and visual clarity.
If you're shooting in low light conditions, be aware that higher frame rates require faster shutter speeds, which may result in darker footage. In these situations, you might need to compromise between stabilization and exposure by opting for a lower frame rate.
When editing, you can also use frame blending or optical flow techniques to create smoother motion from lower frame rate footage. This approach can help maintain a cinematic look while still improving stability.
Frequently Asked Questions
How Does Camera Weight Affect Handheld Stabilization Techniques?
Camera weight profoundly impacts your handheld stabilization techniques. Heavier cameras provide more stability, requiring less effort to keep steady. You'll find it easier to control movements with a weightier camera, but it may tire you quicker during prolonged shoots.
Can Weather Conditions Impact the Effectiveness of Handheld Video Stabilization Methods?
Yes, weather can affect your handheld stabilization. Wind can shake your camera, while rain or snow may make gripping difficult. Cold temperatures can stiffen your hands, and extreme heat might cause sweaty palms, impacting your stability.
Are There Specific Stabilization Techniques for Underwater or Extreme Sports Videography?
For underwater and extreme sports videography, you'll want to use waterproof gimbals, action camera stabilizers, and wearable mounts. Don't forget to adjust your settings for low light and fast motion. Practice smooth movements and steady breathing underwater.
How Does Lens Focal Length Influence Handheld Stabilization Requirements?
When you use longer focal lengths, you'll need more stabilization due to increased magnification of camera shake. Shorter focal lengths are more forgiving, requiring less stabilization effort. You'll notice this difference when shooting handheld.
What Are the Best Practices for Handheld Stabilization When Filming in Low Light?
In low light, you'll want to use a wider aperture and higher ISO. Brace yourself against stable objects, use a rig or gimbal, and consider slower movements. Don't forget to stabilize in post-production if needed.
In Summary
You've now learned several effective methods for handheld video stabilization. By mastering proper grip techniques, using physical supports, and choosing the right equipment, you'll greatly improve your footage's stability. Don't forget to take into account frame rates and post-production software for additional smoothness. With practice, you'll be capturing steady, professional-looking videos in no time. Remember, it's all about combining these techniques to find what works best for your specific shooting situation.


Leave a Reply