To master HDR bracketing on your mobile, start by understanding exposure levels and manual controls. Utilize burst mode for efficient capture and optimize your camera settings for HDR. Perfect your composition, focusing on balancing highlights and shadows. Minimize camera shake with proper handheld techniques or a mobile tripod. Post-process your bracketed images using HDR-specific apps for the best results. Experiment with different exposure ranges, from standard -2EV to +2EV, to more extreme -3EV to +3EV for high-contrast scenes. Adapt your approach to various lighting conditions, and don't forget to fine-tune your final image. These techniques will elevate your mobile photography to new heights.
Understanding HDR Bracketing Basics

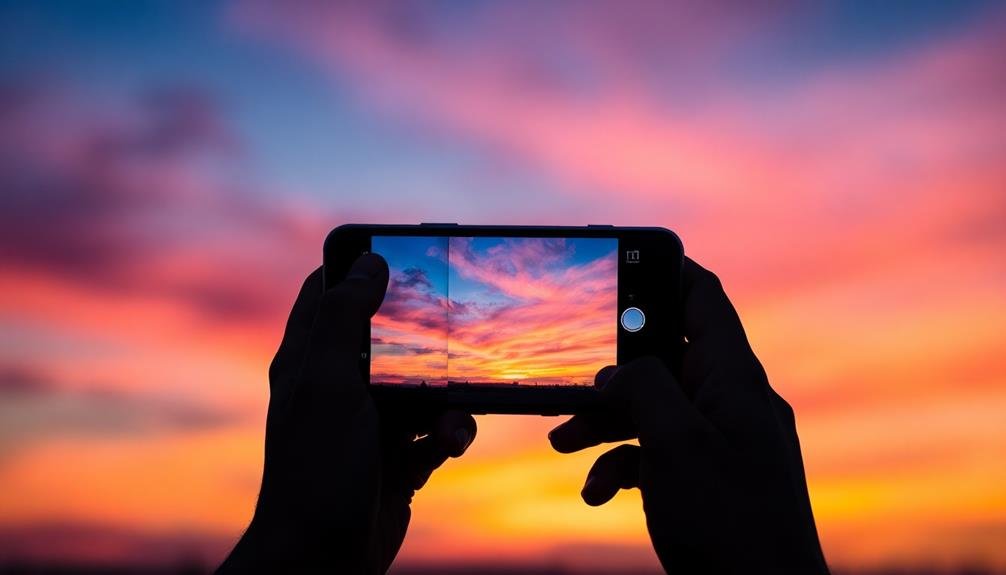
When it comes to HDR bracketing, understanding the basics is essential for achieving stunning results in mobile photography. HDR, or High Dynamic Range, combines multiple exposures to capture a wider range of light and dark tones than a single shot can achieve.
Bracketing refers to the process of taking these multiple exposures at different settings. To start HDR bracketing, you'll need to set your phone's camera to manual mode or use a dedicated HDR app. Take at least three photos: one at the standard exposure, one underexposed, and one overexposed. This allows you to capture details in both highlights and shadows.
The key is to keep your phone steady between shots. Use a tripod or stabilize your device against a solid surface to avoid misalignment. Many modern smartphones offer built-in HDR modes, which automate this process.
When shooting, focus on high-contrast scenes where HDR truly shines. These include landscapes with bright skies and dark foregrounds, interiors with bright windows, or any scene with a mix of bright and dark areas.
Selecting the Right Exposure Levels

Selecting the right exposure levels for HDR bracketing requires you to understand your device's dynamic range limitations.
You'll need to choose ideal exposure stops that capture the full range of light in your scene, typically starting with a base exposure and adjusting up and down from there.
As you practice, you'll learn to adapt your bracketing technique to various lighting conditions, ensuring you capture all the necessary details for a stunning HDR image.
Understand Dynamic Range Limitations
In light of mobile photography's limitations, understanding dynamic range is essential for effective HDR bracketing. Your smartphone's camera sensor has a finite ability to capture the full range of light in a scene, from the darkest shadows to the brightest highlights. This limitation often results in blown-out skies or underexposed foregrounds in high-contrast scenes.
To overcome this, you'll need to assess the dynamic range of your subject. Look for areas where details are lost in shadows or highlights. These are the zones you'll target with your bracketed exposures.
Remember, most mobile cameras can only capture about 10-12 stops of dynamic range, while the human eye can perceive up to 20 stops.
When planning your brackets, consider the scene's lighting conditions. Bright, sunny days with harsh shadows will require more exposures than overcast conditions.
You'll also want to account for your phone's ISO and aperture limitations, as these can affect the overall dynamic range capture. By understanding these constraints, you can optimize your bracketing technique, ensuring you capture all the necessary information to create a well-balanced HDR image in post-processing.
Choose Optimal Exposure Stops
The key to successful HDR bracketing lies in choosing the right exposure stops. When shooting HDR on your mobile device, you'll typically want to capture at least three images: one at the correct exposure, one underexposed, and one overexposed.
For most scenes, a range of -2EV, 0EV, and +2EV works well. This 2-stop difference between shots usually captures enough detail in both shadows and highlights.
However, high-contrast scenes may require a wider range, such as -3EV, 0EV, and +3EV. Some advanced mobile photographers even opt for five-shot brackets with 1-stop increments: -2EV, -1EV, 0EV, +1EV, and +2EV. This provides more flexibility in post-processing but requires more storage space and processing time.
To determine the best exposure stops, analyze your scene's lighting. For scenes with extreme contrast, like sunsets or dimly lit interiors with bright windows, consider using wider bracketing.
For scenes with moderate contrast, stick to the standard 2-stop difference. Remember, it's better to capture more exposures than you think you'll need, as you can always discard unnecessary shots later.
Adapt to Lighting Conditions
While choosing ideal exposure stops is fundamental, adapting to specific lighting conditions is equally important for successful HDR bracketing. You'll need to assess the scene's dynamic range and adjust your exposure levels accordingly.
In bright, high-contrast situations, such as sunny landscapes, you might need to capture a wider range of exposures. Consider using 5 or 7 brackets, with stops ranging from -3 to +3 EV.
For scenes with moderate contrast, like cloudy days or indoor settings, 3 brackets at -2, 0, and +2 EV might suffice.
In low-light conditions, you'll want to prioritize noise reduction. Use fewer brackets and longer exposures, perhaps just 3 shots at -1, 0, and +1 EV.
Pay attention to moving elements in your scene. If there's motion, you'll need faster shutter speeds to minimize ghosting effects. This might mean increasing your ISO or widening your aperture to maintain proper exposure.
Always check your histogram to verify you're capturing details in both highlights and shadows. Remember, it's better to slightly overexpose your brightest shot and underexpose your darkest one to maximize the dynamic range you can capture.
Mastering Manual Exposure Control

Mastering manual exposure control lies at the heart of successful HDR bracketing. You'll need to understand how to adjust three key elements: shutter speed, ISO, and aperture. These settings work together to determine the exposure of your image.
Start by setting your camera app to manual mode. Experiment with different combinations of settings to achieve the desired exposure. Remember, for HDR bracketing, you'll typically take three shots: underexposed, properly exposed, and overexposed.
Here's a quick guide to help you understand the relationship between these settings:
| Setting | Increases | Decreases | Effect on Image |
|---|---|---|---|
| Shutter Speed | Brightness | Darkness | Motion blur |
| ISO | Brightness | Darkness | Noise/grain |
| Aperture | Depth of field | Light intake | Background blur |
When bracketing, adjust only one setting (usually shutter speed) between shots to maintain consistency. Begin with the properly exposed image, then adjust for under and overexposure. Practice this technique in various lighting conditions to develop your skills. With time, you'll intuitively know which settings to use for ideal HDR results in any situation.
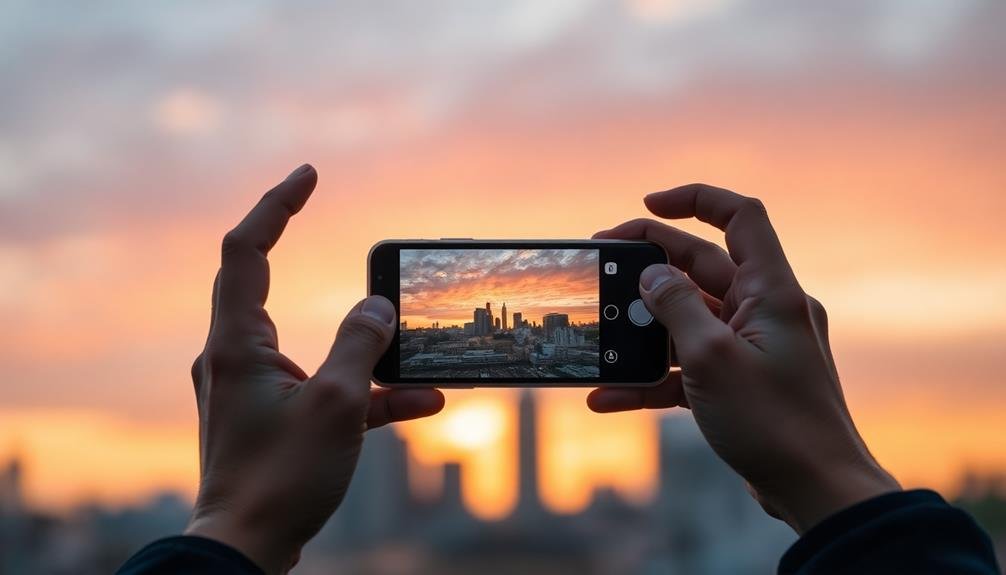
Utilizing Burst Mode for Bracketing

Burst mode can be your secret weapon for HDR bracketing on mobile devices, allowing you to capture multiple exposures in rapid succession.
You'll find this technique particularly useful when shooting handheld, as it helps minimize camera shake between shots.
After capturing your burst sequence, you can select the best frames for HDR processing, ensuring you have the ideal exposures for highlights, midtones, and shadows.
Rapid Capture Advantages
Harness the power of rapid capture techniques to elevate your HDR photography game. By utilizing burst mode for bracketing, you'll greatly increase your chances of capturing the perfect exposure range for your HDR images. This method allows you to shoot multiple frames in quick succession, ensuring you don't miss any essential moments or lighting changes.
Rapid capture offers several advantages for HDR photography:
| Advantage | Description | Benefit |
|---|---|---|
| Speed | Captures multiple exposures quickly | Reduces motion blur |
| Consistency | Maintains similar framing across shots | Easier alignment in post-processing |
| Flexibility | Provides more options for exposure selection | Better final image quality |
| Efficiency | Streamlines the shooting process | Saves time in the field |
| Adaptability | Works well in changing light conditions | Increases success rate in tricky scenes |
You'll find that rapid capture techniques are particularly useful in dynamic environments where lighting conditions change quickly. Whether you're shooting landscapes at sunset or capturing street scenes with moving subjects, burst mode bracketing allows you to adapt to the situation swiftly. By mastering this technique, you'll be able to create stunning HDR images with greater ease and precision, even in challenging shooting conditions.
Handheld Stability Tips
Achieving razor-sharp HDR images while shooting handheld can be challenging, but it's not impossible. To maximize stability, adopt a stable stance with your feet shoulder-width apart and your elbows tucked close to your body. Hold your breath briefly while capturing the images to minimize movement.
When using burst mode for HDR bracketing, you'll need to be extra vigilant about stability. Enable your phone's burst mode feature and hold down the shutter button to capture a rapid sequence of shots. This technique increases your chances of getting at least one set of perfectly aligned images for HDR processing.
To further enhance stability, try leaning against a wall or solid object while shooting. If available, use a mobile tripod or grip accessory for added support. Some phones offer built-in image stabilization, so make sure this feature is activated.
Remember to keep your subject as still as possible during the burst capture. Any movement can result in ghosting or blurring in the final HDR image.
Post-Processing Burst Sequences
Once you've captured your burst sequence for HDR bracketing, the real magic happens in post-processing.
Start by importing your burst sequence into a mobile editing app that supports HDR merging. Popular options include Snapseed, Adobe Lightroom Mobile, and Affinity Photo for iPad.
Select the best-exposed images from your burst, typically choosing three: one underexposed, one properly exposed, and one overexposed. Align these images carefully to guarantee there's no ghosting or misalignment in the final result.
Use your app's HDR merge function to combine the selected images. This process blends the best-exposed parts of each photo, creating a single image with a wider dynamic range.
After merging, fine-tune the result by adjusting contrast, highlights, shadows, and color saturation.
Be careful not to overprocess your HDR image. Aim for a natural look that preserves detail in both highlights and shadows without appearing artificial.
Experiment with different tone mapping techniques to find a style that suits your artistic vision.
Optimizing Camera Settings for HDR

Camera settings play a pivotal role in capturing stunning HDR images on your mobile device. To optimize your settings for HDR bracketing, start by enabling your phone's HDR mode if available. This feature automatically captures multiple exposures and combines them for you.
If you're manually bracketing, adjust your exposure compensation (EV) settings. Typically, you'll want to capture three images: one at the correct exposure (0 EV), one underexposed (-1 to -2 EV), and one overexposed (+1 to +2 EV). This range guarantees you capture details in both shadows and highlights.
Set your ISO as low as possible to minimize noise, ideally around 100-200. Use a slower shutter speed to compensate for the low ISO, but be mindful of camera shake. If your phone has manual focus, set it to guarantee all exposures have consistent focus.
Enable grid lines to help compose your shot and keep it level across all exposures. Turn off flash to avoid inconsistent lighting between brackets.
Shooting in Various Lighting Conditions

When shooting HDR on your mobile device, you'll face unique challenges in different lighting conditions.
In low light, you'll need to steady your phone and potentially use longer exposures, while bright sunlight requires careful management of highlights and shadows.
Mixed lighting situations demand a balanced approach, where you'll need to prioritize which areas of the scene to properly expose.
Low Light Challenges
Low light situations present some of the biggest challenges for mobile photographers using HDR bracketing. When you're shooting in dim environments, your phone's camera struggles to capture enough light, often resulting in noisy or blurry images. To overcome this, you'll need to adjust your HDR bracketing technique.
First, stabilize your phone using a tripod or by propping it against a stable surface. This minimizes camera shake during longer exposures.
Next, increase the number of bracketed shots to capture a wider range of exposures. Instead of the standard three shots, try five or seven to guarantee you've captured all the available light information.
Use your phone's manual mode, if available, to control shutter speed and ISO. For the darkest bracket, use a longer shutter speed to gather more light, while keeping ISO low to reduce noise.
For the brightest bracket, use a faster shutter speed to avoid overexposure. Experiment with different exposure values (EV) between brackets to find the ideal range for your scene.
Bright Sunlight Strategies
Bright sunlight presents a different set of challenges for HDR bracketing on mobile devices. When shooting in intense daylight, you'll need to adjust your approach to capture the full dynamic range of the scene.
Start by finding a stable position to minimize camera shake, as faster shutter speeds can make handheld shots more manageable. Use your phone's exposure compensation feature to guarantee you're not blowing out highlights or losing shadow detail.
For peak results in bright conditions, consider these strategies:
- Use a physical sun shield or your hand to block direct sunlight from hitting the lens, reducing flare and improving contrast.
- Experiment with different angles to minimize harsh shadows and create more balanced compositions.
- Try shooting during the "golden hours" just after sunrise or before sunset for softer, more flattering light.
When bracketing in bright sunlight, aim for at least three exposures: one for highlights, one for midtones, and one for shadows.
Many mobile HDR apps allow you to customize the number of brackets and exposure values. Don't forget to lock your focus and exposure settings before capturing your bracketed shots to maintain consistency across the series.
Mixed Lighting Solutions
From dawn to dusk, mixed lighting conditions present unique challenges for mobile HDR photography. When faced with scenes that combine natural and artificial light sources, you'll need to adapt your bracketing technique to capture the full range of tones.
Start by identifying the dominant light source and its intensity. For indoor scenes with windows, bracket your exposures to capture both the bright outdoor light and dimmer interior details. Use a wider range of exposures, typically -2EV to +2EV, to guarantee you're capturing all the nuances.
In urban environments with streetlights and neon signs, focus on preserving both the highlights and shadows. Experiment with 5-7 bracketed shots to capture the full dynamic range. Pay special attention to areas where different light sources intersect, as these can create interesting contrasts.
For twilight scenes, where the sky and artificial lights compete, use a tripod or stabilize your phone to allow for longer exposures. Bracket your shots to capture the fading natural light and the emerging artificial illumination.
This technique will help you create stunning cityscapes or architectural photos with balanced exposures across all elements of the scene.
Perfecting Composition for HDR Shots

When it comes to perfecting composition for HDR shots, you'll need to approach your framing with extra care. HDR photography demands a keen eye for balance and detail, as you're capturing a wider range of tones and colors.
Start by identifying the key elements in your scene that will benefit most from the expanded dynamic range. Consider how highlights and shadows will interact across multiple exposures, and position your subjects accordingly.
Remember that HDR can sometimes flatten the perceived depth of an image, so use leading lines and layers to maintain a sense of dimension. Pay extra attention to the edges of your frame, as HDR can reveal details in previously dark or bright areas that might now distract from your main subject.
To elevate your HDR compositions, focus on these emotional elements:
- Contrast: Juxtapose light and dark areas to create drama
- Symmetry: Use balanced compositions to evoke calm and order
- Scale: Incorporate elements of varying sizes to inspire awe
Lastly, don't forget to keep your camera steady. Even slight movements between bracketed shots can result in ghosting or alignment issues. Use a tripod or brace yourself against a stable surface for the best results.
Minimizing Camera Shake and Motion
Building on the importance of stability in HDR photography, let's focus on techniques to minimize camera shake and motion. When shooting HDR on your mobile device, even slight movements can ruin your bracketed exposures. To combat this, adopt a stable stance with your feet shoulder-width apart and elbows tucked in. Hold your phone with both hands, keeping it close to your body for added stability.
Utilize your phone's built-in stabilization features, such as optical image stabilization (OIS) or electronic image stabilization (EIS). If available, activate the HDR-specific stabilization mode in your camera app. For extra steadiness, lean against a wall or sturdy object while shooting.
Consider using a mobile tripod or gimbal for ultimate stability, especially in low-light situations where longer exposures are necessary. If you don't have a tripod, improvise by resting your phone on a flat surface or using a makeshift support like a rolled-up jacket.
When capturing moving subjects, time your shots carefully. Try to anticipate moments of stillness or use faster shutter speeds to freeze motion.
Post-Processing HDR Bracketed Images
Once you've captured your HDR bracketed images, it's time to plunge into post-processing. Start by importing your bracketed shots into your preferred mobile editing app that supports HDR merging. Popular options include Snapseed, Adobe Lightroom Mobile, and Photomatix.
These apps will automatically align and merge your exposures, creating a single HDR image with an expanded dynamic range.
After merging, you'll need to fine-tune your HDR image. Adjust the tone mapping to balance highlights and shadows, ensuring details are visible in both bright and dark areas.
Be careful not to overdo it, as excessive HDR can lead to an unnatural look. Next, tweak the contrast, saturation, and sharpness to enhance the overall image quality.
To create truly impactful HDR photos, focus on:
- Preserving natural colors and tones
- Maintaining a realistic balance between light and dark areas
- Enhancing textures and details without introducing artifacts
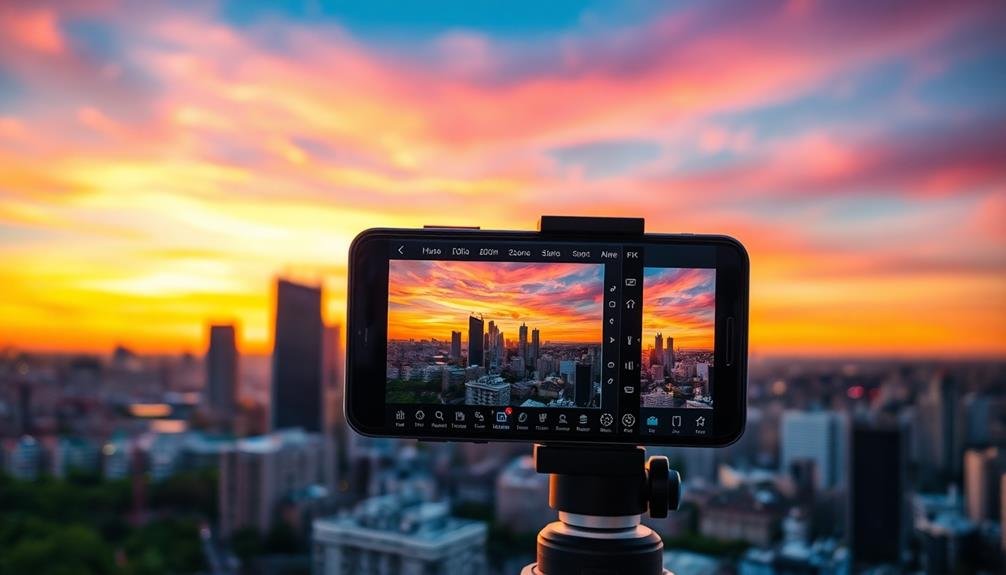
Exploring HDR-Specific Mobile Apps

Several mobile apps have sprung up specifically for HDR photography, offering advanced features tailored to this technique. These apps provide more control over bracketing, exposure settings, and merging processes than your phone's native camera app. You'll find options for manual exposure adjustment, customizable bracket intervals, and advanced HDR algorithms.
When choosing an HDR-specific app, consider factors like user interface, processing speed, and output quality. Some popular choices include:
| App Name | Key Features | Platforms |
|---|---|---|
| Aurora HDR | AI-powered HDR | iOS, Android |
| Pro HDR X | Real-time HDR preview | iOS, Android |
| HDR Max | 12 exposure brackets | iOS |
| Fotor HDR | One-tap HDR | iOS, Android |
| Hydra | Up to 60 exposures | iOS |
These apps often include built-in editing tools, allowing you to fine-tune your HDR images without switching to another application. You'll be able to adjust contrast, saturation, and sharpness, as well as apply filters and effects designed specifically for HDR photography. By exploring these specialized apps, you'll reveal new possibilities for creating stunning HDR images directly from your mobile device.
Frequently Asked Questions
Can HDR Bracketing Be Used for Action or Moving Subjects?
You'll face challenges using HDR bracketing for action or moving subjects. It's not ideal as multiple exposures are combined, potentially causing ghosting or blurring. For best results, stick to static scenes or use single-shot HDR modes.
How Does HDR Bracketing Affect Battery Life on Mobile Devices?
HDR bracketing can considerably drain your device's battery. You're capturing multiple images and processing them, which requires more power. It's best to use this feature sparingly if you're concerned about battery life on your mobile device.
Are There Storage Space Considerations When Shooting HDR Bracketed Images?
Yes, you'll need more storage space for HDR bracketed images. You're capturing multiple exposures for each shot, which means larger file sizes. Consider using cloud storage or regularly transferring photos to free up space on your device.
Can HDR Bracketing Be Combined With Other Mobile Photography Techniques?
Yes, you can combine HDR bracketing with other techniques. Try pairing it with composition rules, long exposure, or macro photography. You'll create unique images by experimenting with focus stacking, panoramas, or night mode alongside HDR bracketing.
How Do Different Mobile Phone Brands Compare in HDR Bracketing Capabilities?
You'll find that iPhone, Google Pixel, and Samsung Galaxy phones excel in HDR bracketing. They offer advanced AI-driven algorithms and multiple exposure captures. Other brands like OnePlus and Huawei are catching up, but still lag behind the top contenders.
In Summary
You've now got the tools to take your mobile HDR photography to the next level. Remember, practice makes perfect. Don't be afraid to experiment with different techniques and settings. As you refine your skills, you'll capture stunning images with incredible dynamic range. Keep pushing your creative boundaries, and soon you'll be producing professional-quality HDR shots right from your smartphone. So get out there and start shooting – your best HDR images are waiting!


Leave a Reply