
To elevate your phone photography with HDR, start by understanding its basics and when to use it. Choose high-contrast scenes wisely, as HDR excels in capturing both bright and dark details. Keep your phone steady to avoid blurry images, using both hands or a tripod for stability. Before shooting, adjust your exposure manually for ideal results, especially in challenging lighting conditions. Finally, edit your HDR photos with a light touch, focusing on subtle adjustments to maintain a natural look. By mastering these five tips, you'll access the full potential of HDR and take your smartphone photography to new heights.
Understand HDR Mode Basics
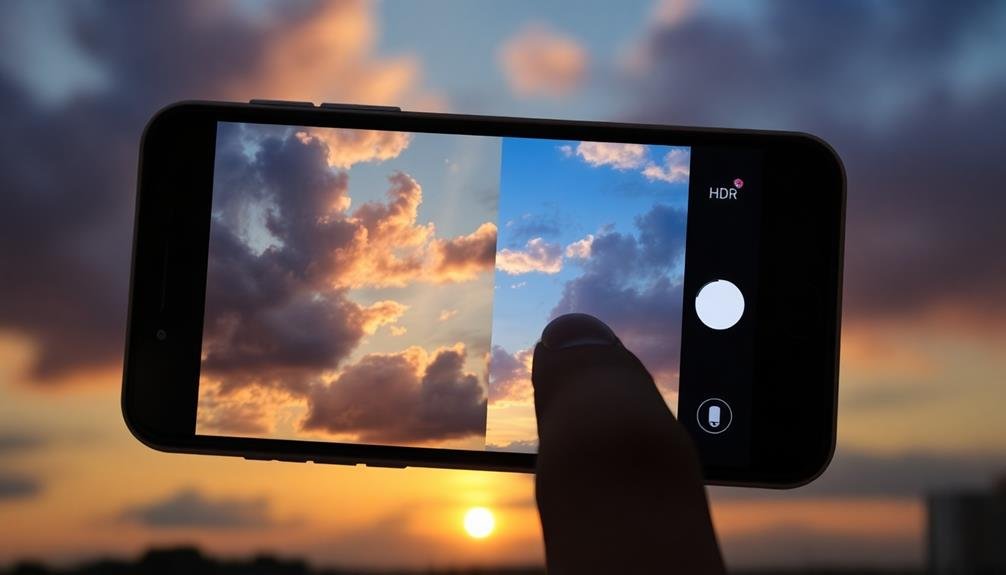
HDR mode on your phone camera stands for High Dynamic Range. It's a feature designed to capture a wider range of light and dark areas in a single photo. When you activate HDR, your camera takes multiple shots at different exposures and combines them into one image. This process helps balance out high-contrast scenes, preserving details in both shadows and highlights.
You'll find HDR particularly useful in challenging lighting situations. It can bring out details in landscapes with bright skies and dark foregrounds, or interior shots with sunlight streaming through windows.
However, HDR isn't always the best choice. It may not work well for moving subjects or in low-light conditions without a steady hand.
Most smartphones offer automatic HDR, which detects when it's needed. You can also manually toggle HDR on or off in your camera settings. When using HDR, keep your phone steady or use a tripod for best results.
Remember that HDR photos may take slightly longer to process and can sometimes appear less natural if overused. Experiment with HDR in various scenarios to understand its effects and when it's most beneficial for your photography.
Choose the Right Scenes
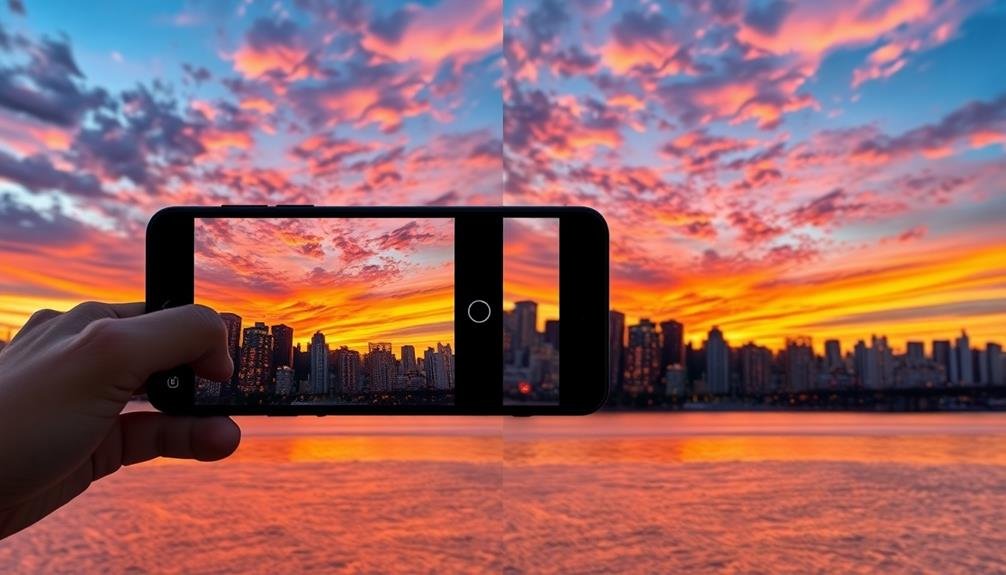
Selecting the right scenes for HDR can make or break your phone photography. Not every situation calls for HDR, so it's essential to recognize when to use it. Generally, HDR works best in high-contrast scenes where you want to capture details in both bright and dark areas.
Landscapes are ideal for HDR, especially during golden hour or when there's a dramatic sky. The technique helps balance the bright sky with darker foreground elements. Backlit scenes also benefit from HDR, as it can reveal details that might otherwise be lost in shadows.
However, avoid using HDR for scenes with moving subjects, as it can create ghosting effects.
When choosing scenes for HDR, consider these key factors:
- Lighting contrast: Look for scenes with a wide range of light and dark areas
- Static subjects: Verify your main subject isn't moving
- Textures and details: HDR can enhance intricate details in architecture or nature
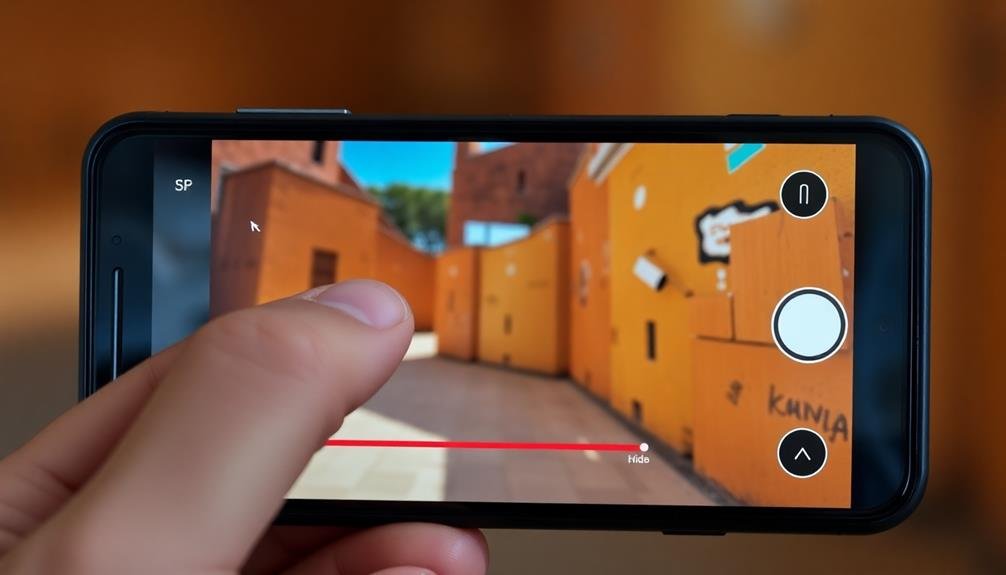
Hold Your Phone Steady

In order to capture sharp HDR images, keeping your phone steady is essential. HDR photography requires multiple exposures, and any movement between shots can result in blurry or misaligned images. To minimize camera shake, hold your phone with both hands and keep your elbows close to your body for added stability.
If possible, lean against a wall or sturdy object to further reduce movement. Consider using a tripod or smartphone mount for the best results, especially in low-light situations or when shooting landscapes. If you don't have a tripod, try resting your phone on a flat surface or improvise with everyday objects like books or rocks.
When pressing the shutter button, use a gentle touch or activate the timer feature to avoid introducing additional movement. Many smartphones now offer built-in image stabilization, but it's still vital to maintain a steady hand.
If your device has a "night mode" or similar feature, it may automatically take multiple exposures and combine them, requiring extra stability. Remember that even slight movements can affect the final HDR image quality, so practice holding your phone steady in various shooting conditions.
Adjust Exposure Before Shooting
Before capturing an HDR image, it's crucial to adjust your exposure settings. Most phone cameras offer manual exposure control, allowing you to fine-tune the brightness of your shot. Tap on the brightest area of your scene to set the exposure, then use the slider to adjust it slightly darker. This prevents overexposure in the highlights while maintaining detail in the shadows.
Remember, HDR works best when there's a considerable contrast between light and dark areas. By adjusting exposure beforehand, you're giving your phone's HDR algorithm the best starting point to work with. This technique is particularly useful in challenging lighting situations, such as:
- Sunset or sunrise scenes
- Backlit subjects
- High-contrast landscapes
Don't be afraid to take multiple shots with different exposure settings. You can always choose the best result later.
If your phone offers an HDR preview mode, use it to see how the final image might look. This helps you make real-time adjustments to achieve the desired effect.
Edit HDR Photos Carefully

Once you've captured your HDR photos, it's time to perfect them through careful editing. Remember that HDR images often require a lighter touch compared to standard photos. Start by adjusting the overall exposure and contrast to guarantee a balanced look. Then, focus on fine-tuning the highlights and shadows to bring out the details in both bright and dark areas.
Pay close attention to color saturation. HDR can sometimes produce overly vibrant colors, so you might need to dial back the saturation slightly for a more natural appearance. Use the following table as a guide for your editing process:
| Step | Action | Goal |
|---|---|---|
| 1 | Adjust exposure | Balance overall brightness |
| 2 | Fine-tune highlights/shadows | Reveal details in all areas |
| 3 | Tweak color saturation | Achieve natural-looking colors |
Don't forget to sharpen your image, but be cautious not to overdo it. HDR photos can sometimes appear softer than standard shots, so a subtle sharpening can help bring out textures and details. Finally, consider applying a vignette or adjusting the crop to direct the viewer's attention to the most important elements of your carefully crafted HDR image.
Frequently Asked Questions
Can HDR Mode Be Used for Night Photography?
Yes, you can use HDR mode for night photography. It'll help balance exposure in low-light scenes, capturing more detail in both shadows and highlights. However, you'll need to keep your phone steady to avoid blurry images.
How Does HDR Affect Battery Life on Smartphones?
HDR can drain your battery faster. It's processing multiple exposures and combining them into one image. You'll notice your phone warming up and battery life decreasing if you're using HDR mode extensively during a photo session.
Are There Any Differences Between HDR on Android and Ios?
You'll find HDR works similarly on Android and iOS, but there are some differences. Android often offers more manual control, while iOS tends to have better automatic HDR processing. Both systems can produce great results with practice.
Can HDR Be Combined With Other Camera Modes Like Portrait or Panorama?
You can often combine HDR with other camera modes on your phone. Portrait mode and HDR work well together, enhancing skin tones and background details. For panoramas, HDR can help balance exposure across the entire image.
Do HDR Photos Take up More Storage Space Than Regular Photos?
Yes, HDR photos typically take up more storage space than regular photos. You'll notice they're larger files because they combine multiple exposures. However, the difference isn't usually significant enough to cause storage concerns on modern smartphones.
In Summary
You've now got the tools to take your phone photography to the next level with HDR. Remember to use it wisely, focusing on high-contrast scenes. Keep your hands steady, fine-tune your exposure, and don't overdo it in post-processing. With practice, you'll capture stunning images that showcase a wider range of tones and details. So go ahead, experiment with these tips, and watch your photos transform into vibrant, professional-looking shots that'll impress everyone.


Leave a Reply