
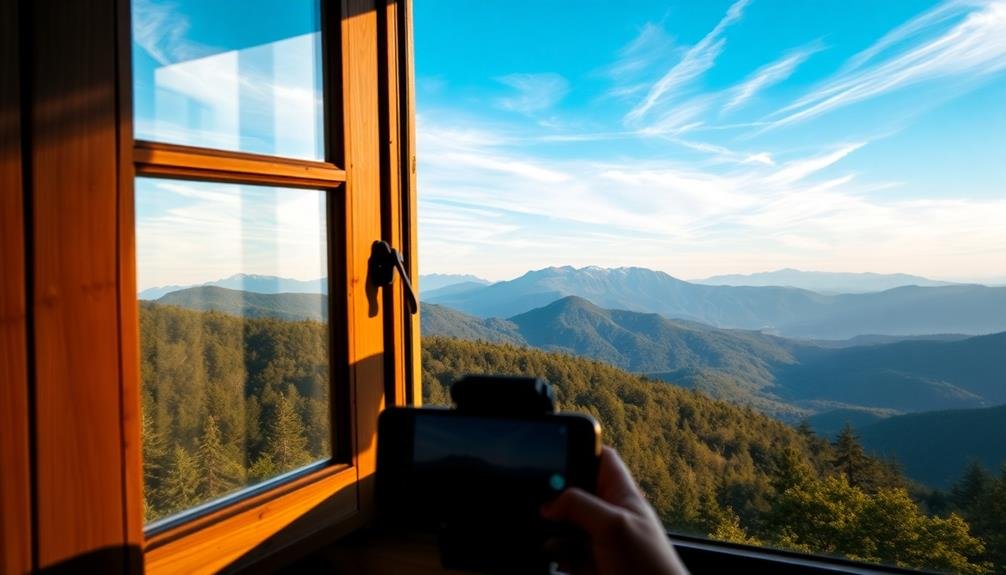
When capturing landscapes with your phone, follow these top rules for stunning results. Use the rule of thirds to frame your shot, placing key elements along imaginary grid lines. Incorporate leading lines to guide the viewer's eye through the image. Add foreground interest for depth and dimension. Take advantage of golden hour lighting for warm, dramatic effects. Explore symmetry and reflections for balance. Create a frame within a frame using natural elements. Utilize negative space to enhance your subject. Play with perspective and scale to add intrigue. These techniques will elevate your phone photography, but there's always more to discover about mastering landscape shots.
Rule of Thirds
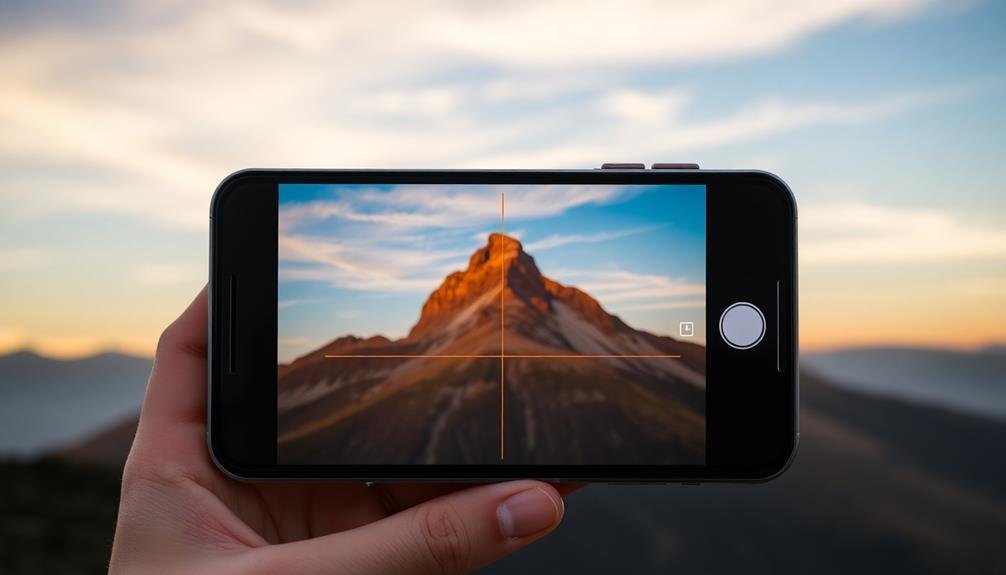
One of the most fundamental principles in photography, the Rule of Thirds can transform your landscape shots from ordinary to extraordinary. This technique involves dividing your frame into a 3×3 grid and placing key elements along these lines or at their intersections. Most smartphone cameras offer a built-in grid feature, making it easy to apply this rule.
When composing your landscape photo, position the horizon along either the top or bottom horizontal line, rather than cutting the image in half. This creates a more dynamic and visually appealing composition. Place points of interest, such as trees, mountains, or buildings, at the intersections of these lines to draw the viewer's eye and create a sense of balance.
The Rule of Thirds isn't meant to be followed rigidly but serves as a guideline to improve your compositions. It helps you avoid centering every subject and encourages you to explore different angles and perspectives.
As you practice, you'll develop an intuitive sense of how to apply this rule effectively. Remember, while it's a powerful tool, don't be afraid to break it when the scene calls for a different approach. Experimentation is key to developing your unique style in landscape photography.
Leading Lines
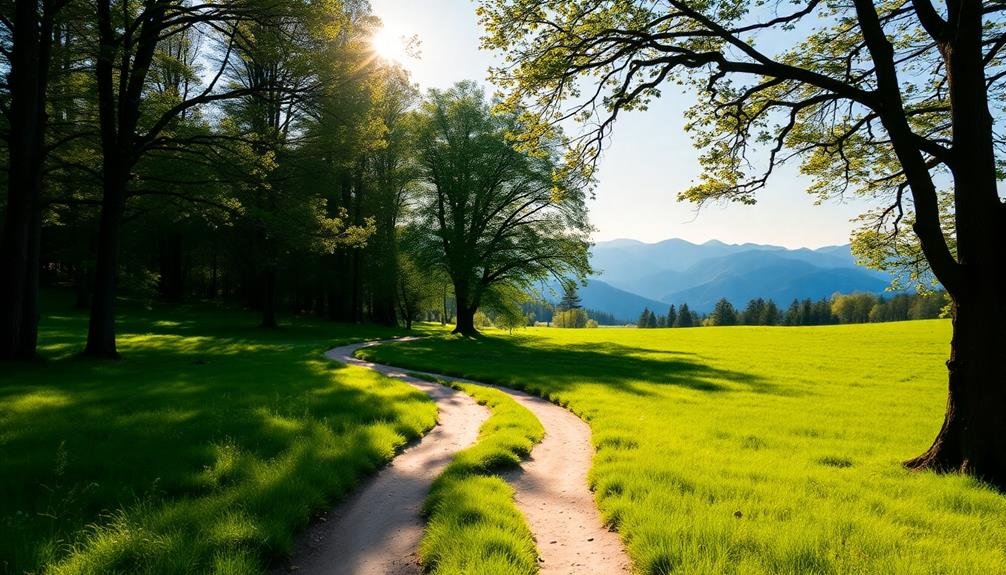
While the Rule of Thirds helps you frame your shot, leading lines guide your viewer's eye through the image. These lines can be natural or man-made elements in your landscape that create a path for the eye to follow. They add depth, dimension, and interest to your photos, making them more engaging and dynamic.
To effectively use leading lines in your landscape photography:
- Look for natural lines: Rivers, coastlines, tree lines, or mountain ridges can serve as powerful leading lines.
- Utilize man-made structures: Roads, fences, bridges, or train tracks often create strong linear elements in landscapes.
- Experiment with perspective: Change your position or angle to emphasize the lines and create a more compelling composition.
- Consider the direction: Lines can lead into the frame, out of it, or towards a focal point, each creating a different effect.
When you're composing your shot, use your phone's grid feature to align the leading lines with the grid points or edges. This will help you create a more balanced and visually appealing image.
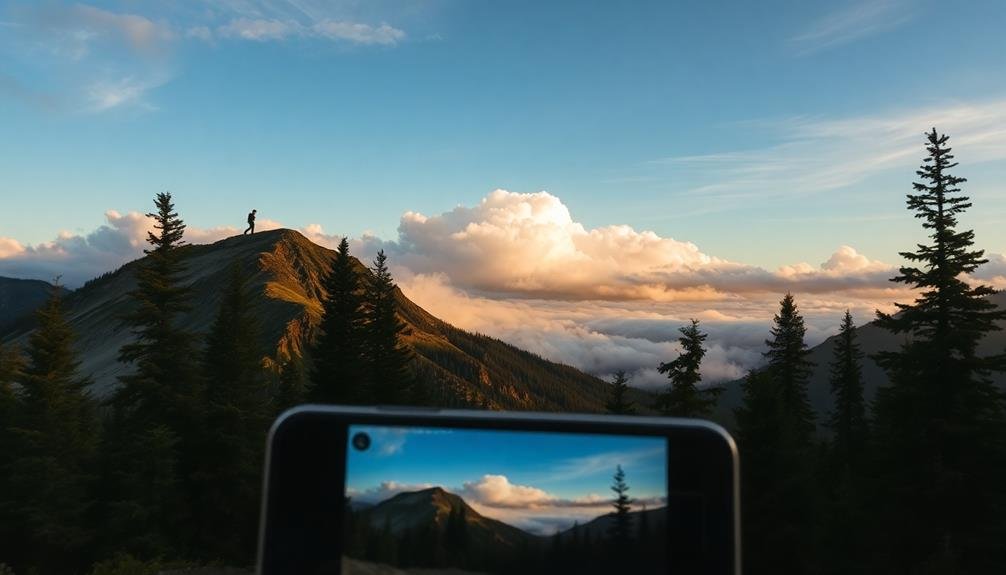
Foreground Interest
After mastering leading lines, it's time to focus on foreground interest. This technique adds depth and dimension to your landscape photos, drawing viewers into the scene. By including compelling elements in the foreground, you'll create a more immersive experience and guide the eye through the image.
When shooting with your phone, look for interesting objects close to the camera. Rocks, flowers, or unique textures can serve as excellent foreground subjects. Position these elements in the bottom third of your frame, using the rule of thirds as a guide. Experiment with different angles and perspectives to find the most engaging composition.
| Foreground Type | Examples | Effect |
|---|---|---|
| Natural | Rocks, flowers | Organic feel |
| Man-made | Fences, paths | Human context |
| Water | Reflections, ripples | Serenity |
To capture foreground interest effectively, use your phone's wide-angle lens if available. This will help you include more of the scene while maintaining focus on nearby objects. Consider using portrait mode to blur the background slightly, emphasizing the foreground. Remember to keep your camera low to the ground for a more dramatic effect, and always guarantee your foreground elements complement rather than overpower the main subject of your landscape.
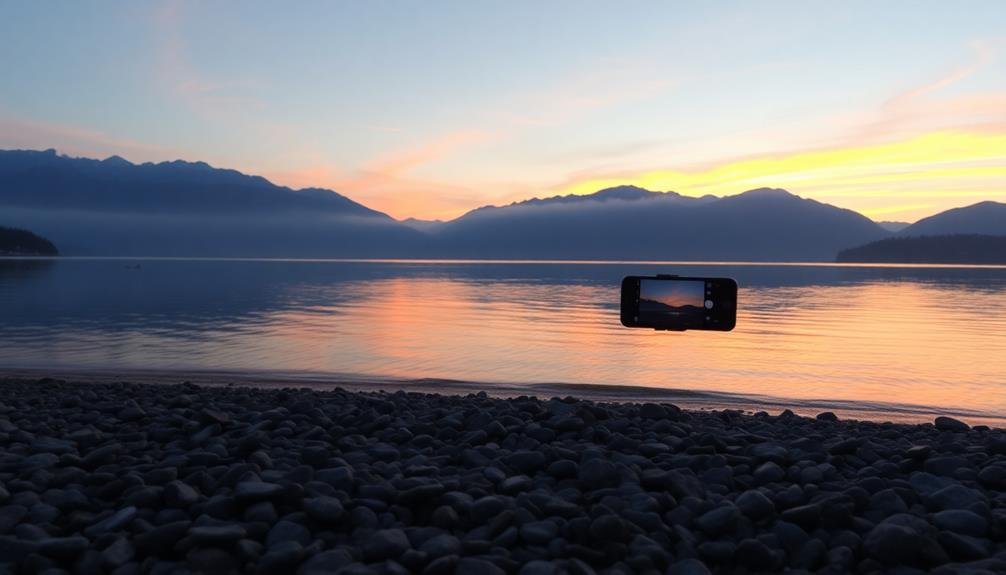
Golden Hour Lighting

Now that you've mastered foreground interest, let's explore the magic of golden hour lighting.
This coveted time occurs shortly after sunrise or before sunset when the sun is low on the horizon, casting a warm, golden glow across the landscape.
It's a photographer's dream, offering soft, diffused light that enhances colors and creates long, dramatic shadows.
To make the most of golden hour lighting for your phone landscape photos:
- Plan ahead: Use apps like PhotoPills or The Photographer's Ephemeris to predict the exact times of golden hour for your location.
- Adjust your white balance: Set it to "cloudy" or "shade" to enhance the warm tones.
- Experiment with backlighting: Position yourself with the sun behind your subject for a stunning silhouette effect.
- Use HDR mode: This helps capture a wider range of tones in high-contrast scenes.
Symmetry and Reflections
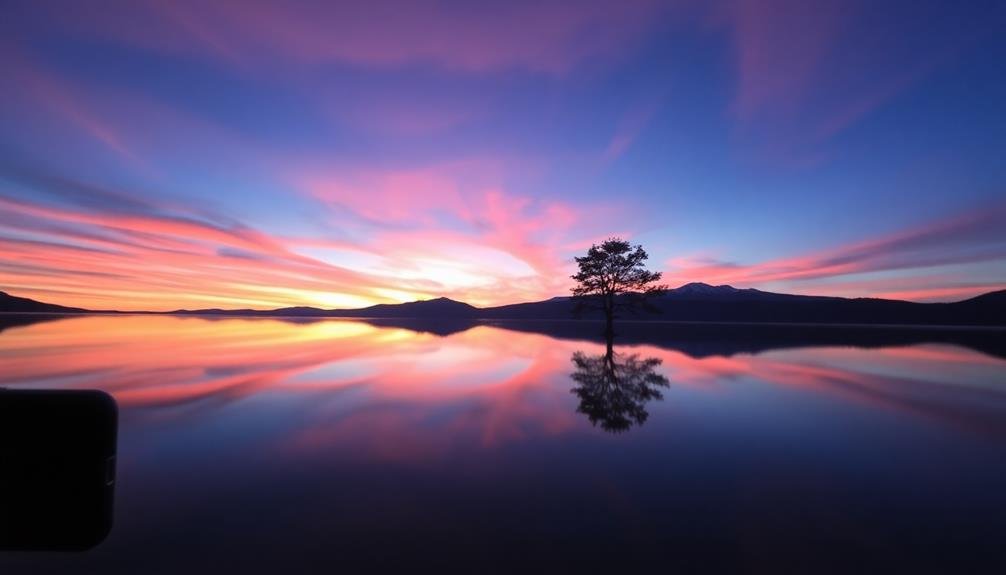
Symmetry and reflections can transform your landscape photos from ordinary to extraordinary.
You'll create balanced compositions by aligning elements in your frame, such as trees or buildings, on either side of a central point.
Look for reflective surfaces like calm lakes, puddles, or even car hoods to add depth and visual interest to your smartphone shots.
Creating Balanced Compositions
Balance is key in landscape photography, and your phone can be a powerful tool for capturing symmetrical and reflective compositions.
When creating balanced landscapes, you'll want to contemplate the placement of elements within your frame. Use your phone's grid feature to align key elements along the lines or intersections, following the rule of thirds.
Look for natural symmetry in your surroundings, such as mirrored reflections in still water or architectural features. These elements can create a sense of harmony and visual appeal in your images.
Don't be afraid to experiment with different angles and perspectives to find the most balanced composition.
To enhance your balanced landscape photos, consider these techniques:
- Use leading lines to draw the viewer's eye through the image
- Incorporate foreground elements to add depth and interest
- Utilize negative space to highlight your main subject
- Play with contrasting colors or textures to create visual balance
Finding Reflective Surfaces
Reflective surfaces offer a treasure trove of opportunities for stunning landscape photos with your phone. Lakes, ponds, puddles, and even wet sand can create mesmerizing symmetrical compositions. When you encounter these surfaces, position yourself to capture both the landscape and its reflection. This technique adds depth and visual interest to your images.
To make the most of reflections, shoot during calm conditions when the water's surface is still. Early mornings and evenings often provide the best lighting and tranquil waters. Experiment with different angles to find the perfect balance between the real scene and its mirror image. You can emphasize the reflection by including more of it in the frame or create a split-screen effect by dividing the image equally.
Don't limit yourself to water reflections. Look for other reflective surfaces like glass buildings, car hoods, or even sunglasses. These unconventional mirrors can add a unique twist to your landscape shots.
When composing your image, pay attention to the details in both the actual scene and its reflection. Use your phone's grid feature to align key elements and create a symmetrical composition that draws the viewer's eye.
Frame Within a Frame
Nature's own elements often provide the perfect opportunity to create a frame within a frame, enhancing your landscape photos. This technique adds depth and draws the viewer's eye to the main subject.
Look for natural features like tree branches, rock formations, or archways that can surround your focal point. You'll create a sense of depth and dimension that'll make your phone photos stand out.
When composing your shot, position yourself so that the framing element is in the foreground, with your main subject visible through the "frame."
Experiment with different angles and distances to find the most pleasing composition. Don't be afraid to move around or adjust your position to get the perfect framing.
Here are four tips to master the frame within a frame technique:
- Use leading lines within the frame to guide the viewer's eye
- Confirm the framing element doesn't overpower the main subject
- Play with symmetry and balance in your composition
- Experiment with partial frames for a more subtle effect
Negative Space

Utilizing negative space is a powerful technique to enhance your landscape photos. It's the empty or unoccupied area surrounding your main subject, and it can dramatically improve the composition of your image. When you're framing a landscape shot, look for opportunities to incorporate negative space.
To use negative space effectively, focus on creating a balance between your subject and the empty areas. This can draw attention to your main focal point and create a sense of scale or isolation. Try positioning your subject off-center, leaving more open space on one side of the frame. You can use the sky, water, or expansive fields as negative space.
Experiment with different ratios of subject to negative space. Sometimes, a small subject surrounded by a vast empty area can create a striking image.
Don't be afraid to leave large portions of your frame seemingly empty; this can evoke emotions like tranquility or loneliness.
Perspective and Scale
Capturing the grandeur of landscapes often hinges on your ability to convey perspective and scale. When using your phone for landscape photography, it's essential to understand how these elements can dramatically enhance your images.
By manipulating perspective and incorporating elements that provide a sense of scale, you'll create more impactful and visually interesting photographs.
To effectively use perspective and scale in your phone landscape photos:
- Include foreground elements: Place objects like rocks, flowers, or trees in the foreground to create depth and lead the viewer's eye into the scene.
- Use leading lines: Incorporate natural or man-made lines that guide the viewer's gaze towards the main subject or focal point.
- Experiment with low angles: Get down low to emphasize foreground elements and create a unique perspective that draws viewers into the scene.
- Add human or animal subjects: Including people or wildlife in your landscape shots can provide a sense of scale, helping viewers understand the magnitude of the scenery.
Remember to experiment with different compositions and viewpoints to find the most effective way to showcase perspective and scale in your landscape photos.
Don't be afraid to move around and try unconventional angles to capture the most compelling images possible.
Frequently Asked Questions
How Can I Protect My Phone From Water Damage While Shooting Landscapes?
You can protect your phone from water damage while shooting landscapes by using a waterproof case or pouch. Keep your device in a sealed plastic bag when not in use, and avoid exposing it to rain or splashes.
What Are the Best Weather Apps for Landscape Photographers?
You'll want to check out AccuWeather, Dark Sky, and Weather Underground for accurate forecasts. These apps provide detailed information on cloud cover, sunrise/sunset times, and precipitation, helping you plan your landscape shoots with precision.
How Do I Clean My Phone's Camera Lens for Clearer Landscape Shots?
To clean your phone's camera lens, you'll want to use a microfiber cloth. Gently wipe in circular motions, removing any smudges or dust. For stubborn dirt, lightly dampen the cloth with distilled water or lens cleaner. Don't use harsh chemicals.
Are There Any Specific Landscape Photography Modes on Smartphones?
You'll find many smartphones have dedicated landscape modes. They often optimize settings for wide scenes, enhance colors, and balance exposure. Look for panorama, HDR, or "scene" modes. Some phones even offer AI-powered landscape recognition for automatic adjustments.
How Can I Stabilize My Phone for Long-Exposure Landscape Shots?
To stabilize your phone for long-exposure landscapes, you'll want to use a tripod or rest it on a stable surface. You can also try leaning against a wall or tree for added support while shooting.
In Summary
You've now got a toolkit of landscape photography rules for your phone. Remember, these aren't rigid laws but guidelines to enhance your shots. As you practice, you'll develop an intuitive sense of composition. Don't be afraid to break these rules occasionally for creative effect. Experiment with different techniques, and most importantly, have fun! Your phone's a powerful tool – use it to capture and share the beauty you see around you.


Leave a Reply