
Food photography in dim restaurants is tricky due to a perfect storm of challenges. You'll face low light levels that make capturing vibrant colors and textures difficult, often resulting in grainy, underexposed images. Mixed lighting sources create unwanted color casts, complicating white balance. Your camera's autofocus may struggle, and you'll risk motion blur with slow shutter speeds. High ISO settings introduce noise, degrading image quality. Composition becomes essential, as you'll need to work with shadows and limited light to highlight the dish. Smartphone users face additional hurdles with smaller sensors and limited manual controls. Despite these obstacles, there are techniques to overcome the darkness and capture mouthwatering shots.
Lighting Challenges in Dim Restaurants

Three main lighting challenges plague food photographers in dim restaurants.
First, you'll face low light levels, which can make it difficult to capture the vibrant colors and textures of your dishes. This often results in grainy, underexposed images that don't do justice to the food's appearance.
Second, you'll encounter mixed lighting sources, such as warm incandescent bulbs, cool LEDs, and candlelight. These varying color temperatures can create unwanted color casts and make it challenging to achieve accurate white balance in your photos.
Lastly, you'll struggle with harsh shadows and uneven lighting. Dim restaurants often use spotlights or directional lighting to create ambiance, but these can cast unflattering shadows on your food, obscuring details and creating high-contrast scenes that are hard to photograph well.
To overcome these challenges, you'll need to adjust your camera settings, use manual controls, and possibly bring additional lighting equipment.
Increasing your ISO, using a wider aperture, and slowing down your shutter speed can help capture more light. However, be cautious of motion blur and noise in your images.
Camera Limitations in Low Light
When shooting food in dim restaurants, you'll face several camera limitations.
You might struggle with slow shutter speeds, leading to motion blur if you're not perfectly steady.
You'll also contend with high ISO noise issues and autofocus systems that may hunt or fail in low light conditions.
Slow Shutter Speed Challenges
A camera's limitations in low-light environments can pose significant challenges for food photographers. When you're shooting in dim restaurants, you'll often need to use slower shutter speeds to capture enough light. This technique, however, comes with its own set of hurdles.
Slow shutter speeds can lead to motion blur, especially if you're hand-holding your camera. Even the slightest movement can result in a blurry image. Additionally, if your subject moves during the exposure, it'll appear fuzzy in the final shot. This is particularly problematic when photographing steam rising from hot dishes or people dining nearby.
To combat these issues, you'll need to employ some strategies:
| Technique | Pros | Cons |
|---|---|---|
| Tripod use | Eliminates camera shake | Bulky, may disturb others |
| Image stabilization | Reduces blur, handheld | Not effective for long exposures |
| Higher ISO | Faster shutter speeds | Increased digital noise |
High ISO Noise Issues
Digital noise, the unwelcome grain that appears in low-light photos, becomes a significant hurdle when shooting in dim restaurants. As you increase your camera's ISO to compensate for the lack of light, you'll notice a degradation in image quality. This noise manifests as speckles or a grainy texture, particularly in darker areas of your food photos.
While modern cameras have improved their high ISO performance, there's still a limit to how far you can push it before the image becomes unusable. You'll find that colors lose their vibrancy, and fine details get lost in the noise. This is especially problematic for food photography, where texture and color are essential elements.
To mitigate noise issues, you'll need to find a balance between ISO, aperture, and shutter speed. Consider using noise reduction software in post-processing, but be aware that this can sometimes result in a loss of sharpness.
Alternatively, you might opt for a camera with a larger sensor or faster lens, which can perform better in low light conditions. Remember, though, that even the best equipment has its limitations in extremely dim environments.
Autofocus Struggles
As light levels drop in dimly lit restaurants, your camera's autofocus system faces considerable challenges. Most autofocus systems rely on detecting contrast in the scene to lock focus, but low light conditions reduce this contrast considerably.
You'll notice your lens hunting back and forth, struggling to find a sharp focus point. Modern cameras often incorporate phase-detection autofocus, which can perform better in low light, but even these systems have their limits.
In extremely dim settings, you might find your camera refusing to focus at all, leaving you frustrated and potentially missing the shot. To combat this issue, try focusing on high-contrast areas of your food, such as the edge of a plate against a darker tablecloth.
You can also use your camera's AF-assist light if available, though this may draw unwanted attention in a quiet restaurant. Manual focus becomes a viable alternative in these situations, allowing you to fine-tune your focus precisely.
Alternatively, consider using a fast prime lens with a wide aperture, which will let in more light and help your autofocus system perform more reliably in challenging low-light environments.
Balancing Ambiance and Food Presentation

While capturing the ambiance of a dimly lit restaurant is essential for setting the mood, it shouldn't come at the expense of showcasing the food.
You'll need to find a delicate balance between preserving the atmosphere and highlighting the culinary creations.
To achieve this balance, consider using a combination of natural and artificial light sources. Position your plate near a candle or soft lamp to add a warm glow without overwhelming the scene. If possible, use a small, portable LED light to subtly illuminate the dish from different angles.
Experiment with your camera's white balance settings to accurately represent the restaurant's lighting while keeping the food's colors appetizing. You might need to adjust the exposure compensation to brighten the food without blowing out the background.
Consider the composition carefully. Include elements of the restaurant's decor in the frame to provide context, but keep the focus on the dish. Use props like utensils or wine glasses to add depth and interest without distracting from the main subject.
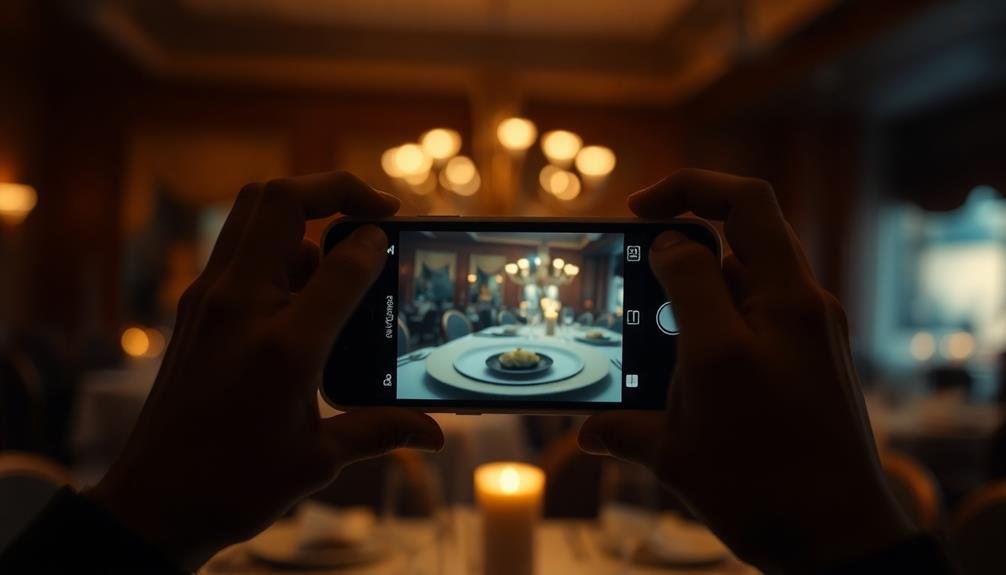
Smartphone Settings for Dark Environments

Today's smartphones pack powerful cameras capable of capturing stunning food photos, even in low-light conditions. To make the most of your device in dim restaurants, start by turning off the flash.
Instead, enable HDR mode, which combines multiple exposures to create a well-balanced image. Adjust your focus by tapping on the main subject, then slide the exposure compensation up to brighten the scene.
For iPhones, use Night mode if available, as it automatically activates in low light. On Android devices, look for similar features like Night Sight or Pro mode.
These options allow you to manually adjust ISO, shutter speed, and white balance. Increase ISO to make the sensor more light-sensitive, but be cautious of introducing noise. Slow down the shutter speed to let in more light, but steady your hand to avoid blur.
Consider using your phone's Portrait mode to create a shallow depth of field, isolating the dish from the dark background.
Composition Techniques for Dim Lighting

When shooting in dim restaurants, you'll need to adapt your composition techniques to make the most of limited light.
Consider using negative space to draw attention to your dish, allowing the darkness to frame and highlight your subject.
You can also apply the rule of thirds to create a balanced and visually appealing image, placing key elements of the dish along the intersecting lines or at their points of intersection.
Negative Space Usage
Despite the challenges of dim lighting, negative space can be a powerful tool in food photography composition. In dimly lit restaurants, you'll find that using negative space effectively can enhance the visual impact of your food shots. By deliberately leaving areas of the frame empty or uncluttered, you'll draw attention to the main subject—the food itself.
To utilize negative space in dim settings, focus on simplifying your composition. Position the dish against a dark, plain background or use the restaurant's ambient lighting to create shadows that frame the food.
You can also experiment with off-center placement, allowing the darkness to fill the remaining space and create a sense of drama.
Don't be afraid to embrace the darkness. Use it to your advantage by creating high-contrast images where the food stands out against the dark surroundings.
This technique can add depth and dimension to your photos, making the dish appear more appealing and enticing.
Rule of Thirds
The Rule of Thirds is a fundamental composition technique that's particularly useful in dim lighting conditions. When you're shooting food in a dimly lit restaurant, this rule can help you create more visually appealing and balanced images. To apply it, imagine dividing your frame into a 3×3 grid, then place key elements along these lines or at their intersections.
In low-light settings, you'll want to make the most of available light sources. Position your dish near a candle or subtle ambient lighting, aligning it with the grid's lines. This placement can draw the viewer's eye to the food while creating a sense of depth and dimension.
You can also use the rule to highlight specific elements of the dish, such as a garnish or unique plating detail. When working with limited light, focus on capturing the dish's texture and color. Place the main subject off-center, following the rule's guidelines, to create a more dynamic composition.
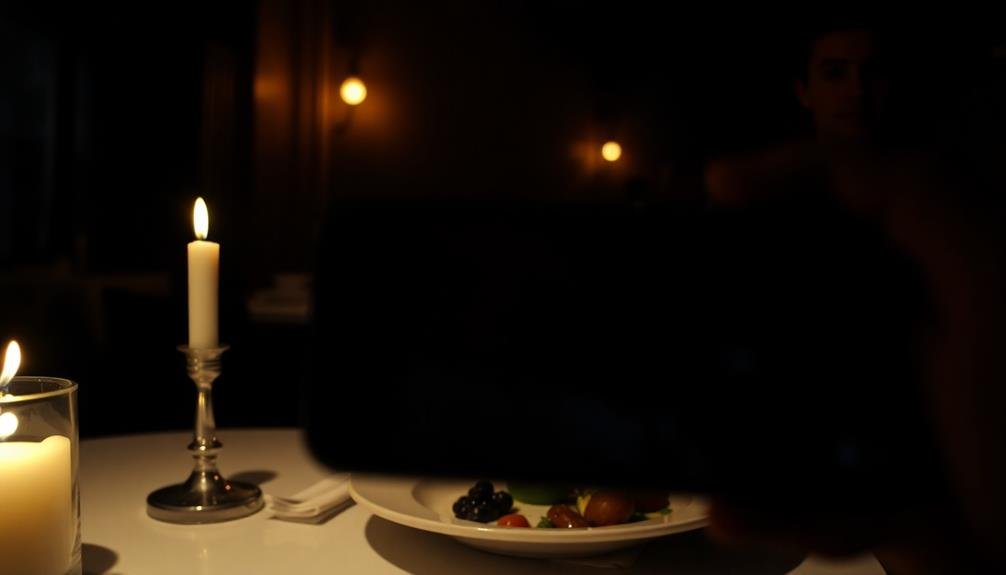
Using Available Light Sources
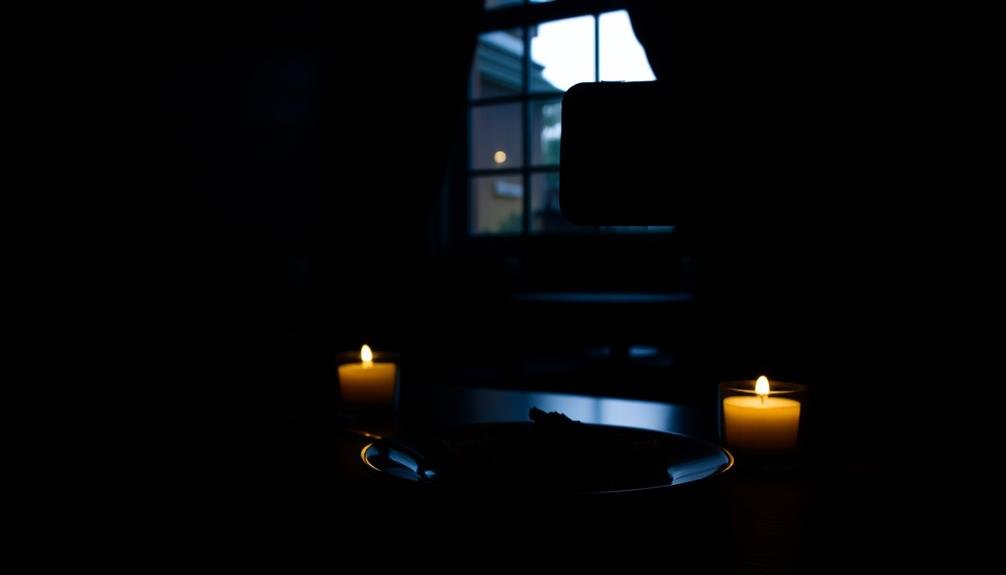
Three primary light sources are available in most dim restaurants: overhead fixtures, table lamps, and candles. You'll need to work with these to capture appetizing food photos. Overhead lighting can create harsh shadows, so you'll want to position your plate carefully to avoid unflattering dark areas. If possible, ask to be seated near a window for natural light during daytime hours.
Table lamps offer a softer, more diffused light. You can use them to create a warm glow on your dish. Try angling the lamp or moving your plate to find the most flattering illumination.
Candles provide a romantic ambiance but often aren't bright enough for good photos. However, you can use them creatively to add a soft highlight or create interesting shadows.
Don't be afraid to combine light sources. You might use a table lamp as your main light and a candle for accent lighting. If you're struggling with low light, consider using a small LED light or your phone's flashlight, diffused with a napkin.
Plate Placement and Angle Considerations
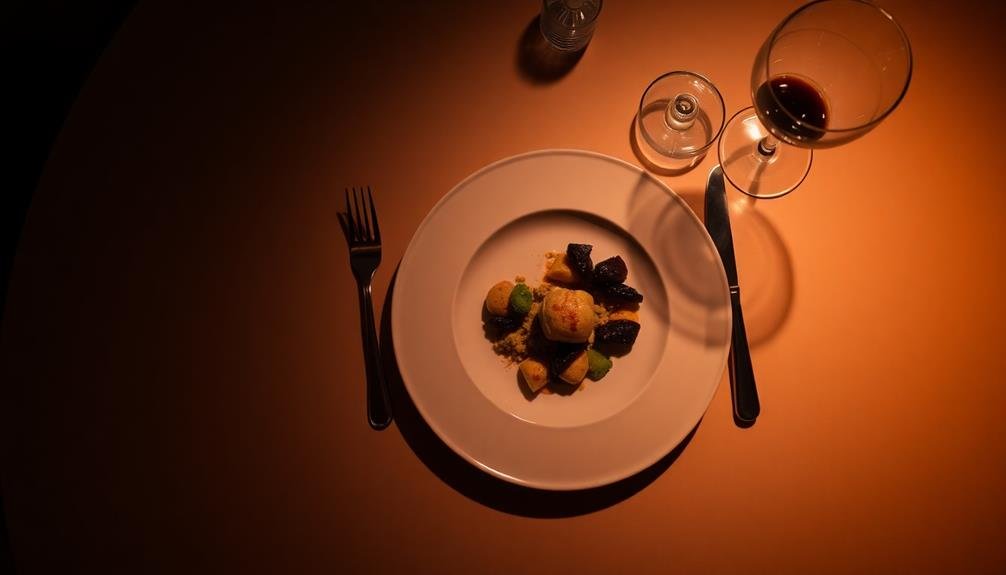
Proper plate placement and angle selection are essential for capturing appetizing food photos in dim restaurants.
You'll want to position your plate near a light source, if possible, to maximize illumination. Consider rotating the dish to find its most flattering angle, highlighting textures and colors. Overhead shots work well for flat dishes or table spreads, while a 45-degree angle can add depth to taller items.
In low light, you'll need to steady your camera, so rest your elbows on the table or use a small tripod. Experiment with different heights to find the sweet spot that showcases the food's best features.
Don't be afraid to move side dishes or decorative elements to create a more balanced composition.
Remember that shadows can be your friend in dim settings. Use them to create contrast and dimension, but be careful not to let them overpower the main subject.
If you're dealing with reflective surfaces like plates or utensils, adjust your angle to minimize unwanted glare.
Editing Tips for Low-Light Photos
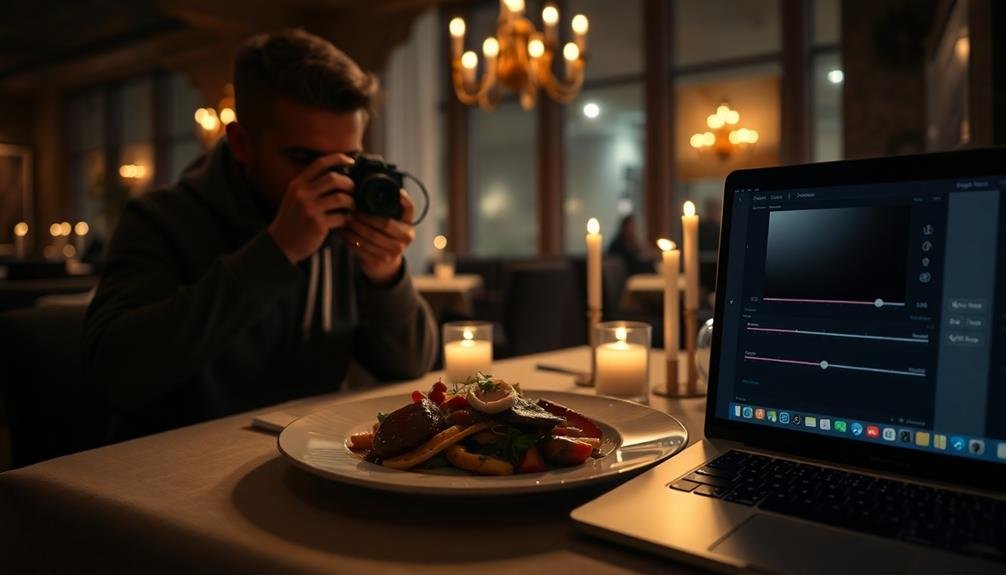
After capturing your low-light food photos, editing can make a significant difference in their final appearance. Start by adjusting the exposure to brighten the image without overexposing highlights. Increase the shadows to reveal details in darker areas, and fine-tune the contrast to enhance the overall depth.
Color correction is essential in low-light situations. Adjust the white balance to counteract any unnatural tints from artificial lighting. Boost the vibrance to bring out the food's natural colors, but be careful not to oversaturate.
Here's a quick guide to vital editing steps:
| Step | Action | Purpose | Tool |
|---|---|---|---|
| 1 | Exposure | Brighten image | Exposure slider |
| 2 | Shadows | Reveal details | Shadows slider |
| 3 | White Balance | Correct color cast | Temperature/Tint |
| 4 | Noise Reduction | Minimize graininess | Noise reduction tool |
Don't forget to reduce noise, which is common in low-light photos. Use your editing software's noise reduction tool, but be cautious not to overdo it, as this can result in a loss of detail. Finally, consider using selective adjustments to highlight specific areas of the dish, drawing attention to its most appealing features.
Color Accuracy in Dark Settings

In dim restaurants, you'll face significant white balance challenges when capturing food photos.
You'll need to make careful color temperature adjustments to accurately represent the dish's appearance.
To preserve the food's natural hues, experiment with custom white balance settings and fine-tune your images during post-processing.
White Balance Challenges
Grappling with white balance challenges, food photographers often struggle to capture accurate colors in dimly lit restaurants.
You'll find that different light sources emit varying color temperatures, which can throw off your camera's ability to interpret colors correctly. In a dim restaurant, you're likely to encounter a mix of warm incandescent bulbs, cool LEDs, and perhaps even candlelight, creating a complex lighting environment.
Your camera's auto white balance may falter in these conditions, resulting in images with an unnatural yellow or orange cast. To combat this, you'll need to manually adjust your white balance settings.
You can use a gray card or a white napkin as a reference point, or experiment with your camera's preset white balance options. Don't be afraid to fine-tune these settings in post-processing.
Remember that each light source in the restaurant can affect different parts of your dish uniquely. You might need to use selective adjustments to correct colors in specific areas of your image.
Color Temperature Adjustments
Color temperature adjustments are essential for maintaining accuracy in dark restaurant settings. You'll often encounter warm, yellowish lighting that can distort food colors. To combat this, you'll need to adjust your camera's white balance settings or use post-processing techniques.
Start by identifying the dominant light source. Is it incandescent, candlelight, or a mix? Each has a different color temperature that affects your images. Here's a quick reference guide:
| Light Source | Color Temperature (K) | White Balance Setting |
|---|---|---|
| Candlelight | 1500-2000 | Tungsten |
| Incandescent | 2700-3300 | Tungsten |
| Halogen | 3400-3600 | Tungsten or Custom |
Once you've identified the light source, adjust your camera's white balance accordingly. If you're shooting in RAW, you'll have more flexibility to fine-tune color temperature during post-processing.
Don't forget to take into account mixed lighting scenarios. You might have warm overhead lights and cooler accent lighting. In these cases, you'll need to find a balance or use local adjustments in post-processing. Remember, your goal is to accurately represent the food's colors while maintaining the restaurant's ambiance. Experiment with different settings to find the perfect balance between accuracy and mood.
Preserving Food Hues
Once you've adjusted the color temperature, preserving food hues in dim restaurant settings becomes your next challenge. Dim lighting can wash out or distort food colors, making dishes appear unappetizing. To combat this, you'll need to focus on maintaining color accuracy.
Start by using a white balance card to calibrate your camera's settings. This guarantees your camera captures colors as accurately as possible.
Next, consider using a small, portable LED light to illuminate the food without overwhelming the ambient atmosphere. Position it carefully to avoid harsh shadows or reflections.
In post-processing, use selective color adjustments to enhance specific hues without affecting the overall image. Boost saturation slightly, but be careful not to overdo it and create an unnatural look. Pay special attention to reds and greens, as these colors often suffer in low light.
If you're shooting with a smartphone, use its HDR mode to capture a wider range of colors and tones. Some apps also offer color correction tools specifically designed for food photography in challenging lighting conditions.
Noise Reduction for Smartphone Images
Smartphone cameras often struggle in low-light conditions, producing grainy or noisy images. To combat this issue when photographing food in dim restaurants, you'll need to focus on noise reduction techniques. Start by tapping on your subject to guarantee proper focus and exposure.
Many smartphones now offer a night mode or low-light setting, which you should activate for better results. If your device allows manual controls, reduce the ISO to minimize noise, but be prepared to hold your phone steady for a longer exposure. Alternatively, use a small tripod or prop your phone against a stable surface.
Consider using HDR mode to capture a wider range of tones and details in challenging lighting. After taking the photo, utilize built-in or third-party editing apps with noise reduction features. These tools can help smooth out graininess without losing too much detail.
Be cautious not to over-edit, as this can make your food look unnatural. Finally, experiment with different angles and compositions to find the best lighting available in the restaurant, even if it means moving your plate slightly or using a friend's phone flashlight for subtle fill light.
Capturing Menu and Decor Details

While capturing the perfect shot of your dish is important, don't forget to document the restaurant's ambiance and menu details. These elements contribute to the overall dining experience and can provide valuable context for your food photos.
In dim lighting, you'll need to employ specific techniques to capture these details effectively. For menu shots, try placing the menu on the table and using a small light source, like your phone's flashlight, to illuminate it. Angle the light to minimize glare and shadows.
When photographing decor, look for areas with the best available light, such as near windows or under spotlights. Use a wider aperture to let in more light and create a shallow depth of field, highlighting specific design elements.
To enhance your dim restaurant photography skills, focus on:
- Using available light sources creatively (candles, pendant lights, or window light)
- Experimenting with different angles to minimize shadows and maximize detail
- Adjusting your camera's white balance to accurately capture the restaurant's atmosphere
- Incorporating people or hands in shots to add scale and life to your images
Frequently Asked Questions
How Can I Practice Food Photography at Home in Low-Light Conditions?
You can practice low-light food photography at home by setting up a dimly lit area, using a tripod, experimenting with longer exposures, and adjusting your camera's ISO. Try different light sources like candles or small lamps for unique effects.
Are There Any Legal Considerations When Photographing Food in Restaurants?
You should be aware of legal considerations when photographing food in restaurants. Always ask for permission from the establishment. Respect their policies and other diners' privacy. Don't use flash without consent. Consider copyright issues for commercial use.
What Are the Best Hashtags for Sharing Dim Restaurant Food Photos?
For sharing dim restaurant food photos, you'll want to use hashtags like #moodyfood, #lowlightfood, #ambientdining, #restaurantvibes, #foodiepics, #culinaryart, #platinggoals, #dinnerdate, #gourmetexperience, and #foodphotography. Don't forget to include location-specific tags too!
How Do Professional Food Photographers Handle Dim Lighting in High-End Restaurants?
You'll see pros use portable LED lights, reflectors, and tripods for stability. They'll adjust camera settings like ISO and aperture, shoot in RAW, and employ longer exposures. Post-processing techniques help enhance images captured in low-light conditions.
Can Special Lenses Improve Food Photography in Dark Restaurant Settings?
You'll find that special lenses can indeed improve your food photography in dark restaurants. They'll allow more light into your camera, helping you capture clearer, more vibrant images without relying on harsh flash lighting.
In Summary
You've learned that food photography in dim restaurants is challenging, but not impossible. With the right techniques, you'll capture appetizing shots even in low light. Remember to adjust your camera settings, use available light creatively, and focus on composition. Don't forget post-processing to enhance your images. Practice makes perfect, so keep experimenting. Soon, you'll be sharing mouthwatering photos that do justice to the chef's creations, no matter how dark the dining room.


Leave a Reply