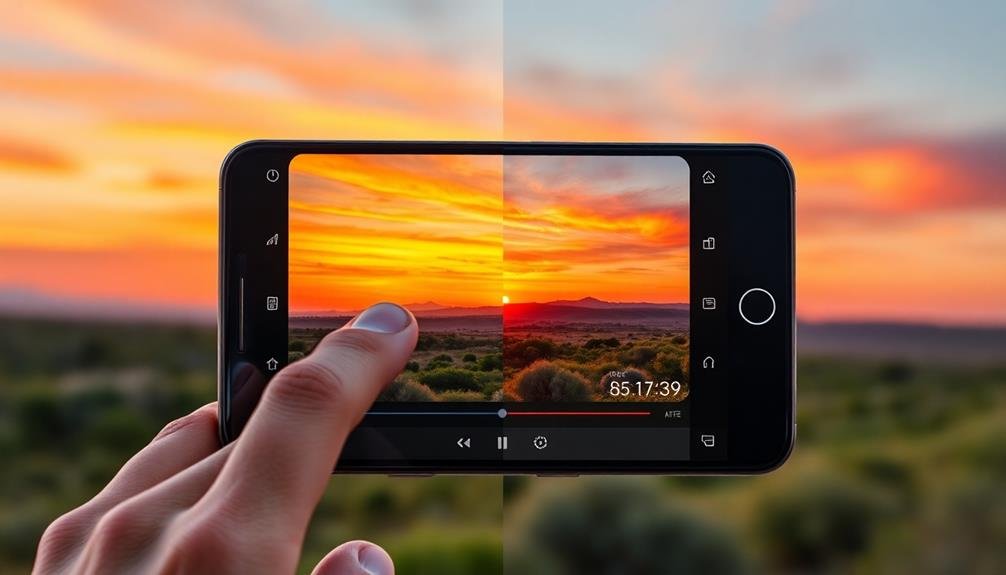
Mobile RAW photography combined with Lightroom presets can elevate your smartphone shots to professional quality. By capturing unprocessed image data, you'll have greater control over editing, allowing for extensive adjustments to exposure, color, and detail. Lightroom Mobile offers a range of preset packs tailored for RAW files, from moody atmospherics to vibrant color enhancements. You can apply these one-tap edits to quickly transform your images or use them as a starting point for further customization. Whether you're into street photography, landscapes, or portraits, there's a preset pack to suit your style. Discover how to choose the right presets and optimize them for stunning results.
Understanding Mobile RAW Photography

With the rise of smartphone technology, mobile RAW photography has become increasingly accessible to amateur and professional photographers alike. RAW files contain unprocessed image data directly from your phone's sensor, offering greater flexibility in post-processing compared to compressed formats like JPEG.
When you shoot in RAW, you'll capture a wider dynamic range, allowing for better highlight and shadow recovery. You'll also have more control over white balance adjustments and can make significant changes without degrading image quality.
However, RAW files are larger and require processing before sharing. To shoot RAW on your smartphone, you'll need a camera app that supports this format, such as Lightroom Mobile or ProCamera. Once you've captured your RAW images, you can edit them using mobile apps like Lightroom or transfer them to your computer for more extensive editing.
Keep in mind that RAW files may look flat and less vibrant initially. This is because they lack the in-camera processing applied to JPEGs.
Don't be discouraged – this gives you the freedom to apply your own creative vision during editing, resulting in higher quality final images.
Benefits of Lightroom Mobile Presets

Lightroom Mobile presets offer a game-changing advantage for photographers on the go. These ready-made editing filters can transform your images with just a single tap, saving you valuable time and effort.
You'll find that presets help maintain consistency across your photo series, creating a cohesive look for your portfolio or social media feed.
With Lightroom Mobile presets, you can quickly apply professional-level edits to your RAW files, enhancing colors, adjusting exposure, and fine-tuning details.
They're especially useful when you're working with limited time or in challenging lighting conditions. You'll be able to achieve complex edits that would typically require extensive knowledge of Lightroom's tools and settings.
Presets also serve as excellent learning tools. By examining how they affect your images, you can gain insights into advanced editing techniques and develop your own style.
You'll have the flexibility to customize presets, tweaking them to suit your specific needs or preferences. This adaptability guarantees that your edits remain unique and tailored to your vision.
Moreover, you can sync your favorite presets across devices, allowing you to maintain a consistent workflow whether you're editing on your phone, tablet, or computer.
Essential RAW Editing Tools

Once you've mastered presets, it's time to immerse yourself in the vital RAW editing tools in Lightroom Mobile. These tools allow you to fine-tune your images with precision and control.
Start with the basics: adjust exposure, contrast, and highlights to set the overall tone of your image. Then, delve into the shadows and blacks to reveal hidden details or create moody atmospheres.
White balance is essential for accurate color representation. Use the temperature and tint sliders to correct any color casts or create intentional warm or cool tones.
The HSL (Hue, Saturation, Luminance) panel is your go-to for targeted color adjustments. Here, you can tweak individual color channels to enhance specific elements in your photo.
Don't overlook the power of the curves tool. It offers granular control over brightness and contrast across different tonal ranges.
For sharpening and noise reduction, use the detail panel judiciously. Apply sharpening to enhance textures, but be careful not to overdo it.
Selecting the Right Preset Pack

Now that you've honed your RAW editing skills, it's time to explore preset packs that can elevate your workflow. Selecting the right preset pack is vital for achieving consistent, professional results while saving time.
Consider your photography style and the genres you work in most frequently. Look for packs that offer a range of options within your preferred aesthetic.
Pay attention to the versatility of the presets. A good pack should work well across various lighting conditions and subjects. Read reviews and examine before-and-after samples to gauge the quality and effectiveness of the presets.
Don't be swayed by overly dramatic effects; subtle, natural-looking presets often yield the best results.
Consider the compatibility of the preset pack with your version of Lightroom. Some packs are designed specifically for mobile or desktop use, while others work across platforms. Price is also a factor, but remember that investing in high-quality presets can greatly improve your editing efficiency.
Lastly, look for preset packs that offer customization options. The ability to fine-tune presets to your specific needs will help you develop a unique editing style while maintaining consistency across your work.
Moody and Atmospheric Presets

For photographers seeking to infuse their images with depth and emotion, moody and atmospheric presets are invaluable tools.
These presets excel at creating a sense of drama and mystery in your photos, often by manipulating shadows, highlights, and color tones. You'll find that they're particularly effective for landscape, portrait, and street photography.
When using moody presets, you'll notice they typically decrease overall exposure, enhance contrast, and shift color balance towards cooler tones. They often deepen shadows and mute highlights, creating a more somber atmosphere.
Some popular moody presets include "Cinematic Dark," "Moody Forest," and "Rainy Day."
Atmospheric presets, on the other hand, focus on enhancing environmental elements like fog, mist, or haze.
They'll soften your images, reduce clarity, and add a dreamy quality to your photos. Look for presets like "Misty Morning," "Foggy Forest," or "Hazy Sunset" to achieve this effect.
Vibrant Color Enhancement Presets

While moody presets create atmospheric depth, vibrant color enhancement presets take your images in the opposite direction. These presets amplify colors, boost saturation, and increase contrast to produce eye-catching, lively photos. You'll find them particularly useful for landscape, travel, and lifestyle photography where you want to showcase the vibrancy of a scene.
When selecting vibrant color presets, look for options that offer fine-tuned control over individual color channels. This allows you to enhance specific hues without oversaturating the entire image. Here's a quick comparison of popular vibrant color presets:
| Preset Name | Color Boost | Contrast | Clarity | Versatility |
|---|---|---|---|---|
| Vivid Pro | High | Medium | High | 4/5 |
| Color Pop | Very High | High | Medium | 3/5 |
| Neon Dreams | Extreme | Low | Low | 2/5 |
| Nature Glow | Medium | High | High | 5/5 |
| Sunset Hues | High | Medium | Medium | 4/5 |
Remember to use these presets as a starting point. You'll often need to make additional adjustments to achieve the perfect balance for your specific image. Pay attention to skin tones and avoid over-processing, which can lead to unrealistic results.
Black and White Conversion Presets

Black and white photography offers timeless appeal, and Lightroom's conversion presets can help you achieve stunning monochrome results.
You'll find presets that emulate classic film styles, creating rich tones and smooth gradients reminiscent of traditional darkroom prints.
For those seeking more impact, dramatic contrast presets can transform your images with deep blacks and brilliant highlights, adding a striking intensity to your black and white compositions.
Classic Monochrome Styles
Through the lens of classic monochrome styles, your photos can take on a timeless quality that transcends color. These presets offer a range of monochromatic looks inspired by iconic black and white photography techniques.
You'll find options that emulate the contrast and grain of vintage film stocks, as well as presets that replicate the tonal range of traditional darkroom processes.
When choosing classic monochrome presets, consider the mood you want to convey. High-contrast presets with deep blacks and bright highlights can create dramatic, punchy images, while softer, low-contrast options offer a more subtle, dreamy aesthetic.
Look for presets that offer fine control over tonal curves, allowing you to adjust the balance of shadows, midtones, and highlights to suit your subject.
Many classic monochrome presets also include options for adding film grain, vignettes, and subtle color tints to enhance the vintage feel.
Experiment with these elements to add depth and character to your images. Remember, these presets are starting points – don't hesitate to fine-tune the settings to achieve your desired look and make your monochrome edits truly unique.
Dramatic Contrast Presets
Dramatic contrast presets take black and white photography to striking new heights. These presets emphasize the interplay between light and shadow, creating bold, eye-catching images that command attention.
You'll find that they're particularly effective for architectural shots, portraits with strong lighting, and landscape photos with dramatic skies.
When using dramatic contrast presets, you'll notice how they push the boundaries of tonal range. Highlights become brighter and shadows deeper, resulting in a high-impact look that's perfect for making your images stand out on social media or in print.
Many of these presets also include grain effects to add a touch of vintage charm or gritty realism to your photos.
Look for presets that offer fine-tuning options, allowing you to adjust the intensity of the contrast and other elements. This flexibility guarantees you can achieve the perfect balance for each image.
Some popular dramatic contrast presets include VSCO's B&W series, RNI's All Films B&W, and Mastin Labs' Ilford B&W pack.
Experiment with different presets to find the ones that best suit your style and the mood you want to convey in your black and white photography.
Portrait-Optimized Presets for RAW

When working with RAW portrait files, you'll want presets that enhance skin tones, create eye-popping details, and add dramatic lighting effects.
These specialized presets can instantly transform your portraits, giving them a professional polish with just a few clicks.
Skin Tone Enhancement
Skin tone enhancement is a crucial aspect of portrait editing, and portrait-optimized presets for RAW files can make this process much easier. When you're working with RAW images, you have more latitude to adjust skin tones without sacrificing image quality.
Look for presets that offer a range of options for different skin types, from fair to deep. The best skin tone enhancement presets will help you achieve natural-looking results by adjusting color temperature, tint, and hue.
They'll also fine-tune saturation and luminance to create a healthy, vibrant appearance without overdoing it. Some presets include specific tools for reducing redness, evening out skin texture, and softening blemishes.
You'll want to choose presets that allow for easy customization, as every portrait is unique. Seek out options that provide a good starting point but still give you control over individual parameters.
This way, you can tweak the preset to suit your subject's specific skin tone and lighting conditions.
Eye-Popping Detail Presets
While skin tone enhancement sets the foundation for stunning portraits, eye-popping detail presets take your RAW images to the next level.
These presets are designed to bring out the intricate details in your subject's features, creating a striking and professional look. They're particularly effective for highlighting eyes, hair texture, and facial contours.
When selecting eye-popping detail presets for your RAW edits, consider these key factors:
- Clarity and sharpness: Look for presets that enhance overall image clarity without introducing artifacts or over-sharpening.
- Micro-contrast: Choose presets that boost local contrast, bringing out fine details without flattening the overall tonal range.
- Texture enhancement: Opt for presets that accentuate skin texture and hair details without making the image appear gritty or unnatural.
- Customizability: Select presets that allow for fine-tuning, as you'll often need to adjust settings based on your specific image and subject.
Dramatic Lighting Effects
Mastering dramatic lighting effects can transform your portraits from ordinary to extraordinary. With the right Lightroom presets, you'll achieve stunning results that highlight your subject's features and create mood-rich images. These presets are designed to enhance shadows, boost highlights, and add depth to your RAW photos.
When selecting dramatic lighting presets, consider the following options:
| Preset Name | Key Features | Best For |
|---|---|---|
| Chiaroscuro | High contrast, deep shadows | Moody portraits |
| Golden Hour | Warm tones, soft highlights | Outdoor shots |
| Studio Glam | Crisp details, sculpted light | Fashion photos |
| Film Noir | Vintage look, dramatic shadows | Black & white |
These presets offer a starting point for your edits. You'll want to fine-tune the settings to match your specific lighting conditions and subject. Pay attention to the histogram to guarantee you're not clipping highlights or shadows. Experiment with local adjustments to further enhance specific areas of your portrait.
Landscape and Nature Preset Collections

Along with portrait presets, landscape and nature preset collections are among the most popular choices for photographers. These presets can transform your outdoor shots, enhancing colors, contrast, and mood in order to create stunning images that capture the essence of natural scenery.
When choosing landscape and nature presets, you'll want to evaluate collections that offer:
- Versatility: Look for presets that work well with various types of landscapes, from lush forests to arid deserts.
- Color enhancement: Seek out presets that boost natural colors without making them appear oversaturated or artificial.
- Sky and cloud optimization: Find presets that bring out the detail in skies and clouds, adding drama to your images.
- Seasonal variations: Choose collections that include presets tailored for different seasons, allowing you to highlight the unique characteristics of each.
Don't forget to experiment with different presets to find the ones that best suit your style. You can also use these presets as starting points and fine-tune the settings to achieve your desired look.
Urban and Street Photography Presets

For urban and street photography, specialized Lightroom presets can elevate your images to capture the gritty, dynamic essence of city life.
These presets often emphasize contrast, vibrant colors, and moody atmospheres that complement urban scenes.
Look for preset collections that offer a range of styles, from high-contrast black and white to cinematic color grading.
You'll want presets that enhance the textures of concrete, metal, and glass while preserving the details in shadows and highlights.
Some popular urban presets include those that emulate film stocks like Kodak Portra or Fuji Superia for a timeless street photography look.
Don't overlook presets designed for night photography, as they can help you manage challenging low-light situations common in cityscapes.
These often include noise reduction and exposure adjustments tailored for after-dark shots.
When choosing urban presets, consider those that offer subtle HDR effects to bring out the drama in architectural details and sky textures.
Vintage and Film Emulation Presets

While urban presets capture modern cityscapes, vintage and film emulation presets transport your images to another era. These presets recreate the look and feel of classic film stocks, giving your digital photos a timeless quality. They're perfect for adding nostalgia, warmth, and character to your shots.
When choosing vintage and film emulation presets, consider these factors:
- Film type: Different presets emulate specific film stocks like Kodak Portra, Fujifilm Velvia, or Ilford HP5.
- Color palette: Vintage presets often feature muted tones, enhanced grain, and subtle color shifts.
- Contrast and fade: Many film-inspired presets add a soft contrast and slight fade to mimic aged photographs.
- Light leaks and artifacts: Some presets include light leaks or dust overlays for added authenticity.
You'll find presets that recreate the look of 35mm, medium format, and even instant films. Experiment with various options to find the perfect vintage style for your images.
Creating Custom Presets for RAW

Creating custom presets for RAW files offers unparalleled control over your editing process. You'll have the flexibility to fine-tune every aspect of your image, from exposure and white balance to color grading and sharpening. Start by adjusting the basic settings to achieve your desired look, then move on to more advanced tweaks like tone curves and HSL adjustments.
When creating your custom preset, focus on developing a consistent style that suits your photography. Experiment with different combinations of settings to achieve unique looks that set your work apart. Remember to test your preset on various images to verify it works well across different lighting conditions and subjects.
| Step | Action | Result |
|---|---|---|
| 1 | Adjust basic settings | Set foundation for overall look |
| 2 | Fine-tune advanced options | Add depth and character |
| 3 | Save and name preset | Create reusable editing tool |
Once you've perfected your custom preset, you can apply it to multiple RAW files with just a click, streamlining your workflow and maintaining consistency across your portfolio. Don't be afraid to create multiple presets for different scenarios or moods, giving you a versatile toolkit for any editing situation.
Optimizing Presets for Social Media

Social media's unique display requirements demand specially tailored Lightroom presets. To optimize your presets for various platforms, you'll need to take into account factors like aspect ratios, color vibrancy, and file size limitations.
Start by creating platform-specific preset variations that cater to each social media site's specifications.
When optimizing your presets for social media, follow these key steps:
- Adjust exposure and contrast to guarantee your images pop on small screens.
- Enhance colors slightly to compensate for compression and maintain vibrancy.
- Apply sharpening judiciously to improve detail without introducing artifacts.
- Fine-tune the crop to fit common aspect ratios (1:1 for Instagram, 16:9 for YouTube, etc.).
Don't forget to test your presets on different devices to verify consistency across platforms.
You'll want to strike a balance between eye-catching visuals and maintaining image quality after compression.
Think about creating separate preset versions for Instagram stories, Facebook posts, and Twitter images to maximize impact.
Frequently Asked Questions
Can I Use Lightroom Presets on Non-Raw Images?
Yes, you can use Lightroom presets on non-RAW images. They'll work on JPEGs, PNGs, and other file formats. However, you'll have less flexibility and editing power compared to RAW files. Still, presets can enhance your non-RAW photos effectively.
How Do I Transfer Lightroom Presets Between Desktop and Mobile Versions?
To transfer Lightroom presets between desktop and mobile versions, you'll need to sync them through Adobe Creative Cloud. First, verify you're signed in on both devices. Then, create or import presets on desktop and they'll automatically sync to mobile.
Are There Free Lightroom Presets Available for Mobile RAW Editing?
Yes, you'll find free Lightroom presets for mobile RAW editing. You can download them from various websites and photography communities. Don't forget to explore Adobe's free preset packs, which are easily accessible within the app itself.
Can I Stack Multiple Presets in Lightroom Mobile?
Yes, you can stack multiple presets in Lightroom Mobile. You'll need to apply one preset, then make adjustments, and save those changes as a new preset. Repeat this process to layer different effects for unique edits.
How Often Should I Update My Lightroom Preset Collection?
You should update your Lightroom preset collection regularly to keep your editing style fresh. Aim for every few months, or whenever you feel inspired. Don't forget to explore new trends and techniques to enhance your creative workflow.
In Summary
You've now got the tools to elevate your mobile RAW photography with Lightroom presets. Remember, they're not just quick fixes but springboards for your creativity. Experiment with different styles, customize to your taste, and don't be afraid to create your own. As you refine your editing skills, you'll develop a signature look that stands out. Keep pushing your boundaries, and soon you'll be producing pro-level edits right from your phone.


Leave a Reply