
Essential mobile lighting setups for product photography include natural window light, portable LED panels, and ring lights. You'll achieve professional results with a window setup using foam board reflectors and diffusers. LED panels offer flexibility, allowing you to create three-point lighting configurations. Ring lights provide even illumination, perfect for close-ups and minimizing harsh shadows. For smartphone users, compact softboxes and DIY lightboxes are game-changers. Don't forget to experiment with light painting apps and remote triggering for added creativity. By mastering these techniques, you'll elevate your product shots from amateur to pro-level. The world of mobile product photography is full of exciting possibilities waiting to be explored.
Natural Window Light Setup

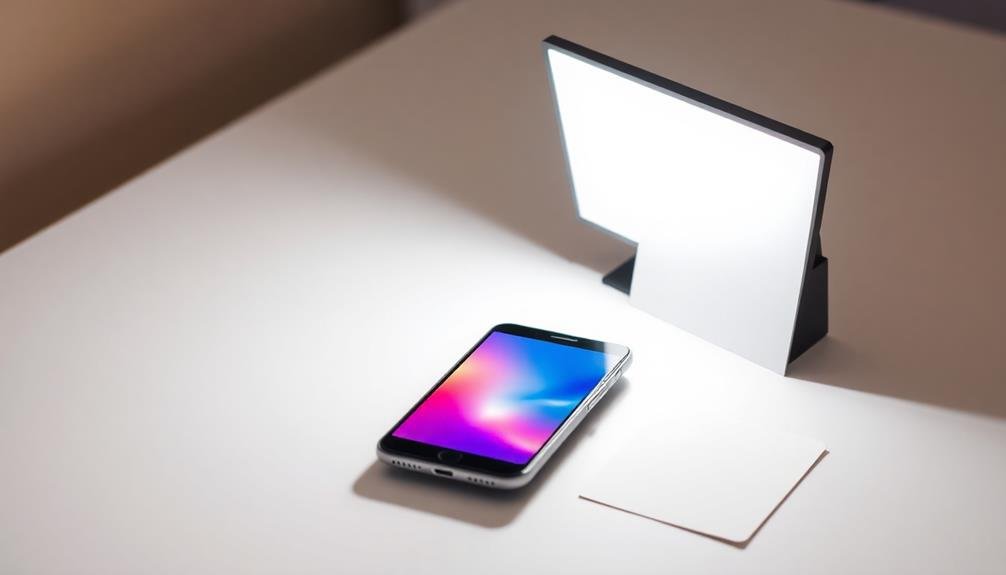
Natural window light is a product photographer's best friend. It's soft, flattering, and doesn't require expensive equipment. To set up a window light product shoot, you'll need a window, a table, and a few simple tools.
Position your table perpendicular to the window, about 2-3 feet away. Place your product on the table, with the window to its side. This setup creates beautiful, directional lighting that highlights your product's features. For darker shadows, move the product closer to the window; for softer light, move it farther away.
Use a white foam board or reflector opposite the window to bounce light back onto the product, filling in shadows. If the light's too harsh, diffuse it with a thin white curtain or sheet over the window. For more control, use a black foam board to create shadows and add contrast.
Experiment with different times of day to find the best light. Early morning or late afternoon often provide warm, golden light, while midday offers cooler, bluer tones. Cloudy days are perfect for soft, even lighting.
Remember to adjust your camera's white balance to match the light source for accurate colors.
Portable LED Panel Techniques
While natural window light offers excellent results, portable LED panels provide flexibility and control for product photographers on the move. These lightweight, battery-powered devices allow you to create professional lighting setups in any location. You'll have the ability to adjust color temperature and brightness, giving you precise control over your product's appearance.
To use LED panels effectively, start by positioning your main light at a 45-degree angle to your product. Add a fill light on the opposite side to soften shadows. For a more dramatic look, use a backlight to create separation between the product and background. Experiment with different panel sizes and diffusers to achieve the desired effect.
Here's a quick guide to common LED panel techniques:
| Technique | Setup | Effect |
|---|---|---|
| Key Light | Single panel, 45° angle | Main illumination |
| Fill Light | Second panel, opposite key | Reduce shadows |
| Backlight | Panel behind product | Create separation |
| Side Light | Panels on both sides | Highlight texture |
| Top Light | Panel above product | Minimize shadows |
Remember to adjust your camera settings to complement your LED setup. Balancing your white balance and exposure will guarantee your products look their best in the final images.
Ring Light for Even Illumination

Ring lights are a versatile tool for highlighting products evenly from all angles.
You'll find they're particularly effective at minimizing harsh shadows, creating a soft, flattering light that enhances your product's features.
Their compact and portable design makes them an ideal choice for on-location shoots or small studio spaces.
Versatile Product Highlighting
In addition to traditional lighting setups, ring lights have become indispensable tools for versatile product highlighting. These circular light sources offer a unique way to showcase your products, creating eye-catching reflections and eliminating harsh shadows.
You'll find that ring lights are particularly effective for small to medium-sized items, especially those with reflective surfaces.
When using a ring light for product highlighting, position it directly above or in front of your subject. This placement guarantees even illumination across the entire product, emphasizing its shape and texture. You can easily adjust the intensity of the light to suit your needs, allowing for subtle or dramatic effects.
For added versatility, consider using colored gels or diffusers with your ring light. These accessories can help you create different moods or match specific brand aesthetics.
You'll also find that ring lights work well in combination with other light sources, allowing you to craft more complex lighting setups.
Don't forget to experiment with different angles and distances. Moving the ring light closer to your product will create softer shadows and more pronounced reflections, while increasing the distance will result in a more even, diffused light across the entire scene.
Minimizing Harsh Shadows
Often, harsh shadows can detract from the visual appeal of product photos, making it vital to minimize their impact.
Ring lights are an excellent tool for achieving even illumination and reducing unwanted shadows. By encircling your product with a continuous light source, you'll create soft, wraparound lighting that eliminates harsh contrasts.
When using a ring light for product photography, position it directly in front of your subject. This setup guarantees that light falls evenly on all sides, effectively filling in shadows and creating a clean, professional look. You can adjust the intensity of the ring light to suit your needs, allowing for greater control over the final image.
To further enhance your product shots and minimize shadows:
- Use a diffuser to soften the light and create a more flattering effect
- Experiment with different angles to find the most flattering position for your product
- Incorporate reflectors to bounce light back onto shadowy areas
Compact and Portable
For photographers on the go, compact and portable ring lights are essential tools in creating professional product shots anywhere. These versatile devices offer even illumination, reducing harsh shadows and creating a soft, flattering light that's perfect for product photography.
You'll find that ring lights come in various sizes, with smaller options being ideal for mobile setups. When choosing a portable ring light, look for models that are lightweight and easily collapsible.
Many modern ring lights feature adjustable color temperatures and brightness levels, allowing you to fine-tune your lighting setup to match any environment. USB-rechargeable batteries are a game-changer, ensuring you're never tethered to a power outlet during shoots.
To maximize the effectiveness of your ring light, position it directly in front of your product. This placement eliminates shadows and creates a clean, professional look.
For added versatility, consider a ring light with a built-in phone mount, enabling you to capture high-quality images using your smartphone. Some models even offer additional features like Bluetooth connectivity and remote control options, further enhancing your mobile photography workflow.
With a compact ring light in your kit, you'll be ready to capture stunning product photos wherever your work takes you.
Softbox Solutions for Smartphones

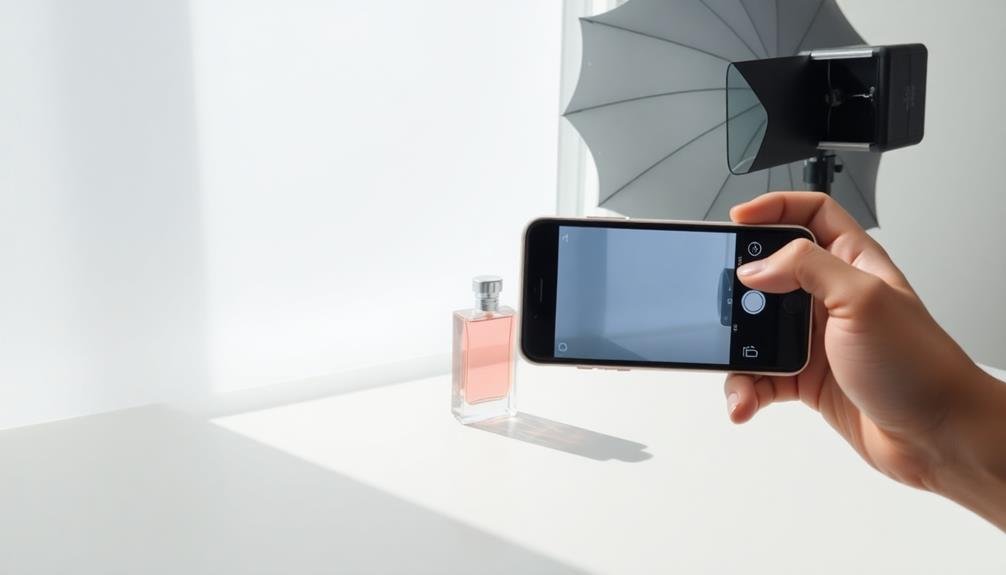
Softbox solutions for smartphones have revolutionized product photography on the go. These compact, versatile tools allow you to create professional-looking images with soft, diffused light, all while using your mobile device. By attaching a small softbox to your phone, you'll be able to control shadows, reduce harsh reflections, and achieve a more flattering look for your products.
When choosing a softbox for your smartphone, consider the size and portability. Many options fold down for easy transport, making them ideal for on-location shoots. Look for models with adjustable light intensity and color temperature to give you more control over your final image.
Here are some key benefits of using softbox solutions for smartphone product photography:
- Improved light quality and softness
- Greater control over shadows and highlights
- Professional-looking results without expensive equipment
To get the most out of your smartphone softbox, experiment with different angles and distances from your subject. You'll find that even small adjustments can greatly impact the final look of your product photos.
Don't forget to use your phone's manual camera settings to fine-tune exposure and white balance for best results.
Reflector Placement and Usage

Mastering reflector placement and usage can dramatically enhance your mobile product photography. Reflectors help you control light, fill shadows, and add highlights to your subjects. You'll want to experiment with different angles and distances to achieve the desired effect.
Start by positioning your main light source, then use reflectors to bounce light back onto the product. For a soft, even light, place a large reflector opposite your main light. To add dimension, use smaller reflectors at various angles around the subject.
Here's a quick guide to reflector types and their effects:
| Reflector Type | Best Use | Effect |
|---|---|---|
| White | General purpose | Soft, neutral fill |
| Silver | Highlight emphasis | Bright, contrasty |
| Gold | Warm tones | Adds warmth to subject |
Don't forget about natural reflectors in your environment. A white wall or piece of foam board can serve as an excellent reflector in a pinch. As you practice, you'll develop an intuition for reflector placement that'll elevate your product shots from amateur to professional-looking with minimal equipment.
DIY Lightbox for Small Products
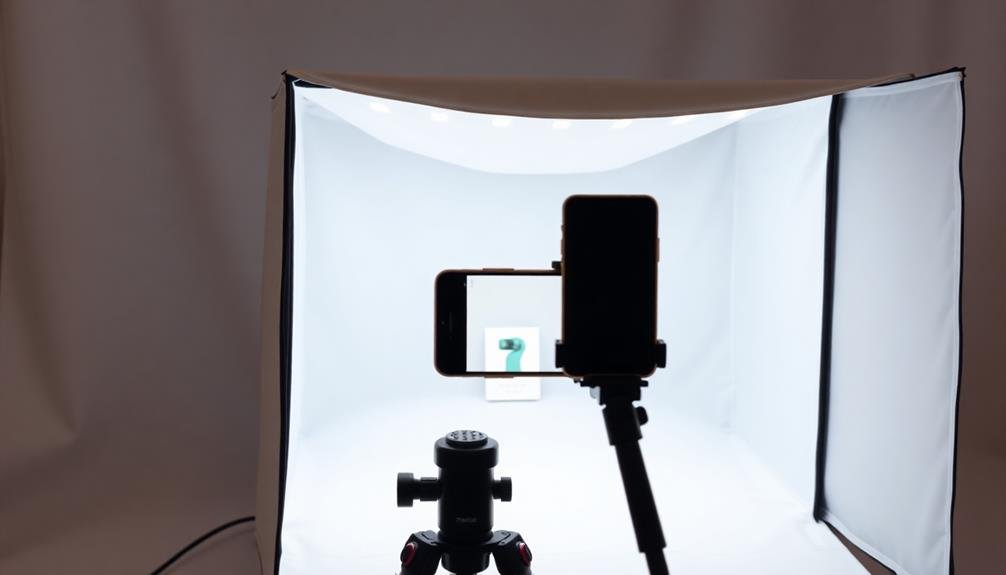
While reflectors are invaluable tools, creating a controlled environment for small product photography can take your shots to the next level. A DIY lightbox is an excellent solution for capturing small items with consistent lighting and a clean background. You can easily construct one using materials you likely have at home or can obtain inexpensively.
To build your lightbox, start with a cardboard box and cut out large windows on the top and sides, leaving a frame for structure. Cover these openings with white tissue paper or translucent fabric to diffuse light. Line the interior with white poster board for a seamless background. Place your product inside and position your lights outside the box, shining through the diffused openings.
Here's why a DIY lightbox is beneficial:
- Provides even, soft lighting for small products
- Eliminates unwanted shadows and reflections
- Creates a clean, professional look with minimal effort
Experiment with different light positions around your lightbox to achieve the desired effect. You can also customize your setup by adding colored backgrounds or textured surfaces to complement your product.
With this simple DIY solution, you'll dramatically improve your small product photography results.
Color Gels for Creative Effects
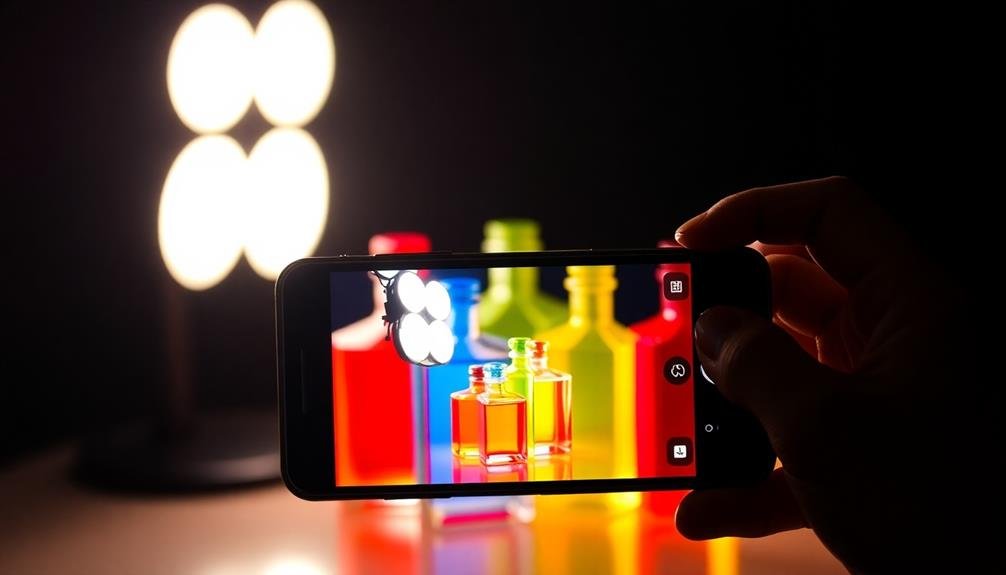
Elevate your product photography with color gels for unique and eye-catching effects. These thin, transparent sheets of colored plastic can transform your lighting setup, adding vibrant hues and dramatic shadows to your shots. You'll find color gels in various shades, from bold primary colors to subtle pastels.
To use color gels effectively, start by attaching them to your light sources. Cut the gel to fit your light, ensuring it covers the entire surface. Secure it with clips or gaffer tape, being careful not to block any ventilation.
Experiment with different color combinations to create mood and depth in your images. For example, use a blue gel on your key light and an orange gel on your fill light for a striking contrast.
Consider the product's natural colors when selecting gels. Complementary colors can make your subject pop, while analogous colors create a harmonious atmosphere. Don't overdo it – sometimes a single colored light is enough to add interest.
Remember to adjust your white balance accordingly, as colored lights can affect your camera's color perception. With practice, you'll master using color gels to produce fascinating product photos that stand out in a crowded marketplace.
Continuous vs. Strobe Lighting

Two main lighting options dominate product photography: continuous and strobe lighting. Continuous lighting provides a constant light source, allowing you to see exactly how your product will look in real-time. It's ideal for beginners and video work.
Strobe lighting, on the other hand, emits brief, powerful bursts of light, freezing motion and providing crisp images.
When choosing between continuous and strobe lighting for your mobile setup, consider these factors:
- Power: Strobes typically offer more power, allowing you to overcome ambient light and achieve greater depth of field.
- Heat: Continuous lights can generate significant heat, potentially damaging delicate products or making long shoots uncomfortable.
- Versatility: Continuous lights work for both photo and video, while strobes are limited to still photography.
For mobile product photography, LED panels are popular continuous light options due to their portability and low heat output.
If you opt for strobes, consider compact speedlights that can easily fit in your kit.
Macro Lighting for Close-ups

When shooting close-up product photos, you'll often need specialized lighting techniques.
Ring lights can provide even illumination for macro shots, eliminating harsh shadows and creating attractive highlights on small objects.
For tiny items, you'll want to use diffusion methods to soften the light and prevent overexposure, ensuring every detail is captured clearly.
Ring Light Techniques
Ring lights have become indispensable tools for macro product photography, offering a unique lighting solution for close-up shots. These circular light sources provide even illumination from all angles, reducing harsh shadows and creating a soft, flattering glow around your products.
When using a ring light for macro photography, position it as close to your lens as possible to maximize its effect.
To achieve the best results with ring lights in product photography, consider these techniques:
- Adjust the intensity: Most ring lights offer variable brightness settings. Experiment with different levels to find the perfect balance for your subject.
- Use color temperature options: Many ring lights allow you to switch between warm and cool tones. This feature helps you match the lighting to your product's characteristics.
- Combine with other light sources: While ring lights are powerful on their own, you can enhance your setup by incorporating additional lights for depth and dimension.
When shooting reflective products, be mindful of the ring-shaped catchlight that may appear in your images. You can minimize this effect by adjusting the angle of your shot or using post-processing techniques.
Remember to experiment with different distances between the ring light and your subject to find the ideal balance of illumination and shadow detail.
Diffusion for Small Objects
Mastering diffusion techniques is essential when capturing small objects in macro photography. When you're working with tiny subjects, even the slightest harsh shadow can ruin your shot. To achieve soft, even lighting, you'll need to diffuse your light source effectively.
Start by using a small softbox or a DIY diffuser made from translucent paper or fabric. Position it close to your subject to create a gentle wrap-around light. For even softer illumination, try bouncing your light off a white surface or using a ring flash with a diffuser attachment.
Don't forget about the background. A light tent can provide a seamless, evenly lit environment for your small objects. If you're on a budget, create a mini studio using a clear plastic container lined with white paper.
Experiment with different angles and distances between your light source, diffuser, and subject. You'll find that subtle adjustments can dramatically affect the final image.
Balancing Ambient and Artificial Light

Striking the right balance between ambient and artificial light is essential for achieving professional-looking product photos. When you're shooting on location, you'll often encounter a mix of natural and artificial light sources. Your goal is to create a harmonious blend that enhances your product's features without overpowering or washing out the image.
Start by evaluating the available ambient light. Is it soft or harsh? Warm or cool? Then, introduce your artificial lighting to complement or contrast with the existing light. Use reflectors or diffusers to soften harsh sunlight, or add fill light to eliminate unwanted shadows.
Remember, you can adjust your camera's white balance to account for mixed lighting conditions.
Consider these tips when balancing ambient and artificial light:
- Use a light meter to measure both ambient and artificial light levels
- Experiment with different ratios between ambient and artificial light
- Adjust your artificial light's color temperature to match or contrast with ambient light
Light Painting With Smartphone Apps

Light painting offers a creative twist to your mobile product photography arsenal. By using smartphone apps designed for light painting, you can add unique, eye-catching effects to your product shots. These apps allow you to use your phone's flashlight or screen as a light source, creating streaks, swirls, or patterns of light around your subject.
To get started, download a light painting app like Light Painting Camera or Slow Shutter Cam. Set up your product in a dark environment and mount your main camera on a tripod. Open the app on a second smartphone, which you'll use as your light source.
Set your main camera to a long exposure, typically between 10-30 seconds. As the exposure begins, move the light-painting phone around your product, creating patterns or highlighting specific areas.
Experiment with different movements, colors, and intensities to achieve various effects. You can outline your product, create a halo effect, or add abstract light designs to the background.
Remember to practice your movements to guarantee smooth, controlled light paths. With patience and creativity, you'll produce stunning, one-of-a-kind product images that stand out in a crowded marketplace.
Diffusion Methods for Harsh Light
When working with mobile lighting setups, harsh light can be a considerable challenge for product photographers. Fortunately, there are several effective diffusion methods you can employ to soften the light and create more flattering product images.
One of the simplest techniques is to use a white paper or cloth as a makeshift diffuser. Place it between your light source and the product to scatter the light and reduce harsh shadows.
For a more professional approach, consider investing in collapsible diffusers designed for mobile photography. These lightweight tools can easily fit in your gear bag and provide consistent results.
Another option is to create a DIY softbox using a cardboard box and translucent material, which can considerably soften your light output.
Here are some key benefits of using diffusion methods:
- Reduces harsh shadows and highlights
- Creates a more even, flattering light on your products
- Minimizes reflections on shiny surfaces
When working with smartphone flash or small LED lights, you can also try bouncing the light off a white surface, such as a wall or ceiling. This indirect lighting technique effectively diffuses the light and creates a softer, more natural look for your product photos.
Remote Triggering for Flexibility

Photographers seeking greater control and flexibility in their mobile product shoots can benefit greatly from remote triggering systems. These tools allow you to fire your camera or flash units from a distance, giving you the freedom to position lights and adjust your setup without constantly returning to the camera.
Wireless triggers come in various forms, from simple infrared systems to more advanced radio frequency units. RF triggers offer greater range and don't require line-of-sight, making them ideal for complex setups.
Many modern triggers also support TTL metering and high-speed sync, enabling you to maintain proper exposure even in challenging lighting conditions.
When choosing a remote trigger, consider compatibility with your camera and flash system. Some brands offer proprietary solutions, while others provide universal options.
Look for triggers with multiple channels to avoid interference when working in busy environments.
For even more control, explore smartphone apps that connect to your camera via Wi-Fi or Bluetooth. These apps often provide live view functionality, allowing you to compose shots and adjust settings remotely.
This can be particularly useful when photographing reflective products or working in tight spaces.
Multi-light Setup Configurations
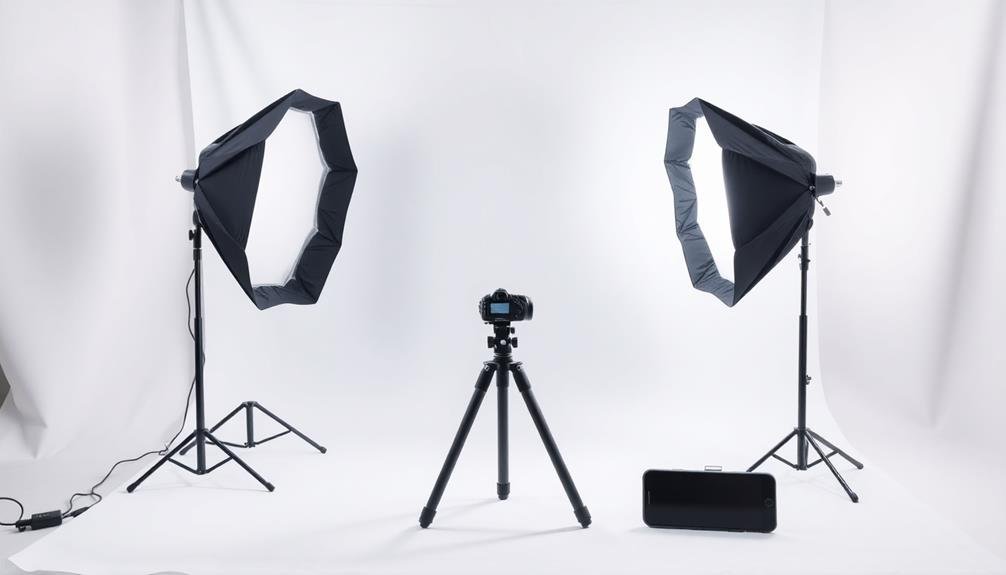
When setting up multiple lights for product photography, you'll want to master two key configurations.
The Three-Point Lighting Technique uses a key light, fill light, and backlight to create depth and highlight your product's features.
For a softer, more even illumination, you can opt for Ring Light Configurations, which wrap light around your subject and minimize harsh shadows.
Three-Point Lighting Technique
The three-point lighting technique is a cornerstone of professional product photography. It's a versatile setup that allows you to create depth, highlight product features, and control shadows effectively. This technique uses three light sources: key light, fill light, and backlight.
Your key light is the primary source, providing the main illumination for your product. Position it at a 45-degree angle to the subject, about 45 degrees above eye level.
The fill light, typically less intense than the key light, softens shadows and adds detail to darker areas. Place it opposite the key light, but lower and at a less severe angle.
Finally, the backlight separates the product from the background, creating a subtle outline or rim light effect.
To master the three-point lighting technique:
- Experiment with light intensity ratios between your key and fill lights
- Adjust the backlight's position to control the rim light effect
- Use diffusers or reflectors to fine-tune shadow softness
Ring Light Configurations
Ring lights have become increasingly popular for product photography, offering a unique lighting solution that can enhance your mobile setup.
These circular light sources provide even illumination, reduce shadows, and create attractive catchlights in reflective surfaces.
To set up a ring light configuration, position your product in the center of the ring. This placement guarantees uniform lighting from all angles, perfect for small to medium-sized items.
For larger products, consider using multiple ring lights to maintain consistent illumination across the entire subject.
You can adjust the intensity and color temperature of your ring light to suit different products and backgrounds. Many ring lights offer dimming options and color filters, allowing you to fine-tune the lighting to complement your subject's characteristics.
For added versatility, combine your ring light with other light sources. Place a small LED panel or reflector behind the product to create separation from the background.
Alternatively, use a second ring light at a different angle to introduce subtle shadows and depth.
When shooting reflective objects, experiment with the ring light's position to control reflections. Slight adjustments can dramatically impact the final image, so take time to find the best placement for each product.
Frequently Asked Questions
How Do I Choose the Right Color Temperature for Product Photography Lighting?
You'll want to match your lighting's color temperature to your product's intended environment. Use daylight (5500K) for natural looks, or warmer tones (3200K) for cozy feels. Consider your product's colors and adjust accordingly.
What Are the Best Practices for Photographing Reflective or Shiny Products?
To photograph reflective or shiny products, you'll want to use diffused lighting and control reflections. Try using a light tent or softboxes, and experiment with angles. Don't forget to use polarizing filters to reduce unwanted glare.
How Can I Achieve Consistent Lighting Across Multiple Product Photoshoots?
You'll want to create a consistent lighting setup. Use the same equipment, angles, and settings for each shoot. Document your setup with photos and notes. This'll guarantee you can replicate the lighting across multiple sessions.
What Lighting Techniques Work Best for Capturing Transparent or Translucent Objects?
For transparent or translucent objects, you'll want to use backlighting to highlight their unique properties. Try placing a light source behind the item and use reflectors to fill in shadows. Don't forget to experiment with diffusion techniques.
How Do I Properly Expose for Both the Product and Its Background?
You'll want to balance exposure for both product and background. Use spot metering on the product, then adjust your settings. If needed, employ fill lights or reflectors to brighten shadows. Don't forget to check your histogram!
In Summary
You've now got a range of mobile lighting techniques at your fingertips. From natural window light to advanced multi-light setups, you're equipped to tackle any product photography challenge. Don't forget to experiment with different combinations and apps to find your unique style. With practice, you'll master these portable setups, allowing you to create stunning product images anywhere, anytime. Keep exploring, refining your skills, and watch your product photography shine.


Leave a Reply