
To capture stunning natural light portraits with your phone, focus on golden hour lighting for warm, flattering tones. Position your subject at a 45-degree angle to the light source for depth and dimension. On overcast days, take advantage of soft, diffused light for even skin tones. Use window light indoors, experimenting with distance and angles. Employ simple reflectors like white boards to fill shadows. Adjust your phone's exposure and white balance settings for accuracy. Compose shots using the rule of thirds and encourage natural poses. With these pro tips, you'll be well on your way to creating professional-looking portraits. The world of smartphone portraiture has even more to offer.
Understanding Natural Light Sources

Mastering natural light sources is essential for creating stunning portraits. When shooting with your phone, you'll encounter various types of natural light, each with unique qualities. The sun is your primary light source, but its position and intensity change throughout the day, affecting your portraits dramatically.
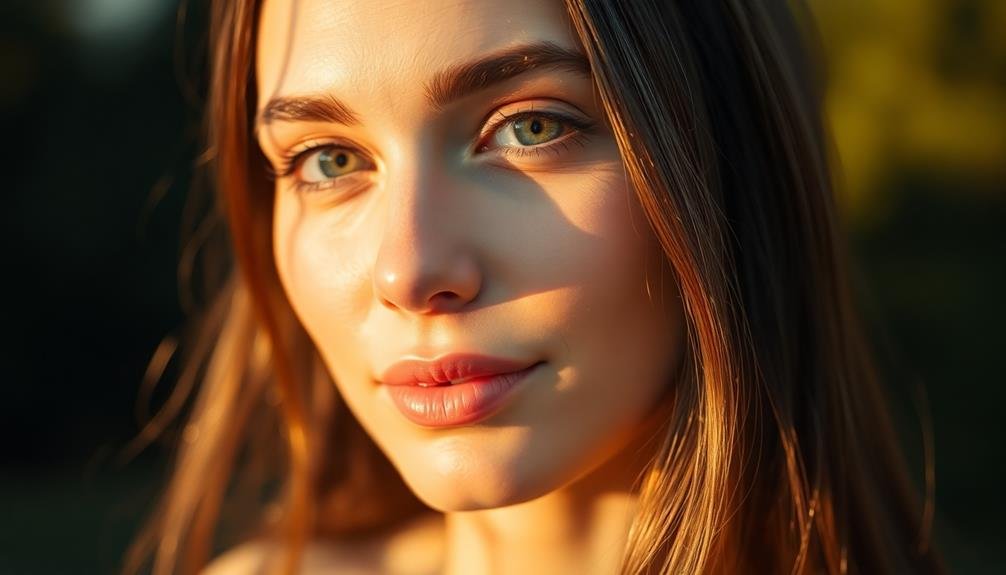
During the golden hours—just after sunrise and before sunset—you'll find soft, warm light that's ideal for flattering portraits. Midday sun creates harsh shadows and high contrast, which can be challenging but also creative. Overcast days provide diffused light, perfect for even illumination and soft shadows.
Pay attention to reflected light from surfaces like buildings, water, or light-colored walls. These can act as natural reflectors, filling in shadows and adding dimension to your subject. Window light is another excellent source, offering directional illumination that's flattering for indoor portraits.
To understand light better, observe how it interacts with your subject's features. Notice how it affects skin tones, highlights, and shadows. Experiment with different angles and times of day to see how the light changes.
With practice, you'll develop an intuitive sense of how to use natural light to your advantage in portrait photography.
Golden Hour Photography Techniques
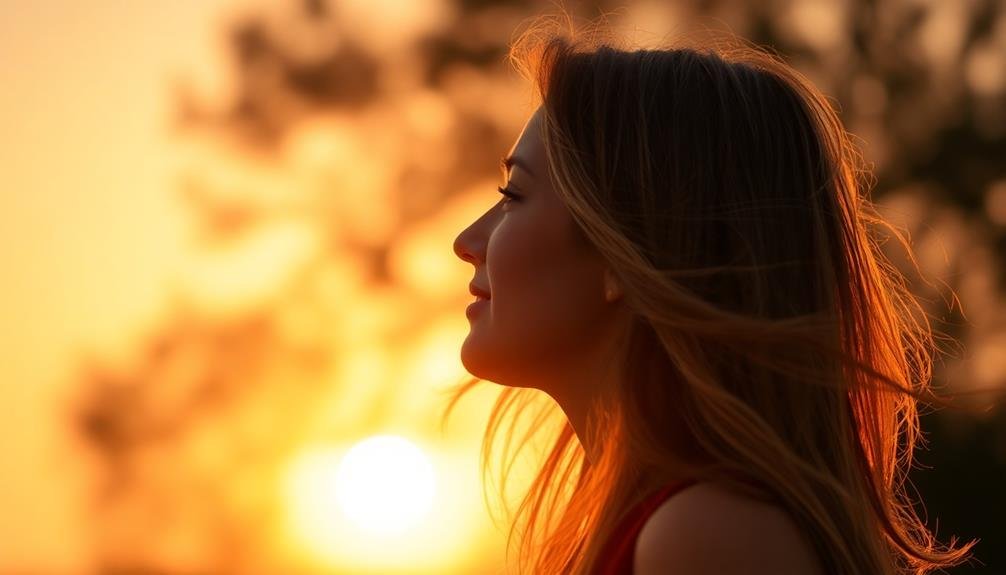
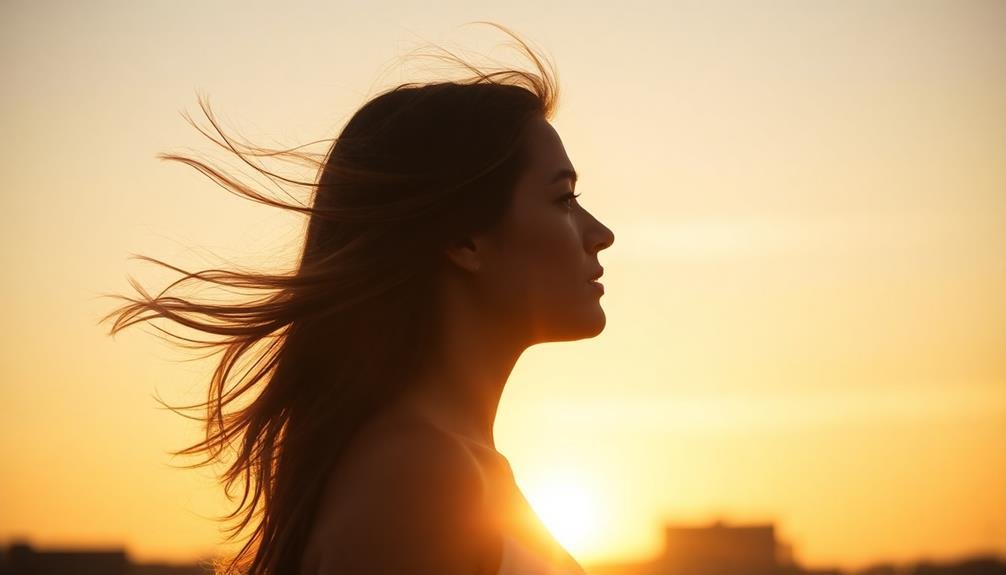
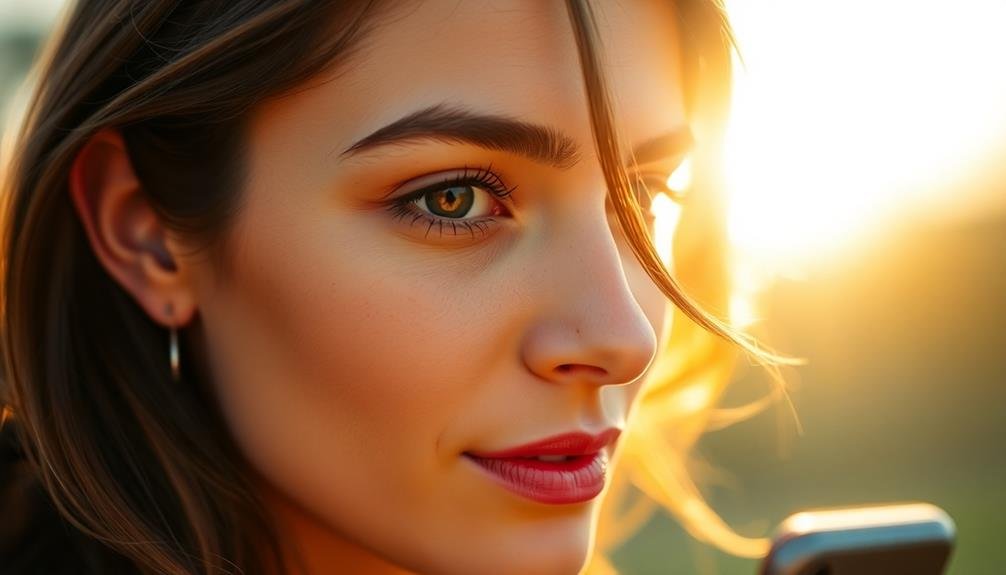
The golden hour offers unparalleled opportunities for portrait photography. This magical time occurs shortly after sunrise or before sunset when the sun is low on the horizon, casting a warm, soft light.
To make the most of this fleeting window, position your subject with the sun behind them for a beautiful backlit effect. This creates a natural glow around their hair and edges, adding depth to your image.
Experiment with side lighting by having your subject turn 90 degrees to the sun. This technique accentuates facial features and adds dimension to your portraits.
For a softer look, use the sun as a front light, but be careful not to let your subject squint. You can also try silhouettes by exposing for the bright sky and letting your subject fall into shadow.
Don't forget to adjust your phone's camera settings. Lower the exposure slightly to preserve the warm tones and prevent overexposure. Use portrait mode if available, and experiment with HDR to capture a wider range of tones.
Overcast Days: Soft Light Advantages
On overcast days, you'll discover a photographer's secret weapon: soft, diffused light. This even lighting distribution creates flattering skin tones and minimizes harsh shadows, making your subjects look their best.
You'll find that overcast conditions offer a forgiving environment for portraits, allowing you to focus on composition and connection with your subject rather than battling harsh contrasts.
Even Lighting Distribution
Soft, diffused light on overcast days offers a unique advantage for portrait photographers. You'll find that this type of lighting creates an even distribution across your subject's face, minimizing harsh shadows and reducing the need for additional equipment like reflectors or diffusers.
When shooting portraits on an overcast day, you'll notice that the clouds act as a giant softbox, spreading light evenly across the scene. This natural diffusion helps to smooth out skin texture and minimize blemishes, resulting in a flattering look for your subject.
You'll also have more flexibility in positioning your subject, as you won't need to worry about strong directional light creating unflattering shadows. To make the most of even lighting distribution, encourage your subject to face different directions and experiment with various angles.
You'll find that the consistent light allows for a wider range of poses and expressions without dramatic changes in exposure. Remember to adjust your camera's white balance to account for the cooler tones typically associated with overcast conditions. This will help guarantee accurate skin tones and overall color balance in your portraits.
Flattering Skin Tones
Overcast days offer more than just even lighting distribution; they're a boon for achieving flattering skin tones in natural light portraits. The soft, diffused light minimizes harsh shadows and reduces contrast, creating a smooth, even complexion for your subject. This natural light softbox effect helps to hide blemishes and wrinkles, resulting in a more flattering appearance.
To make the most of overcast conditions for skin tones, consider these tips:
- Position your subject facing the brightest part of the sky
- Use a reflector to bounce light onto shadowed areas
- Experiment with different angles to find the most flattering light
- Avoid direct sunlight peeking through clouds, which can create unflattering highlights
- Adjust your phone's white balance to compensate for the cooler light
You'll find that overcast days provide a forgiving environment for capturing skin tones. The absence of harsh shadows allows for more accurate color reproduction, reducing the risk of unflattering highlights or overly dark shadows.
This natural softening effect can be particularly beneficial for portraits of older subjects or those with skin concerns, as it helps to create a more youthful and radiant appearance without the need for extensive post-processing.
Reduced Harsh Shadows
Consistently, overcast days prove to be a photographer's ally in reducing harsh shadows for natural light portraits. The diffused light created by cloud cover acts as a giant softbox, spreading light evenly across your subject's face. This soft illumination minimizes unflattering shadows that can accentuate wrinkles, blemishes, or under-eye circles.
To take advantage of overcast conditions, position your subject facing the brightest part of the sky. This technique guarantees even lighting across their features. You'll notice a significant reduction in harsh shadows around the eyes, nose, and chin compared to direct sunlight. The soft light also allows for greater flexibility in posing, as you won't need to worry about your subject squinting or casting strong shadows.
When shooting on overcast days, increase your phone's ISO slightly to compensate for the reduced light. This will help maintain a faster shutter speed, reducing the risk of motion blur. Additionally, consider using your phone's HDR mode to capture a wider range of tones in the softer light.
Window Light Portrait Strategies

Why is window light so revered by portrait photographers? It's simple: windows provide a soft, directional light source that flatters subjects and creates depth. When you're using your phone for portraits, window light can be your secret weapon for stunning results.
To make the most of window light, try these strategies:
- Position your subject at a 45-degree angle to the window
- Use sheer curtains to diffuse harsh sunlight
- Experiment with different distances from the window
- Place a reflector opposite the window to fill shadows
- Shoot during golden hour for warm, flattering light
Remember, the size of the window matters. Larger windows create softer light, while smaller ones produce more dramatic shadows. You can control the light's intensity by moving your subject closer to or farther from the window.
On overcast days, windows act as giant softboxes, providing even, flattering light across your subject's face.
Don't be afraid to play with backlight, either. Position your subject between the camera and the window for a dreamy, ethereal effect. Just be sure to expose for the face to avoid silhouettes.
Reflectors: Enhancing Natural Light

Reflector magic can transform your natural light portraits from good to great. These simple tools bounce light back onto your subject, filling in shadows and adding a sparkle to the eyes. You don't need expensive equipment; a white foam board or even a light-colored wall can serve as an effective reflector.
Position your reflector opposite the main light source to balance the lighting. For window portraits, place it on the shadowed side of your subject's face. Experiment with different angles to achieve the desired effect. Tilting the reflector slightly upward can create a natural-looking catchlight in the eyes.
Don't limit yourself to white reflectors. Silver ones provide a cooler, more intense light, while gold reflectors add warmth to skin tones. For a softer effect, try using a translucent reflector as a diffuser.
When using your phone, activate HDR mode to capture a wider range of tones. This helps preserve details in both highlights and shadows.
Smartphone Camera Settings for Portraits
Modern smartphones pack a punch when it comes to portrait photography, offering a range of settings to enhance your shots. To capture stunning natural light portraits, you'll want to familiarize yourself with your phone's camera settings. Start by enabling HDR mode, which balances exposure in high-contrast scenes. Next, tap to focus on your subject's face and adjust the exposure slider to fine-tune brightness.
For a professional look, try these advanced settings:
- Portrait mode: Creates a shallow depth of field effect
- Manual focus: Allows precise control over the focal point
- White balance: Adjusts color temperature for accurate skin tones
- Grid overlay: Helps with composition and framing
- RAW format: Captures more data for post-processing flexibility
Don't forget to experiment with your phone's built-in filters and editing tools. These can help enhance colors, contrast, and overall mood of your portraits.
When shooting outdoors, use the rule of thirds to position your subject off-center for a more dynamic composition. Finally, remember that natural light changes throughout the day, so adjust your settings accordingly to capture the best possible portraits in any lighting situation.
Composition Rules for Phone Portraits

While mastering your smartphone's camera settings is important, understanding composition rules can elevate your portrait photography to the next level.
Start by applying the rule of thirds: imagine your screen divided into a 3×3 grid and place your subject along these lines or at their intersections. This creates a more balanced and visually appealing image.
Pay attention to framing. Use natural elements like trees, doorways, or windows to frame your subject, adding depth and context to your portraits.
Don't be afraid to leave negative space around your subject; it can create a sense of openness and draw attention to your main focus.
Consider the background carefully. A cluttered or distracting backdrop can detract from your subject, so opt for simple, clean backgrounds when possible.
If you can't change locations, use portrait mode to blur the background.
Experiment with different angles. Get low for a powerful, imposing look, or shoot from above for a more flattering angle.
Try unconventional perspectives to add interest to your portraits.
Posing Techniques for Natural Shots

Capturing natural-looking portraits requires more than just technical skill—it's about making your subject feel comfortable and relaxed. When posing your subject, aim for authenticity rather than forced positions. Encourage them to move naturally and interact with their surroundings.
Avoid stiff, unnatural poses by giving gentle direction and allowing your subject's personality to shine through.
To achieve natural-looking shots, try these posing techniques:
- Ask your subject to lean against a wall or tree for a casual, relaxed look
- Have them walk towards you, capturing candid moments in motion
- Suggest they play with their hair or adjust their clothing for organic movement
- Prompt genuine laughter by telling a joke or asking them to recall a funny memory
- Encourage them to look away from the camera, creating a sense of mystery
Remember to keep communication open throughout the shoot. Offer positive feedback and show your subject some of the great shots you've captured to boost their confidence.
Utilizing Shadows in Portraits

Shadows can be your secret weapon in natural light portraits.
You'll want to master shadow play techniques to add depth and intrigue to your images. By strategically positioning your subject relative to the light source, you can create dramatic contrasts that elevate your portraits from ordinary to extraordinary.
Shadow Play Techniques
One of the most dynamic elements in natural light portraiture is the interplay between light and shadow. By mastering shadow play techniques, you'll elevate your portraits from ordinary to extraordinary.
Embrace shadows as a creative tool to add depth, drama, and intrigue to your images.
To effectively use shadow play in your portraits:
- Position your subject near a window or doorway
- Experiment with side lighting for dramatic contrast
- Use dappled light from trees for a soft, dreamy effect
- Create silhouettes by placing your subject in front of a bright background
- Utilize reflective surfaces to bounce light and fill in shadows
Don't be afraid to push the boundaries of traditional portraiture.
Try partially obscuring your subject's face with shadows to create an air of mystery. Use strong directional light to emphasize facial features or create interesting patterns on the skin.
Experiment with backlighting to create a halo effect around your subject's hair.
Dramatic Contrasts Creation
Three key elements are essential for creating dramatic contrasts in portrait photography: strong directional light, strategic subject positioning, and careful exposure control. To achieve this effect, you'll need to find or create a light source that casts defined shadows. Position your subject so that one side of their face is well-lit while the other falls into shadow.
When shooting, expose for the highlights to maintain detail in the bright areas. This will naturally deepen the shadows, enhancing the contrast. You can fine-tune the effect by adjusting your phone's exposure compensation. Don't be afraid to embrace deep shadows; they add depth and mystery to your portraits.
Here's a quick guide to dramatic contrast techniques:
| Technique | Effect | Best Time |
|---|---|---|
| Side lighting | Strong facial contours | Golden hour |
| Backlighting | Rim light, silhouettes | Sunset |
| Dappled light | Interesting patterns | Midday |
Experiment with different angles and positions to find the most striking contrast. Remember, the key is to balance light and shadow to create a compelling visual narrative. With practice, you'll develop an eye for dramatic lighting opportunities in everyday settings.
Backlighting: Creating Dramatic Effects
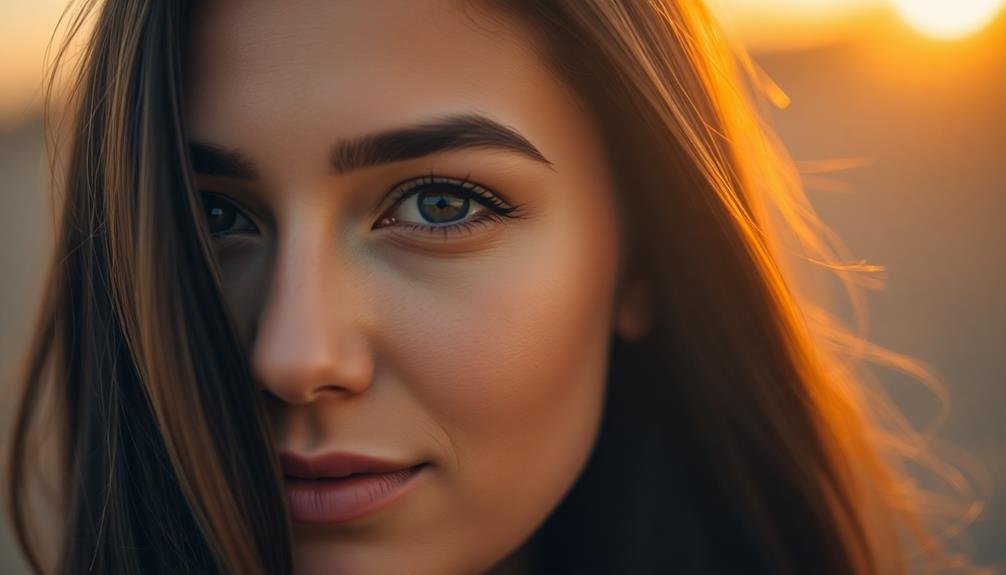
Have you ever noticed how a subject can be transformed when light streams from behind them? Backlighting is a powerful technique that can add drama and depth to your portraits. To master this effect with your phone camera, position your subject between you and the light source, such as the sun or a bright window.
When shooting backlit portraits, consider these tips:
- Expose for the subject's face, not the background
- Use your phone's HDR mode to balance highlights and shadows
- Experiment with lens flare for artistic effects
- Try silhouettes by underexposing the subject
- Move around to find the best angle for a halo effect
Backlighting can create a dreamy, ethereal atmosphere or a bold, high-contrast look. It's particularly effective during golden hour, when the low sun casts a warm glow.
To avoid lens flare (unless it's intentional), use your hand or a lens hood to shield the camera. If your subject appears too dark, try using your phone's flash as a fill light or a reflector to bounce light back onto their face.
With practice, you'll learn to harness backlighting to create stunning, professional-looking portraits using just your smartphone.
Color Temperature and White Balance
While backlighting can create stunning effects, understanding color temperature and white balance is key to capturing accurate, pleasing skin tones in your portraits.
Color temperature refers to the warmth or coolness of light, measured in Kelvin. Sunlight at midday is cooler (bluer), while sunrise and sunset light is warmer (more orange). Your phone's camera automatically adjusts white balance to compensate for these variations, but it's not always perfect.
To improve your portraits, pay attention to the lighting conditions and adjust your white balance accordingly. Most phone cameras offer preset options like "cloudy" or "sunny," or allow you to set a custom white balance. If your subject's skin looks too orange or blue, try changing the white balance setting.
You can also use apps that offer more advanced white balance controls. Experiment with different settings to find what works best for each lighting situation.
Editing Natural Light Portraits
Editing natural light portraits can elevate your images from good to great. With the right techniques, you'll enhance the beauty of your subject while maintaining a natural look.
Start by adjusting the exposure and contrast to guarantee your image isn't too bright or dark. Then, fine-tune the highlights and shadows to bring out details in both light and dark areas.
Color correction is essential for natural light portraits. Adjust the white balance to achieve accurate skin tones and overall color harmony. Don't be afraid to experiment with warmth and tint to create a specific mood.
Here are five key editing tips for stunning natural light portraits:
- Use selective adjustments to enhance eyes and skin
- Apply subtle vignetting to draw focus to your subject
- Experiment with clarity and texture for added depth
- Utilize HSL sliders to fine-tune specific colors
- Consider a light film-inspired preset for a timeless look
Remember to keep your edits subtle and natural-looking. Avoid over-processing, which can make your portraits appear artificial.
Instead, aim to enhance the existing beauty of your subject and the natural light. With practice, you'll develop your own editing style that complements your photography skills.
Location Scouting for Outdoor Portraits

When scouting locations for outdoor portraits, you'll want to look for areas with ideal natural lighting conditions.
Seek out spots that offer soft, diffused light like open shade or during the golden hour near sunrise or sunset.
Additionally, search for interesting background elements that complement your subject, such as textured walls, lush greenery, or architectural features.
Best Lighting Conditions
Finding the perfect location for outdoor portraits is essential to capturing stunning natural light images. Once you've scouted your ideal spot, it's vital to understand the best lighting conditions for your shoot. The golden hour, just after sunrise or before sunset, offers warm, soft light that's flattering for portraits. However, don't limit yourself to these times alone.
Consider these lighting conditions for diverse, enchanting results:
- Overcast days: Diffused light creates even tones and minimizes harsh shadows
- Backlit scenes: Dramatic silhouettes and dreamy, hazy effects
- Dappled light: Interesting patterns and textures through tree leaves or structures
- Open shade: Soft, directional light ideal for close-up portraits
- Blue hour: Cooler tones and balanced exposure between sky and subject
Experiment with different times of day and weather conditions to find your preferred style.
Remember, harsh midday sun can create unflattering shadows, so seek out shaded areas or use reflectors to soften the light.
Pay attention to how light interacts with your surroundings and subject. By mastering these lighting conditions, you'll elevate your natural light portraits and create stunning images that stand out.
Interesting Background Elements
Scouting for interesting background elements can make or break your outdoor portraits. When choosing a location, look for features that complement your subject without overpowering them. Seek out natural frames like archways, trees, or rock formations to add depth and context to your images.
Consider how textures like weathered wood, brick walls, or lush foliage can enhance the overall composition.
Don't overlook urban environments, which offer unique opportunities with colorful street art, geometric architecture, or interesting signage. In natural settings, bodies of water can provide reflections and add a serene atmosphere to your portraits.
Remember to assess how the background will interact with your subject's clothing and skin tone.
Time your shoot to take advantage of golden hour lighting, which can transform ordinary backgrounds into magical settings. Be mindful of potential distractions in the background, such as power lines or busy streets.
Use shallow depth of field to blur distracting elements while maintaining focus on your subject. Finally, always respect private property and obtain necessary permissions when scouting locations.
With careful consideration, you'll find backgrounds that elevate your portraits from ordinary to extraordinary.
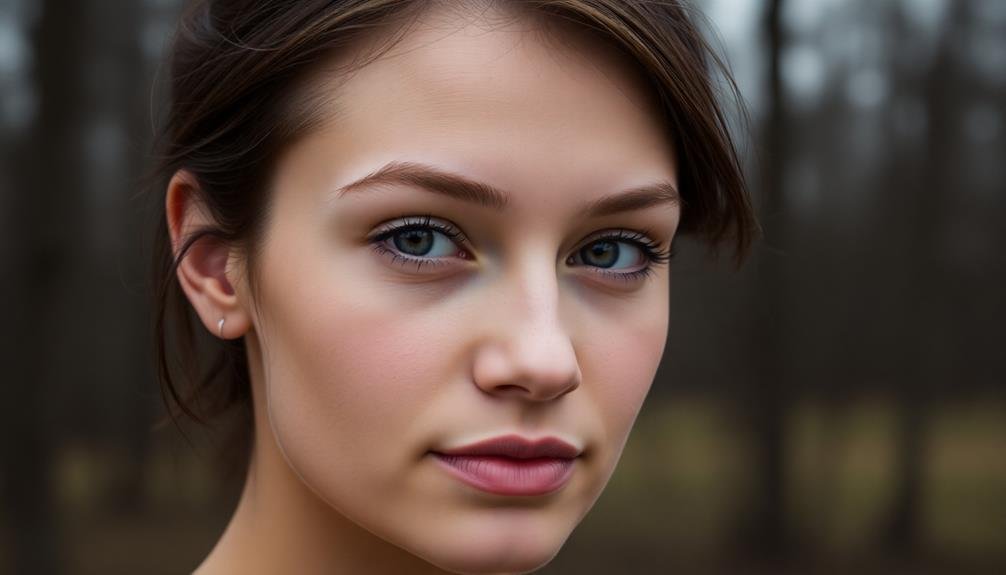
Capturing Authentic Expressions

Three key elements contribute to capturing authentic expressions in natural light portraits: building rapport, creating a comfortable environment, and mastering the art of timing.
To build rapport, engage your subject in conversation and show genuine interest in their thoughts and experiences. This helps them relax and forget about the camera, allowing their true personality to shine through.
Create a comfortable environment by choosing a location where your subject feels at ease. This could be their home, a favorite park, or a familiar café. Encourage them to wear clothing they're comfortable in and to bring props that reflect their personality.
Mastering timing is essential for capturing authentic expressions. Be ready to snap the photo at any moment, as genuine emotions often appear fleetingly.
Here are some tips to help you capture authentic expressions:
- Use burst mode to capture a series of quick shots
- Tell jokes or ask thought-provoking questions to elicit natural reactions
- Give your subject a task to focus on, like reading a book or playing with a pet
- Capture candid moments between posed shots
- Use prompts to guide your subject without over-directing them
Frequently Asked Questions
How Can I Protect My Phone Camera Lens From Damage During Outdoor Shoots?
You can protect your phone's camera lens by using a lens cover or case with a built-in lens shield. Keep it clean with a microfiber cloth, avoid touching it directly, and store your phone safely when not in use.
What Are the Best Accessories for Stabilizing a Smartphone During Portrait Photography?
You'll want to invest in a sturdy tripod with a smartphone mount. Don't forget a remote shutter for hands-free shooting. For extra stability, try a gimbal or handheld stabilizer. These accessories will greatly improve your portrait photography.
How Do I Maintain Consistent Image Quality When Switching Between Front and Rear Cameras?
To maintain consistent quality between front and rear cameras, you'll want to clean both lenses regularly, use similar settings, and guarantee proper lighting. Don't forget to adjust your distance and framing when switching cameras for ideal results.
Are There Specific Apps for Planning Natural Light Conditions for Portrait Shoots?
Yes, there are apps for planning natural light conditions. You'll find options like PhotoPills, Sun Surveyor, and The Photographer's Ephemeris. They'll help you predict sunlight, shadows, and golden hour timing for your portrait shoots.
How Can I Prevent Lens Flare When Shooting Portraits in Bright Sunlight?
To prevent lens flare in bright sunlight, use a lens hood or your hand to shield the lens. You can also adjust your position or the subject's to block direct sunlight. Try shooting during golden hour for softer light.
In Summary
You've now got the tools to create stunning natural light portraits with just your phone. Remember, it's all about observing and using available light creatively. Don't be afraid to experiment with different times of day, weather conditions, and locations. Keep practicing these techniques, and you'll soon develop an intuitive understanding of light. With patience and persistence, you'll be capturing professional-quality portraits that showcase your subjects in their best light.


Leave a Reply