
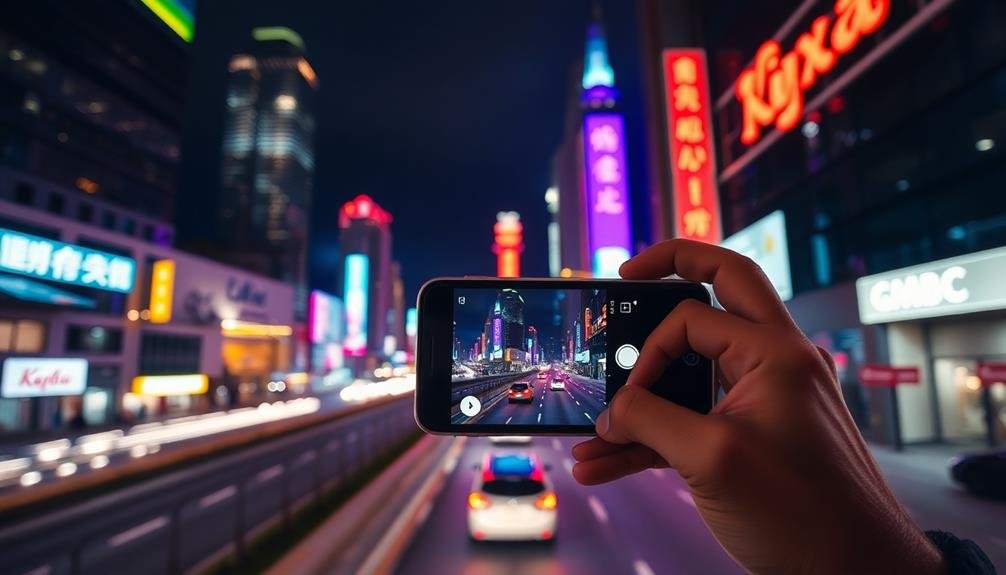
To make your iPhone night street photos pop, embrace low-light conditions and master manual camera settings. Utilize Night mode effectively, capturing light trails and motion for dynamic shots. Play with various light sources, framing dramatic compositions that balance shadows and highlights. Don't shy away from experimenting with reflections and focusing on unique urban details. Edit your photos to enhance mood and atmosphere, adjusting contrast and color temperature. Remember to keep your iPhone steady for sharp images, and try different angles to transform ordinary scenes into extraordinary ones. With these techniques, you'll reveal the full potential of nighttime urban photography.
Embrace Low Light Conditions

Night's shadows are your canvas when it comes to iPhone street photography. Embracing low light conditions allows you to capture the city's unique nocturnal atmosphere.
Don't shy away from dimly lit streets or shadowy corners; these areas often yield the most enchanting images.
Utilize your iPhone's Night mode to its fullest potential. This feature automatically activates in low light, extending exposure time to gather more light.
Experiment with manual exposure adjustments to fine-tune your shots. Seek out artificial light sources like street lamps, neon signs, or car headlights to add depth and drama to your compositions.
Pay attention to contrast between light and dark areas. Use shadows to frame your subjects or create silhouettes against brighter backgrounds.
Capture reflections on wet streets or puddles to add an extra dimension to your photos. Don't be afraid of noise in your images; it can add a gritty, authentic feel to street scenes.
Master Manual Camera Settings
To take your iPhone night street photography to the next level, you'll need to master manual camera settings.
Start by learning how to control exposure and ISO, which will allow you to balance brightness and noise in your shots.
Don't forget to adjust your white balance to capture the true colors of the nighttime scene, whether it's the warm glow of streetlights or the cool hues of neon signs.
Exposure and ISO Control
As darkness falls, mastering exposure and ISO control becomes essential for capturing stunning iPhone night street photos. You'll need to balance these settings to achieve the perfect shot in low-light conditions. Exposure determines how much light enters your camera, while ISO controls your sensor's sensitivity to light.
Start by adjusting your exposure compensation. In most cases, you'll want to increase it slightly to brighten your night scenes. However, be careful not to overexpose, as this can lead to loss of detail in highlights. Next, tackle your ISO settings. Higher ISO values allow for brighter images in low light but can introduce noise. Experiment with different ISO levels to find the sweet spot between brightness and image quality.
| ISO Level | Light Sensitivity | Noise Level | Best For | Considerations |
|---|---|---|---|---|
| 100-400 | Low | Minimal | Well-lit streets | Longer exposure required |
| 800-1600 | Medium | Moderate | Dimly lit scenes | Balanced approach |
| 3200-6400 | High | Significant | Very dark environments | Use sparingly |
| 12800+ | Very High | Extreme | Extremely low light | Last resort |
| Auto | Variable | Varies | Rapidly changing scenes | Less control |
White Balance Adjustment
While mastering exposure and ISO control is essential, adjusting white balance is equally important for capturing enchanting iPhone night street photos. Your iPhone's camera often struggles to accurately interpret the color temperature of various light sources at night, resulting in unnatural-looking images.
To combat this, you'll want to manually adjust the white balance. In your iPhone's camera app, look for the WB or color temperature icon. Slide it towards blue for cooler tones or orange for warmer hues. Street lamps typically cast an orange glow, so you might need to cool down your image slightly.
Experiment with different settings to find the perfect balance. Pay attention to neon signs, car headlights, and other artificial light sources. These can create interesting color contrasts when white balance is adjusted correctly.
Don't be afraid to push the boundaries. Sometimes, an intentionally "incorrect" white balance can create a moody or artistic effect. For example, a cooler setting can emphasize the eerie atmosphere of a foggy night street, while a warmer tone can make a bustling street scene feel more inviting and vibrant.
Utilize Night Mode Effectively

To make the most of your iPhone's Night mode for street photography, you'll need to master a few key techniques.
Start by adjusting exposure and timing to capture the perfect balance of light and detail in low-light conditions.
Next, experiment with capturing light trails from passing cars or street lamps to add dynamic elements to your shots, while carefully balancing shadows and highlights to create depth and atmosphere in your nighttime street scenes.
Adjust Exposure and Timing
One of the most powerful tools at your disposal for night street photography on an iPhone is Night mode. However, to truly make your photos pop, you'll need to adjust exposure and timing.
When shooting in low light, your iPhone's camera will often try to overcompensate, resulting in grainy or washed-out images. To combat this, manually adjust the exposure by tapping on the screen and sliding the exposure bar up or down.
Timing is essential in night street photography. You'll want to capture the perfect balance of light and movement. Experiment with different shutter speeds to achieve various effects.
Here are four tips to help you master exposure and timing:
- Use the AE/AF lock feature to maintain consistent exposure across multiple shots
- Try bracketing your exposures to guarantee you capture the best possible image
- Experiment with longer exposure times to create light trails from moving vehicles
- Use burst mode to capture fast-moving subjects in low light conditions
Capture Light Trails Effectively
For stunning night street photos with light trails, you'll need to master your iPhone's Night mode. This feature automatically activates in low-light conditions, allowing you to capture long exposures without a tripod. To effectively capture light trails, find a spot with moving traffic or other light sources.
Hold your iPhone steady and frame your shot. Tap the Night mode icon and drag the slider to increase exposure time. The longer the exposure, the more pronounced the light trails will be. Experiment with different durations to achieve your desired effect.
Here's a quick guide to light trail photography:
| Subject | Exposure Time | ISO | Focus |
|---|---|---|---|
| Car Headlights | 3-5 seconds | 100-200 | Foreground |
| City Skyline | 5-10 seconds | 50-100 | Background |
| Street Lamps | 2-4 seconds | 200-400 | Mid-range |
| Fireworks | 1-3 seconds | 100-200 | Sky |
Remember to keep your iPhone as still as possible during the exposure. You can use a tripod or lean against a stable surface for sharper images. Experiment with different angles and compositions to create unique and enchanting light trail photos that truly pop.
Balance Shadows and Highlights
Balancing shadows and highlights is essential for creating enchanting iPhone night street photos. Night Mode on your iPhone automatically adjusts exposure for low-light scenes, but you can fine-tune this balance manually. Tap to focus on your subject, then slide the exposure adjustment up or down to achieve the desired effect. Remember, preserving some shadows adds depth and mystery to your images.
To effectively balance shadows and highlights:
- Use HDR mode for high-contrast scenes
- Experiment with exposure compensation
- Try bracketing shots at different exposures
- Edit in post-production to recover details
When shooting scenes with bright artificial lights, be careful not to overexpose highlights. Use the highlight warning feature in your camera app to identify blown-out areas.
For darker scenes, focus on capturing the available light sources creatively. Street lamps, neon signs, and car headlights can become focal points in your composition.
Don't be afraid to embrace deep shadows in some areas of your frame. This contrast can create a moody atmosphere and draw attention to illuminated subjects.
With practice, you'll develop an eye for balancing light and dark elements in your night street photography, resulting in alluring images that truly pop.
Play With Light Sources

Through the lens of your iPhone, street lights, neon signs, and car headlights become your artistic palette at night. These light sources offer unique opportunities to create enchanting street photos. Experiment with different angles and distances to transform ordinary lights into striking focal points or dreamy bokeh effects.
Don't shy away from high-contrast scenes. Use bright lights to silhouette subjects or create dramatic shadows. Position your iPhone to capture reflections in puddles, windows, or shiny surfaces for added depth and interest. Try incorporating multiple light sources to add layers and complexity to your composition.
Here's a quick guide to playing with different light sources:
| Light Source | Effect | Technique |
|---|---|---|
| Street Lamps | Soft glow | Frame subject under lamp |
| Neon Signs | Vibrant colors | Use as background element |
| Car Headlights | Dynamic streaks | Slow shutter speed mode |
Capture Motion and Movement

Night street photography offers a perfect canvas for capturing motion and movement. With your iPhone, you can freeze or blur action to create dynamic and engaging images. To capture motion effectively, experiment with different shutter speeds using third-party camera apps that allow manual control.
For crisp, frozen action, use faster shutter speeds. This works well for capturing pedestrians mid-stride or vehicles passing by. To create a sense of motion blur, opt for slower shutter speeds. This technique can transform car headlights into streaks of light or turn bustling crowds into ghostly figures.
When capturing movement, consider these techniques:
- Panning: Follow a moving subject while using a slower shutter speed.
- Light trails: Use long exposures to capture the paths of moving lights.
- Zoom burst: Zoom in or out during exposure for a radial blur effect.
- Multiple exposures: Combine several shots to show a subject's movement.
Don't forget to stabilize your iPhone using a tripod or steady surface for sharper results, especially with slower shutter speeds.
Practice these techniques to add energy and life to your night street photos, transforming ordinary scenes into enchanting visual stories.
Frame Dramatic Compositions

Framing dramatic compositions is essential for creating enchanting night street photos with your iPhone. You'll want to look for strong visual elements that draw the eye and create depth in your images. Use leading lines, such as streetlights or building edges, to guide the viewer's gaze through the frame. Experiment with different angles and perspectives to add intrigue to your shots.
Consider the rule of thirds when composing your night street photos. Place key subjects at the intersections of imaginary grid lines to create a more balanced and visually appealing image. Don't be afraid to embrace negative space, as it can heighten the drama and focus attention on your main subject.
| Composition Technique | Effect | Example |
|---|---|---|
| Leading Lines | Guides viewer's eye | Street lamps |
| Rule of Thirds | Creates balance | Subject off-center |
| Negative Space | Heightens drama | Isolated subject |
Incorporate foreground elements to add depth and context to your night scenes. A illuminated storefront or a parked car can provide interesting framing for distant city lights. Play with reflections in puddles or windows to create symmetry and visual interest. Remember, dramatic compositions often involve contrasts – light and dark, near and far, static and moving elements.
Edit for Mood and Atmosphere

Once you've captured your dramatic night street scenes, it's time to enhance the mood and atmosphere through editing. Use your iPhone's built-in editing tools or third-party apps to bring out the best in your night street photos.
Focus on adjusting contrast, shadows, and highlights to create depth and dimension in the dark areas while preserving the glow of city lights.
Experiment with color temperature to set the right mood. Cooler tones can create a mysterious, noir-like atmosphere, while warmer tones evoke a cozy, inviting feel.
Don't be afraid to push the boundaries with selective color adjustments to make certain elements pop against the night backdrop.
To truly capture the essence of night street photography, consider these editing techniques:
- Boost clarity to enhance textures and details
- Add a subtle vignette to draw focus to the center of the image
- Experiment with grain to create a film-like aesthetic
- Use radial filters to emphasize light sources
Experiment With Reflections

Reflections offer a unique way to add depth and interest to your iPhone night street photos. They create a sense of symmetry and intrigue, making viewers look twice. To capture stunning reflections, seek out wet surfaces after rain or find bodies of water like puddles, lakes, or fountains. Glass windows and polished surfaces can also provide excellent reflective opportunities.
When shooting reflections, experiment with different angles. Try getting low to the ground for puddle shots or positioning yourself at various distances from reflective surfaces. Use your iPhone's grid feature to align the reflection perfectly with the real subject for a balanced composition.
Here's a quick guide to reflection types and their effects:
| Reflection Type | Surface | Effect | Best Time | Technique |
|---|---|---|---|---|
| Water | Puddles, Lakes | Rippling, Distorted | After Rain | Get Low |
| Glass | Windows, Mirrors | Clear, Sharp | Any Time | Avoid Glare |
| Metal | Cars, Sculptures | Warped, Abstract | Night | Play with Angles |
| Wet Pavement | Streets | Subtle, Atmospheric | During/After Rain | Wide-Angle Lens |
| Ice | Frozen Surfaces | Crystalline, Ethereal | Winter | Careful Exposure |
Don't forget to adjust your exposure for the reflection, as it's often darker than the actual subject. With practice, you'll master the art of capturing enchanting reflections in your night street photography.
Focus on Unique Urban Details

Urban environments are filled with fascinating details that often go unnoticed during the day. At night, however, these unique elements can become striking focal points for your iPhone street photography. As you explore the city after dark, keep an eye out for interesting textures, patterns, and architectural features that are accentuated by artificial lighting.
Look for:
- Neon signs and illuminated storefronts
- Intricate ironwork on gates or balconies
- Weathered brick walls or graffiti
- Unusual street furniture or public art installations
These details can add depth and character to your night street photos, creating visually compelling compositions. Use your iPhone's manual focus feature to guarantee sharpness on these small elements, and experiment with different angles to highlight their uniqueness.
Don't be afraid to get close to your subjects. The iPhone's wide-angle lens allows you to capture intimate details while maintaining context.
Play with shadows and contrasts to create dramatic effects, emphasizing the interplay between light and dark in urban settings. By focusing on these often-overlooked urban details, you'll create night street photos that tell a rich, layered story of the city after dark.
Frequently Asked Questions
How Do I Protect My Iphone From Theft While Taking Night Street Photos?
To protect your iPhone while taking night street photos, you'll want to stay alert and keep a firm grip. Use a wrist strap, keep it close to your body, and avoid displaying it unnecessarily. Consider using anti-theft apps too.
What Accessories Enhance Iphone Night Street Photography Besides a Tripod?
You'll want to contemplate a clip-on lens for wider angles or macro shots. An external LED light or flash can boost illumination. A hand grip improves stability, while a remote shutter allows for shake-free captures.
Are There Specific Iphone Models Better Suited for Night Street Photography?
You'll find newer iPhones excel at night street photography. Models with larger sensors, like the Pro series, capture more light. They've got improved low-light capabilities, Night mode, and better image processing. Don't worry if you've got an older model, though!
How Can I Ensure My Safety When Photographing in Unfamiliar Urban Areas at Night?
You'll want to stay alert and trust your instincts. Stick to well-lit areas, travel with a buddy, and keep valuables hidden. Let someone know your plans and consider carrying a personal alarm or pepper spray.
What Are the Best Apps for Post-Processing Iphone Night Street Photos?
You'll want to try Snapseed, VSCO, and Lightroom Mobile for editing your iPhone night street photos. They offer powerful tools to enhance contrast, adjust exposure, reduce noise, and apply creative filters that make your shots pop.
In Summary
You've got the tools to make your iPhone night street photos truly pop. Don't be afraid to experiment and push your creativity. Embrace the darkness, play with light, and capture the city's energy. Remember, it's not just about technical skills; it's about your unique vision. Keep practicing, refining your techniques, and developing your style. Soon, you'll be creating stunning night street shots that'll make viewers stop and stare.


Leave a Reply