When composing food photos on your mobile device, focus on six key rules. Apply the Rule of Thirds by placing your subject at grid intersections. Utilize Negative Space to enhance focus and minimize distractions. Incorporate Leading Lines to guide the viewer's eye through the image. Create Balanced Asymmetry by placing the main subject off-center and using complementary elements. Achieve Color Harmony with complementary or analogous color schemes. Add depth through Layering, arranging elements at different heights. These fundamental principles will elevate your mobile food photography, but they're just the beginning of creating mouthwatering images that stand out on social media.
Rule of Thirds

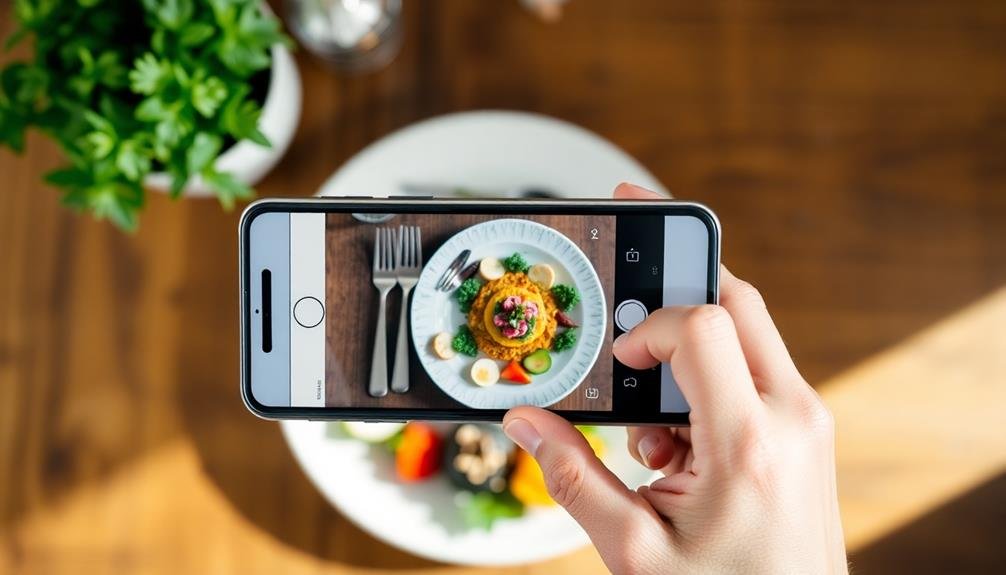
One of the most fundamental principles in food photography composition is the Rule of Thirds. This guideline suggests dividing your frame into a 3×3 grid and placing key elements along these lines or at their intersections. When you're shooting food with your mobile device, activate the grid feature in your camera settings to make this easier.
To apply the Rule of Thirds, position your main subject off-center. For instance, place a plate of food at one of the intersections rather than dead center. This creates a more dynamic and visually appealing image. Use the grid to align other elements in your shot, such as utensils, garnishes, or background items.
Don't feel constrained by this rule; it's more of a guideline. Sometimes, breaking it intentionally can lead to striking compositions.
However, mastering the Rule of Thirds will give you a solid foundation for creating balanced, engaging food photos. Remember to experiment with different placements and see how they affect your image's overall impact.
With practice, you'll develop an intuitive sense of composition that'll elevate your food photography on mobile devices.
Negative Space

Negative space can be a powerful tool in your food photography arsenal.
By strategically incorporating empty areas around your subject, you'll draw more attention to the dish and create a sense of visual balance.
You can achieve this by using plain backgrounds, leaving areas of the frame uncluttered, or positioning your food off-center to allow for breathing room.
Enhancing Subject Focus
A powerful technique in food photography composition is the strategic use of negative space. By incorporating empty areas around your subject, you'll draw the viewer's attention to the food, creating a more impactful image. Negative space allows your dish to breathe, preventing a cluttered or overwhelming composition.
To enhance subject focus using negative space:
- Simplify your background: Choose plain surfaces or uncluttered settings to minimize distractions.
- Position your subject off-center: Utilize the rule of thirds to create balance and visual interest.
- Experiment with cropping: Adjust your frame to increase or decrease the amount of negative space.
- Play with contrast: Use light and dark areas to create depth and emphasize your subject.
When shooting with a mobile device, you'll need to be mindful of your surroundings. Look for clean, uncluttered areas to place your food.
Use your phone's grid feature to help with composition. Don't be afraid to move around and try different angles to find the perfect balance between your subject and the negative space.
Creating Visual Balance
While negative space enhances subject focus, it's equally important for creating visual balance in your food photography. Negative space, or the empty areas around your subject, plays a significant role in composition. It gives your main subject room to breathe and prevents your image from feeling cluttered or overwhelming.
To achieve visual balance, consider the rule of thirds. Divide your frame into a 3×3 grid and place your main subject along these lines or at their intersections. This creates a more pleasing and balanced composition than centering your subject. Use negative space deliberately to guide the viewer's eye towards your focal point.
Don't be afraid to leave empty areas in your frame. These spaces can add a sense of simplicity and elegance to your food photos. Experiment with different angles and arrangements to find the perfect balance between your subject and the surrounding negative space.
Leading Lines

Leading lines serve as powerful visual tools in food photography, guiding the viewer's eye through the image and towards the main subject.
When composing your shots, look for natural lines within the food itself or in the surrounding elements. These lines can be straight, curved, or even implied, and they'll help create a sense of depth and movement in your photos.
To effectively use leading lines in your food photography:
- Utilize utensils: Place forks, knives, or spoons strategically to direct attention to the main dish.
- Arrange ingredients: Line up herbs, spices, or garnishes to create paths leading to the focal point.
- Leverage table settings: Use the edges of plates, placemats, or tablecloths to frame the food and guide the eye.
- Exploit natural food shapes: Capitalize on the inherent lines in foods like asparagus spears, sliced bread, or pasta strands.
Balanced Asymmetry

Balanced asymmetry offers a dynamic approach to food photography composition, in contrast to the structured guidance of leading lines. When you're shooting food with your mobile device, you don't always need perfect symmetry to create visually appealing images. Instead, try placing your main subject off-center while using other elements to balance the frame.
To achieve balanced asymmetry, imagine your frame divided into thirds both horizontally and vertically. Place your main dish or focal point at one of the intersections of these lines. Then, use complementary elements like garnishes, utensils, or background items to balance the opposite side of the frame. This technique creates visual interest and guides the viewer's eye through the image.
When composing your shot, pay attention to the visual weight of different elements. Larger or brighter objects carry more weight, so you can balance a small, detailed item with a larger, simpler one.
Don't be afraid to experiment with negative space, as it can help emphasize your subject and create a sense of elegance in your food photos.
Color Harmony

Color harmony plays an essential role in creating visually appealing food photographs. When you're shooting with your mobile device, understanding how colors interact can elevate your images from amateur to professional-looking. The right color combinations can evoke emotions, create mood, and guide the viewer's eye through your composition.
To achieve color harmony in your food photos, consider these techniques:
- Use complementary colors: Pair opposite colors on the color wheel, like red and green or blue and orange, to create vibrant contrast.
- Experiment with analogous colors: Choose colors that sit next to each other on the color wheel for a harmonious, cohesive look.
- Try monochromatic schemes: Focus on variations of a single color to create a sophisticated, uniform appearance.
- Incorporate triadic color schemes: Select three colors equally spaced on the color wheel for a balanced yet dynamic composition.
When styling your food shots, pay attention to the colors of your ingredients, props, and backgrounds. You can adjust your mobile device's white balance settings to enhance color accuracy.
Don't be afraid to edit your photos post-capture to fine-tune the color harmony. Remember, subtle adjustments can make a significant difference in the overall appeal of your food photography.
Layering and Depth

While color harmony sets the mood, layering and depth bring your food photos to life. To create dimension in your mobile food photography, focus on arranging elements at different heights and distances from the camera. Start by placing larger items in the background, then work your way forward with smaller components. This technique adds visual interest and guides the viewer's eye through the image.
Use props strategically to enhance depth. Place a fork or napkin in the foreground to frame the dish, or position complementary ingredients in the background to tell a story. Don't forget to experiment with different angles – a 45-degree shot often works well for showcasing layers.
| Foreground | Middle | Background |
|---|---|---|
| Utensils | Main dish | Ingredients |
| Garnishes | Side dishes | Decor |
| Textures | Plating details | Ambient elements |
When shooting, tap to focus on the most important part of your dish. This creates a shallow depth of field, blurring the background and emphasizing your subject. Remember, layering isn't just about physical arrangement – it's about creating a visual journey that entices your audience to explore every detail of your food photograph.
Frequently Asked Questions
What Camera Settings Should I Use for Food Photography on My Smartphone?
For smartphone food photography, you'll want to use HDR mode, focus on the main subject, and adjust exposure. Experiment with different angles and natural lighting. Don't forget to clean your lens for crisp, clear shots.
How Do I Deal With Poor Lighting Conditions in Restaurants?
To deal with poor lighting in restaurants, you can use your phone's flash, ask for a table near a window, or bring a small portable light. You'll also want to adjust your camera's exposure and use editing apps afterward.
Are There Any Food Photography Apps That Can Enhance My Images?
Yes, there are several apps to enhance your food photos. You'll find options like Foodie, VSCO, and Snapseed useful. They offer filters, editing tools, and adjustments specifically designed for food photography, helping you create appetizing images effortlessly.
Should I Use Filters or Edit My Food Photos After Taking Them?
You should edit your food photos after taking them. While filters can be fun, subtle adjustments to brightness, contrast, and color can greatly enhance your images without making them look artificial. Experiment to find your style.
How Can I Make My Food Look Appetizing When It's Not Visually Appealing?
You can make unappealing food look appetizing by focusing on texture, using props, adjusting lighting, and playing with angles. Don't be afraid to rearrange elements or add garnishes to enhance the dish's visual appeal.
In Summary
You've now got the essential rules for food photography composition on mobile devices. Remember, the rule of thirds, negative space, and leading lines will guide your viewer's eye. Balanced asymmetry keeps things interesting, while color harmony sets the mood. Don't forget to add depth through layering. With practice, you'll master these techniques and create stunning food photos right from your smartphone. So grab your device, arrange your dish, and start shooting!


Leave a Reply