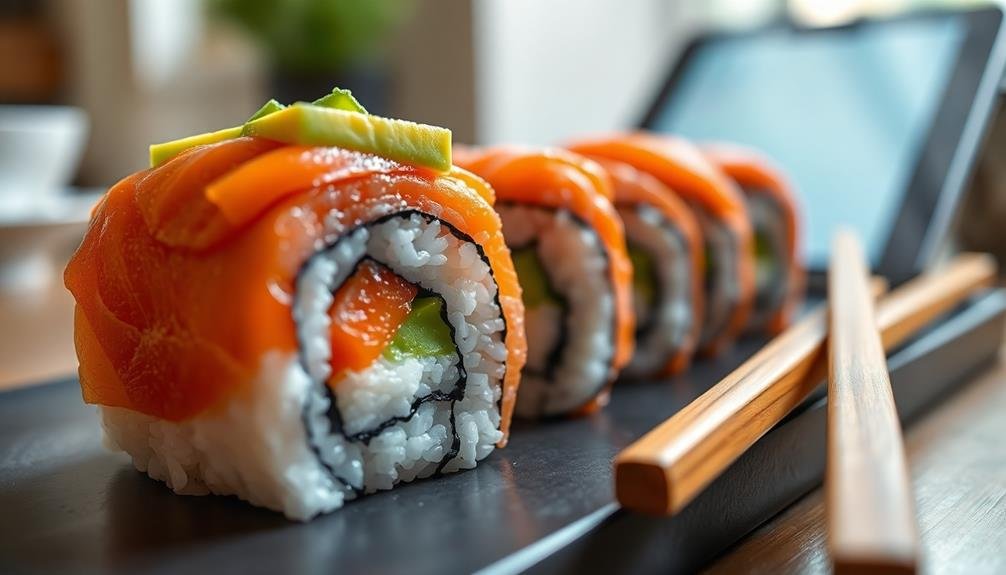
To make your food photos pop on your phone, focus on lighting, composition, and styling. Use natural light when possible, or experiment with artificial lighting for more control. Apply the rule of thirds and play with different angles to create visually appealing shots. Enhance your dish's colors and textures through careful styling and prop selection. Don't forget to leave some negative space to draw attention to the food. Utilize your phone's camera features, like HDR mode and selective focus, to capture the best details. With these techniques, you'll create mouthwatering images that stand out on social media. But there's even more to discover about elevating your food photography game.
Lighting: Natural vs. Artificial
Often, the key to stunning food photography lies in the lighting. When it comes to capturing mouthwatering food shots on your phone, you'll need to decide between natural and artificial light sources.
Natural light, like that from a window, can create a soft, flattering glow that enhances the food's texture and colors. It's ideal for creating a fresh, authentic look.
To use natural light effectively, position your dish near a window but avoid direct sunlight, which can cast harsh shadows. Cloudy days offer perfect diffused light for food photography. If you're shooting outdoors, seek shade to prevent overexposure.
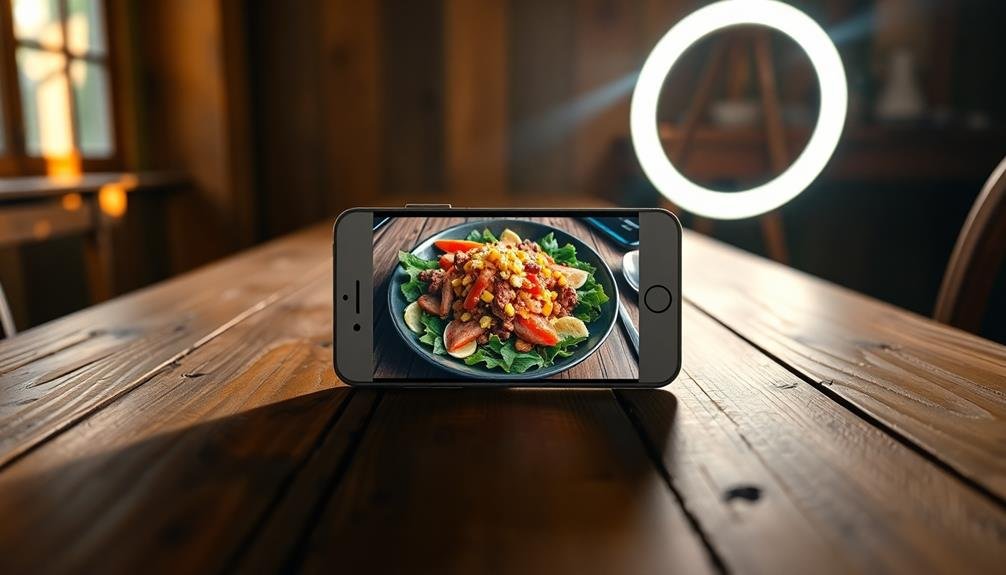
Artificial lighting gives you more control over the final image. You can use LED panels or ring lights to achieve consistent results, especially in low-light situations.
When using artificial light, experiment with different angles to find the most flattering illumination for your dish.
Composition and Framing Techniques
The art of composition can elevate your food photos from mundane to mouthwatering. Start by using the rule of thirds: imagine your screen divided into a 3×3 grid and place your main subject along these lines or at their intersections. This creates a more balanced and visually appealing image.
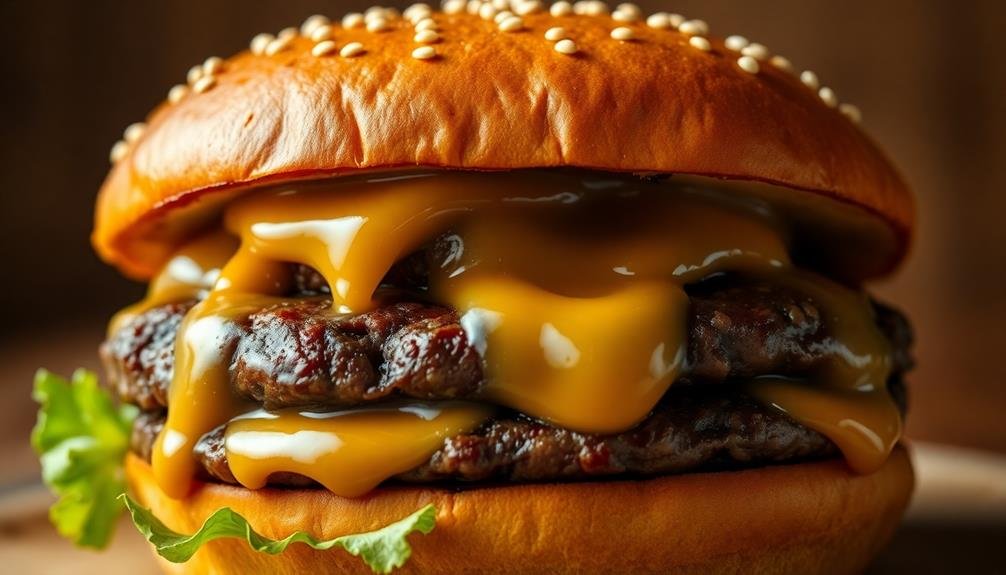
Don't be afraid to experiment with angles. Overhead shots work well for flat dishes or table spreads, while a 45-degree angle can highlight texture and depth. For tall items like burgers or layered desserts, try a straight-on shot to showcase their height.
Consider negative space to draw attention to your food. A clean, uncluttered background can make your dish pop. Use complementary colors or contrasting textures to add interest.
Play with perspective by getting close to your subject. Fill the frame with enticing details like melting cheese or glistening sauces.
Alternatively, zoom out to capture the entire table setting for a more atmospheric shot.
Angles and Perspectives
When it comes to food photography, your choice of angle can make or break the shot.
Experiment with overhead shots for a thorough view of the dish, eye-level compositions to capture the food's height and layers, and unique viewpoints to add interest and intrigue.
Don't be afraid to get creative and try unconventional angles to showcase your culinary subject in a fresh, appetizing way.
Overhead Shots
Overhead shots, also known as flat lays, have become a staple in food photography. They offer a unique perspective that showcases the entire dish and its arrangement. To capture the perfect overhead shot, position your phone directly above the food, ensuring it's parallel to the surface. This angle works particularly well for dishes with intricate plating or multiple components.
When composing your overhead shot, consider the rule of thirds. Place key elements along the imaginary grid lines or at their intersections to create a visually appealing image. Don't forget to pay attention to negative space, as it can help highlight your main subject.
Here's a quick guide to elevate your overhead food shots:
| Lighting | Composition | Styling |
|---|---|---|
| Natural light | Rule of thirds | Complementary colors |
| Diffused light | Negative space | Texture variety |
| Avoid harsh shadows | Symmetry/asymmetry | Props and garnishes |
Experiment with different heights to find the ideal distance between your phone and the food. Remember, practice makes perfect, so don't be afraid to take multiple shots and adjust as needed. With these tips, you'll be capturing stunning overhead food photos in no time.
Eye-Level Compositions
Shifting your perspective from above to eye-level can breathe new life into your food photography. This angle allows you to capture the depth and layers of a dish, creating a more immersive experience for your viewers.
It's particularly effective for tall items like burgers, layered desserts, or stacked pancakes. To achieve eye-level shots, position your phone at the same height as the food. You'll want to focus on the front of the dish, allowing the background to blur slightly. This technique creates depth and draws attention to the main subject.
For added interest, try angling your phone slightly upward to emphasize the height of the dish. Eye-level compositions also work well for capturing steam rising from hot dishes or drinks. They're perfect for showcasing the texture of foods like crusty breads or melting cheese.
When shooting at eye level, pay attention to the background. A simple, uncluttered backdrop will keep the focus on your food. Experiment with different angles around the dish to find the most appealing view.
Unique Viewpoints
Viewpoint variety can transform ordinary food shots into engaging visual stories. By experimenting with different angles and perspectives, you'll capture your culinary creations in fresh, enthralling ways.
Don't limit yourself to the standard eye-level view; instead, explore the full range of possibilities your smartphone camera offers.
Try these unique viewpoints to elevate your food photography:
- Overhead shots: Position your phone directly above the dish for a bird's-eye view, showcasing the food's arrangement and composition.
- Macro close-ups: Get up close and personal with your subject, revealing intricate textures and details that might go unnoticed from afar.
- Angled perspectives: Tilt your phone to capture the dish from a 45-degree angle, adding depth and dimension to your images.
When shooting from different viewpoints, pay attention to how light interacts with your subject. Adjust your position to highlight textures, create shadows, or emphasize specific elements of the dish.
Don't be afraid to move around and experiment with unconventional angles. Sometimes, the most striking food photos come from unexpected perspectives that challenge viewers' expectations and draw them into the image.
Color Theory in Food Photos

Understanding color theory can dramatically improve your food photography.
You'll want to contemplate complementary color combinations, the interplay between warm and cool tones, and how to effectively use contrast and saturation.
Complementary Color Combinations
Color theory plays an essential role in creating visually appealing food photos. When it comes to complementary color combinations, you'll want to focus on pairing hues that are opposite each other on the color wheel. These contrasting colors create visual interest and make your food pop on screen.
For example, blue and orange, purple and yellow, or red and green are classic complementary pairs that can elevate your food photography.
To effectively use complementary colors in your food photos:
- Choose a dominant color for your main dish and incorporate its complement in smaller accents or garnishes.
- Use props or backgrounds that feature the complementary color to create balance and harmony in the composition.
- Experiment with different shades and tints of complementary colors to add depth and dimension to your images.
Warm vs. Cool Tones
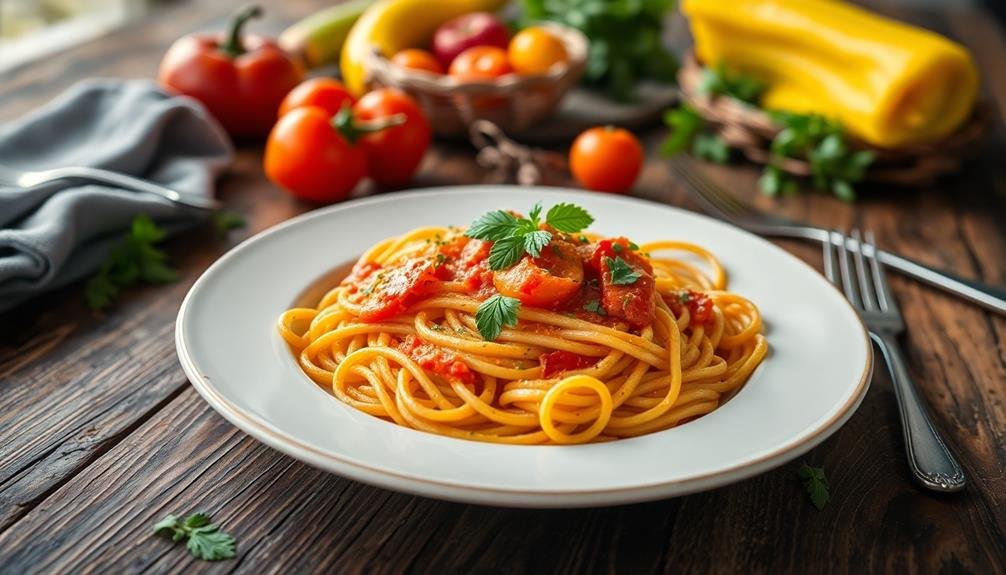
The interplay between warm and cool tones can dramatically impact the mood and appeal of your food photography. Warm tones, like reds, oranges, and yellows, evoke feelings of comfort, energy, and appetite stimulation. They're ideal for dishes like roasted meats, baked goods, and autumn-inspired meals.
Cool tones, such as blues, greens, and purples, create a sense of freshness and can make foods appear lighter or healthier. They work well for salads, seafood, and summer drinks.
To create contrast and visual interest, try combining warm and cool tones in your composition. For example, place a warm-toned dish on a cool-colored surface or use cool-toned garnishes on warm-colored foods. You can also adjust your white balance settings to shift the overall tone of your image warmer or cooler, depending on the mood you want to convey.
Remember that lighting plays a significant role in determining the temperature of your photo. Natural daylight tends to be cooler, while artificial light sources like incandescent bulbs produce warmer tones.
Experiment with different lighting conditions to find the perfect balance for your food photos.
Contrast and Saturation
Beyond the interplay of warm and cool tones, contrast and saturation are powerful tools in food photography. Contrast refers to the difference between light and dark areas in your image, while saturation is the intensity of colors. By adjusting these elements, you can make your food photos more appealing and eye-catching.
To create contrast, focus on highlighting the textures and details of your dish. Use lighting to create shadows and depth, emphasizing the three-dimensional nature of the food. Increase the contrast in post-processing to make colors pop and add drama to your image.
Saturation can make your food look more vibrant and appetizing. However, be careful not to overdo it, as excessive saturation can make your photo look unnatural and unappealing. Aim for a balance that enhances the natural colors of the food without distorting them.
Here are three tips to effectively use contrast and saturation in your food photos:
- Use directional lighting to create shadows and highlight textures
- Experiment with complementary colors to increase visual contrast
- Adjust saturation selectively, focusing on the main ingredients of your dish
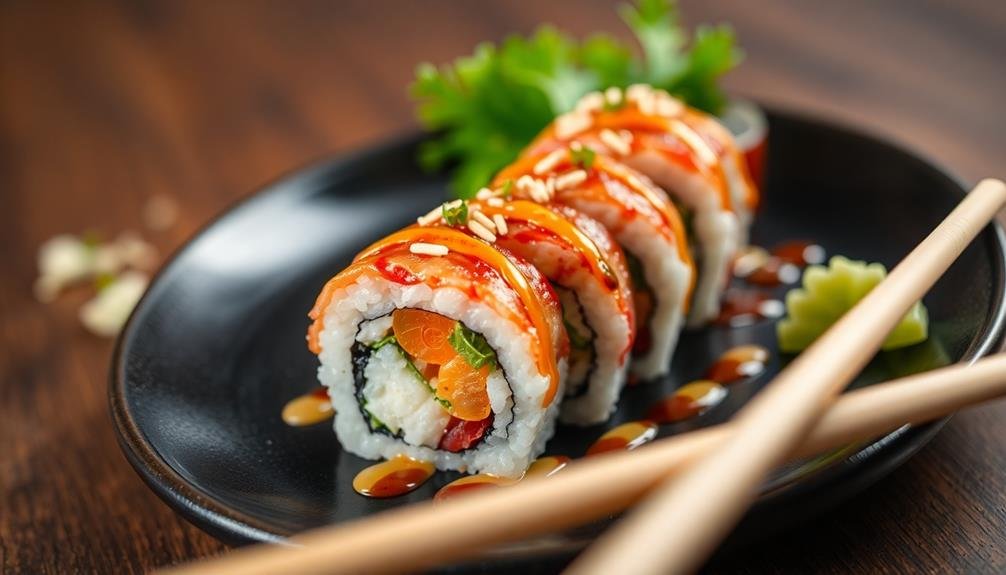
Styling Your Dish
Crafting an eye-catching presentation is crucial for stunning food photography. When styling your dish, focus on creating visual interest through varied textures, colors, and heights. Arrange elements thoughtfully, leaving some negative space to prevent overcrowding. Use odd numbers of items for a more dynamic composition.
Layer your ingredients to add depth and dimension. Place larger items at the back and smaller ones in front to create perspective. Incorporate garnishes like fresh herbs, edible flowers, or citrus slices to add pops of color and freshness.
Don't forget about the background; choose a complementary surface that enhances your dish without overpowering it. Consider the story you want to tell with your food. Add props like utensils, napkins, or ingredients to create context and atmosphere. However, be selective and make sure they don't distract from the main subject.
Pay attention to details like sauce drips or crumbs, which can add authenticity or detract from the overall appeal. Experiment with different angles to find the most flattering view of your dish. Sometimes, a slight tilt or off-center placement can dramatically improve the composition.
Props and Backgrounds
Proper selection of props and backgrounds can elevate your food photography from amateur to professional. When choosing props, opt for items that complement your dish without overshadowing it.
Consider using cutlery, napkins, or ingredients used in the recipe to add context and depth to your image. Remember, less is often more – don't clutter your shot with unnecessary items.
For backgrounds, simplicity is key. A clean, neutral surface like a marble countertop or a wooden table can provide an elegant backdrop.
Alternatively, use colored boards or fabrics to create contrast and mood. The background should enhance your food's colors and textures, not compete with them.
Here are three tips to make the most of props and backgrounds:
- Match your props and background to the dish's style and cuisine
- Experiment with different textures and materials for visual interest
- Use negative space to draw attention to your main subject
Focus and Depth of Field
When capturing food photos, mastering focus and depth of field can elevate your images from amateur to professional.
You'll want to achieve a sharp subject with a beautifully blurred background using selective focus techniques.
Understanding aperture settings and how they affect your images will give you greater control over your food photography's visual impact.
Sharp Subject, Blurred Background
A striking food photo often relies on a razor-sharp subject contrasted against a softly blurred background. This technique, known as selective focus, draws the viewer's attention to the main dish while creating a pleasing, dreamy atmosphere.
To achieve this effect on your phone, tap the screen to focus on your subject, then adjust the exposure if needed. Many smartphones now offer portrait mode, which simulates a shallow depth of field, perfect for food photography.
To maximize the impact of sharp subject, blurred background technique:
- Position your main dish close to the camera lens
- Create distance between the subject and the background
- Use a contrasting background color to make your food stand out
Selective Focus Techniques
Selective focus techniques are the backbone of creating visually appealing food photos. By manipulating your phone's focus and depth of field, you'll draw attention to specific parts of your dish while artfully blurring others.
In order to achieve this effect, tap on your phone's screen to select the focal point. Many newer phones offer portrait mode, which simulates a shallow depth of field, making your subject pop against a soft background.
Experiment with different angles and distances to find the sweet spot for your shot. Getting closer to your subject often enhances the selective focus effect.
Try focusing on a single ingredient or texture within the dish to create intrigue. You can also play with layering by placing elements in the foreground, middle ground, and background, focusing on the middle layer for a dynamic composition.
Don't forget to take into account the background when using selective focus. A busy backdrop can detract from your subject, so opt for simple, complementary backgrounds.
Aperture Settings Explained
Despite the prevalence of automatic settings on smartphones, understanding aperture is essential for elevating your food photography. Aperture refers to the size of the opening in your camera's lens, which controls how much light enters and affects the depth of field in your images.
A wider aperture (smaller f-number) creates a shallow depth of field, blurring the background and focusing attention on your subject. Conversely, a narrower aperture (larger f-number) keeps more of the scene in focus.
To make the most of aperture settings in food photography:
- Use a wide aperture (f/1.8 – f/2.8) to highlight a specific dish or ingredient, creating a dreamy, bokeh effect in the background.
- Opt for a medium aperture (f/4 – f/8) when showcasing multiple dishes or a table setting, ensuring everything remains sharp.
- Choose a narrow aperture (f/11 – f/16) for overhead shots or when capturing intricate details in a dish, maintaining clarity throughout the frame.
Editing Apps for Food Photos
Once you've captured your mouthwatering food photos, it's time to enhance them with editing apps. These tools can transform your images from good to great, making your culinary creations truly shine.
VSCO is a popular choice among food photographers, offering a wide range of filters and advanced editing options. It's perfect for achieving that trendy, muted look many food bloggers prefer.
Snapseed, Google's free editing app, provides powerful tools like selective adjustments and healing brushes to fine-tune your images.
For Instagram users, Foodie is a specialized app designed specifically for food photography. It offers custom filters and a top-down camera mode ideal for flat lays.
Lightroom Mobile is another excellent option, giving you professional-grade editing capabilities on your phone.
Don't overlook your phone's built-in editing tools, either. They're often more than sufficient for quick adjustments to brightness, contrast, and saturation.
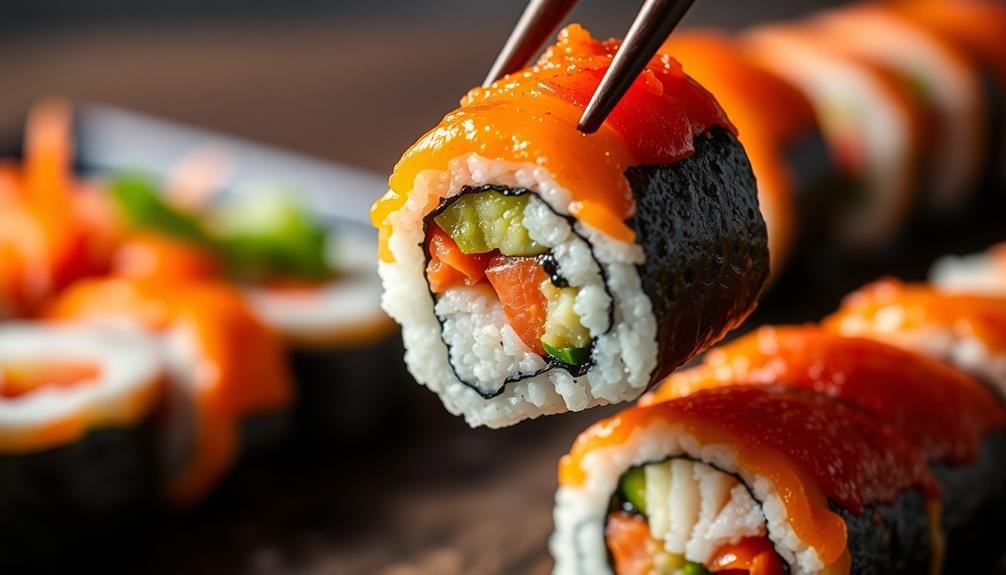
Capturing Texture and Detail
To capture the texture and detail of your food, you'll want to master macro lens techniques for ultra-close shots.
You can enhance depth and dimension by strategically positioning your lighting to cast subtle shadows.
Focus on unique features of the dish, such as the crispy edges of a cookie or the glistening surface of a sauce, to make your images truly stand out.
Macro Lens Techniques
Macro lenses are your secret weapon for capturing stunning food textures and intricate details. These specialized lenses allow you to get incredibly close to your subject, revealing aspects of food that aren't visible to the naked eye.
When using a macro lens for food photography, focus on the most interesting elements of the dish, like the crispy edge of a pizza crust or the delicate layers of a pastry.
To make the most of your macro lens techniques:
- Use a tripod to eliminate camera shake and guarantee sharp focus
- Experiment with different angles to find the most compelling perspective
- Adjust your depth of field to control which parts of the image are in focus
Don't be afraid to get creative with your macro shots. Try capturing the bubbles in a glass of champagne or the intricate patterns on a slice of citrus fruit.
Remember that lighting is vital when working with macro lenses, so position your food near a natural light source or use a small LED light to illuminate the details you want to highlight.
With practice, you'll be able to showcase the beauty of food in ways that will captivate your audience.
Lighting for Depth
Lighting plays an essential role in capturing the texture and depth of food in photography. To create dimension in your shots, use side lighting to highlight the food's contours and textures. Position your light source at a 45-degree angle to the subject, allowing shadows to form and emphasize the food's features.
Natural light is often the best choice for food photography. Place your dish near a window, but avoid direct sunlight, which can create harsh shadows. If you're shooting outdoors, look for soft, diffused light on overcast days or during the golden hours of early morning or late afternoon.
For artificial lighting, invest in a small LED panel or ring light. These tools provide consistent illumination and allow you to adjust the intensity and color temperature. Experiment with backlighting to create a glowing effect around the edges of your food, adding depth to the image.
Don't forget about reflectors. Use white cards or small mirrors to bounce light back onto shadowed areas, filling in details and balancing the overall exposure. This technique helps reveal intricate textures and guarantees every part of your dish looks appetizing.
Focus on Unique Features
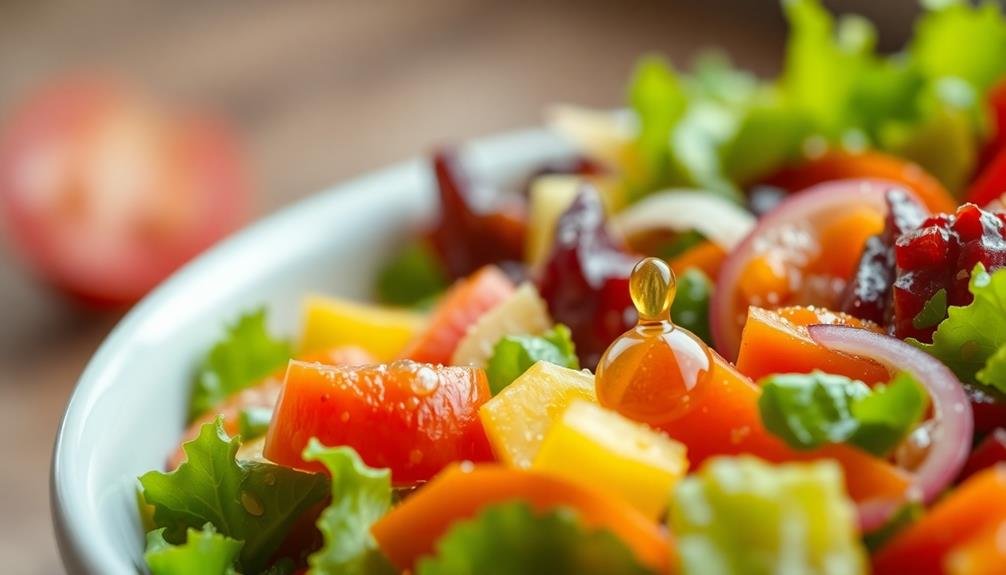
When capturing food photos, zeroing in on unique features can elevate your images from ordinary to extraordinary. Look for textures, colors, and shapes that make the dish stand out. Capture the flakiness of a croissant, the glistening sheen of a glazed donut, or the vibrant hues of a fruit salad. These details bring your food photos to life and make them more enticing to viewers.
To focus on unique features effectively, get up close and personal with your subject. Use your phone's macro mode or move in as close as possible without losing focus. Experiment with different angles to highlight the most interesting aspects of the dish. Don't be afraid to zoom in on a particular element that catches your eye.
Here are three tips to enhance your food photography:
- Use natural light to bring out textures and shadows
- Experiment with depth of field to isolate specific features
- Play with composition to draw attention to unique elements
Timing and Food Freshness

Timing is essential when capturing food photos. You'll want to snap your shots when the food is at its freshest and most visually appealing. Hot dishes should be photographed immediately, capturing steam and melting elements for a mouthwatering effect.
For cold items, like ice cream or chilled drinks, shoot quickly before they start to melt or condensation forms on glasses.
Pay attention to the lifespan of different ingredients. Fruits and vegetables can wilt or brown rapidly, so photograph them as soon as they're prepared.
Sauces and dressings can separate or congeal over time, losing their appetizing appearance. If you're working with a multi-course meal, prioritize photographing dishes that are most time-sensitive.
Consider the best moment for each food item. Capture gooey cheese pulls while the dish is still hot, or photograph a perfectly medium-rare steak before it continues cooking.
For baked goods, time your shots to showcase golden-brown crusts and rising steam. By focusing on timing and freshness, you'll guarantee your food photos look as delicious as the real thing.
Negative Space in Composition
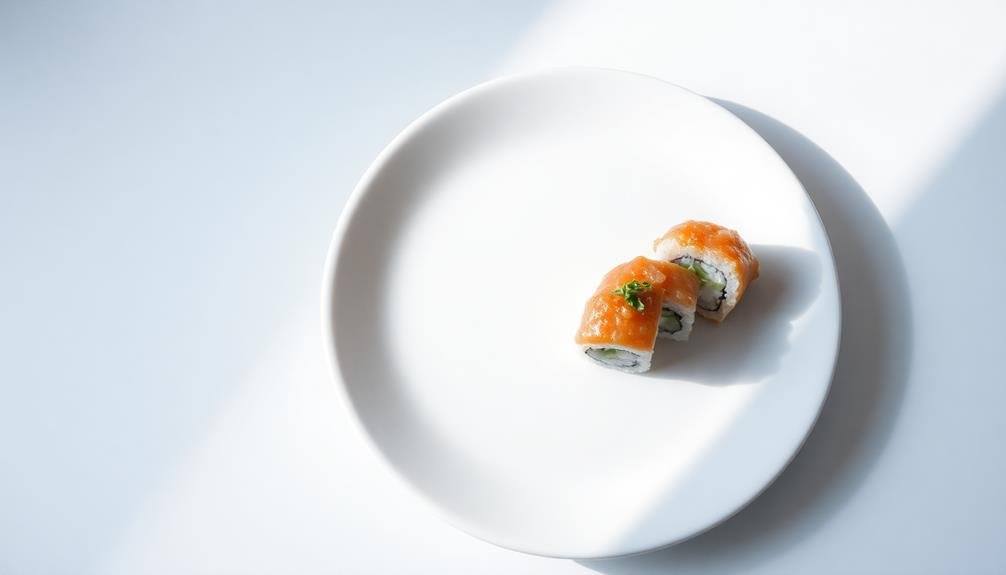
In the domain of food photography, negative space plays an essential role in composition. It's the empty area surrounding your main subject that can make or break your image. When used effectively, negative space draws attention to your food, creates balance, and adds a sense of elegance to your photos.
Don't be afraid to leave some breathing room around your dish; it'll help it stand out and prevent your image from feeling cluttered.
To make the most of negative space in your food photos:
- Use a plain background: Choose a simple, neutral surface that won't compete with your food.
- Position your dish off-center: This creates more negative space and adds visual interest.
- Experiment with angles: Try shooting from above or at a 45-degree angle to play with the empty space around your subject.
Storytelling Through Food Images
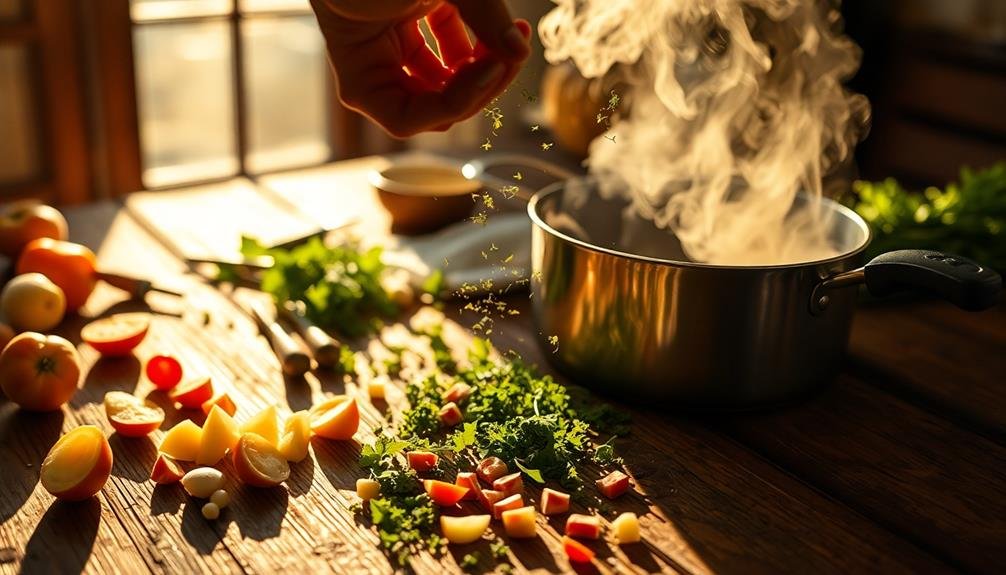
Food's ability to tell a story through images is a powerful tool in photography. When you're capturing food photos, think beyond just the dish itself. Consider the context, the ingredients, and the preparation process. You can create a narrative by including elements that hint at the dish's origin or the chef's inspiration.
Try incorporating props that relate to the cuisine or the setting. A rustic wooden table, vintage utensils, or fresh ingredients can add depth to your story. Capture the steam rising from a hot dish or the drip of sauce to convey freshness and appeal to the senses. Show hands in action, whether they're kneading dough or garnishing a plate, to add a human element.
Consider the mood you want to convey. Warm lighting can create a cozy atmosphere, while bright, natural light might suggest a fresh, healthy meal.
Smartphone Camera Settings
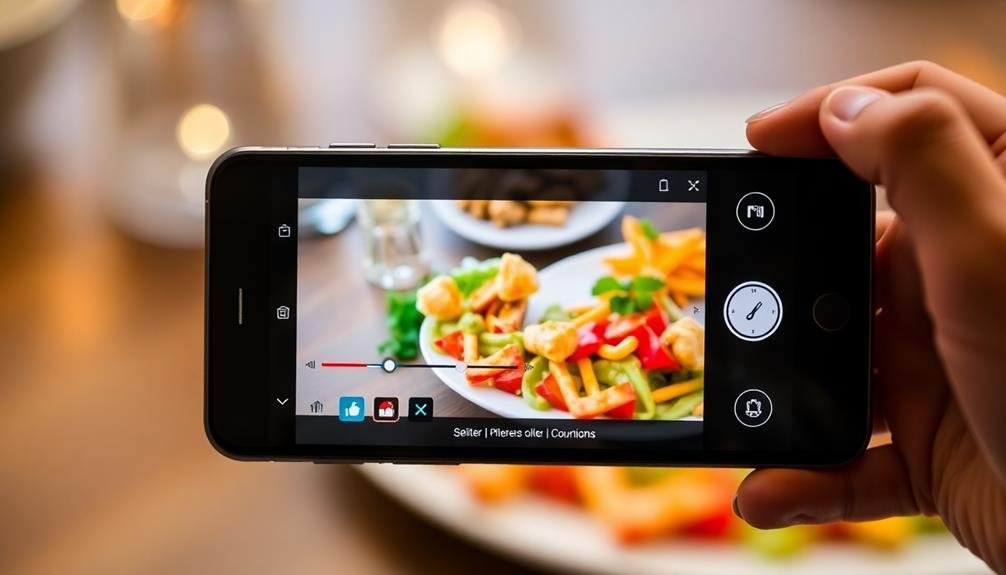
With the rise of smartphone photography, capturing stunning food images has become more accessible than ever. To make your food photos truly pop, it's important to understand and utilize your smartphone's camera settings effectively. Most modern smartphones offer a range of features that can dramatically improve your food photography.
Start by enabling HDR (High Dynamic Range) mode, which combines multiple exposures to create a well-balanced image with rich details in both shadows and highlights. Next, adjust your focus by tapping on the main subject of your dish, ensuring it's sharp and clear. Many phones also offer a "Food" or "Macro" mode specifically designed for close-up shots of dishes.
To further enhance your food photos, consider these additional settings:
- Adjust exposure: Swipe up or down on the focus point to fine-tune brightness
- Use grid lines: Enable the 3×3 grid to help with composition and alignment
- Experiment with portrait mode: Create a blurred background effect to make your dish stand out
Remember to keep your phone steady and take advantage of natural light whenever possible. With these settings mastered, you'll be well on your way to creating mouthwatering food images that stand out on social media.
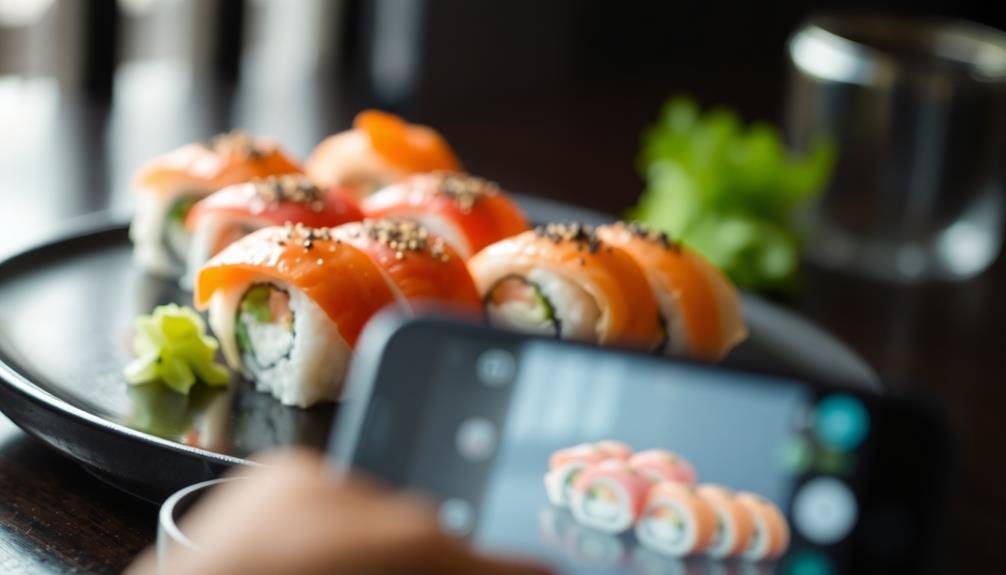
Social Media-Friendly Food Shots
Creating eye-catching food shots for social media requires more than just good camera settings. You'll need to take into account composition, lighting, and presentation to make your food photos stand out in crowded social feeds.
First, choose a visually appealing background that complements your food without overpowering it. Neutral surfaces like marble, wood, or plain tablecloths work well.
Next, focus on the arrangement of your dish. Use the rule of thirds to place your main subject off-center for a more dynamic composition. Add interest with props like utensils, napkins, or ingredients, but don't overcrowd the frame.
Lighting is essential for social media-friendly food shots. Natural light is often best, so try shooting near a window. If you're in a dimly lit restaurant, use a friend's phone flashlight to illuminate your dish.
Avoid harsh overhead lighting that can create unflattering shadows.
Frequently Asked Questions
How Can I Make Steam Visible in Hot Food Photos?
To make steam visible in hot food photos, you'll want to use backlighting. Position a light source behind your dish, and shoot in a darker environment. This contrast will help highlight the rising steam, making it more prominent.
What's the Best Way to Photograph Foods With Reflective Surfaces?
To photograph reflective foods, you'll want to control lighting carefully. Use diffused light to reduce harsh reflections. Experiment with angles to capture interesting highlights. Consider using a polarizing filter to minimize unwanted glare on shiny surfaces.
How Do I Capture the Perfect "Cheese Pull" in Pizza Photos?
To capture the perfect cheese pull, you'll want to heat your pizza until it's gooey. Lift a slice slowly, using two hands. As you pull, have someone snap multiple shots to catch the ideal stretch moment.
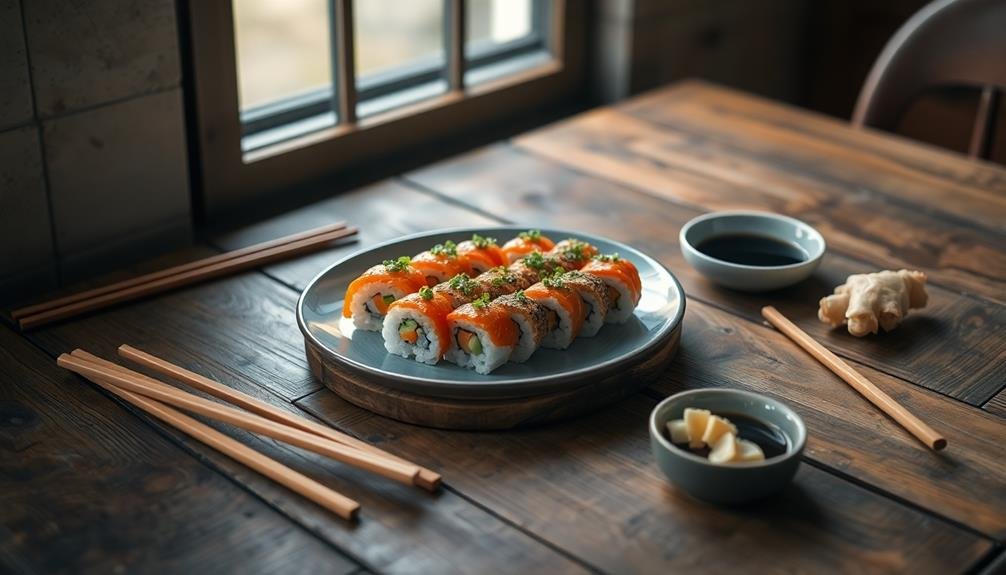
Are There Specific Plating Techniques for Different Cuisines in Food Photography?
Yes, plating techniques vary by cuisine. You'll want to highlight key ingredients, use appropriate dishware, and consider cultural presentation norms. For Asian dishes, try vertical stacking. Italian cuisine often benefits from rustic, family-style plating. Always aim for balance and contrast.
How Can I Photograph Frozen Treats Without Them Melting Too Quickly?
You'll want to work quickly! Use a cold surface, pre-chill props, and have your camera settings ready. Shoot in a cool room, use artificial ice, or try dry ice for fog effects. Don't forget backup treats!
In Summary
You've now got the tools to make your food photos pop on your phone. Remember, it's all about lighting, composition, angles, and styling. Don't forget to play with colors and negative space. Tell a story with your images and adjust your camera settings for the best results. With practice, you'll be creating social media-worthy food shots in no time. So grab your phone, plate up something delicious, and start snapping!


Leave a Reply