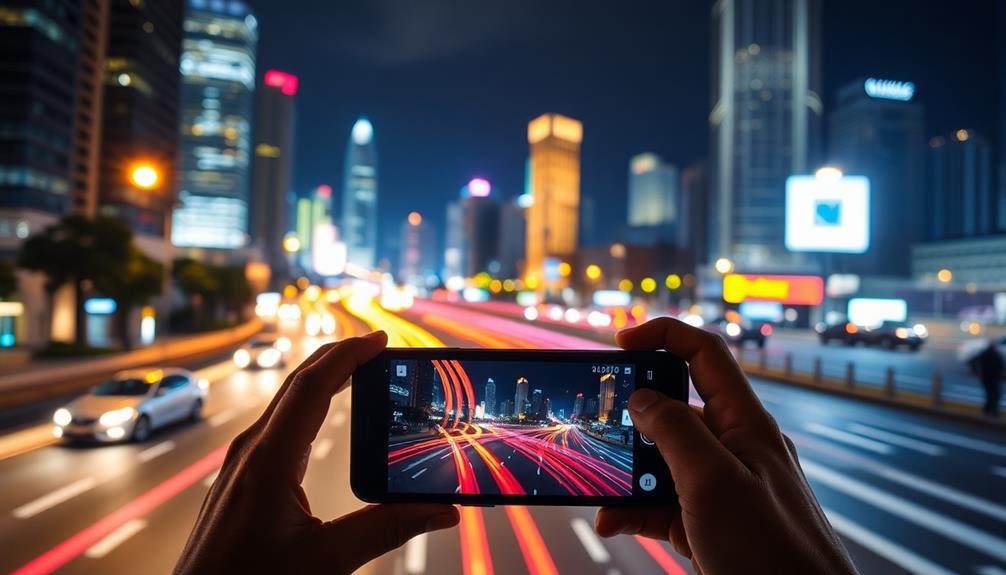
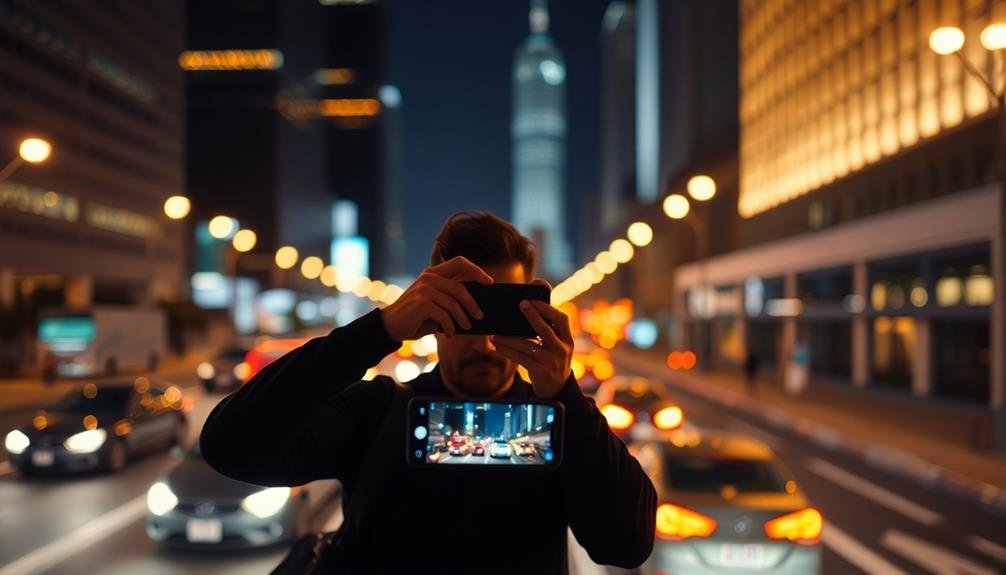
Transform your mobile photography with these pro tricks for stunning light trail photos. Use a tripod or stabilizer for sharp images, and adjust manual camera settings for ideal exposure. Find the perfect location and time your shots carefully to capture bustling traffic. Experiment with shutter speeds to achieve desired trail lengths. Compose with foreground elements for depth, and play with focus techniques. Enhance colors in post-processing to make your trails pop. Get creative by combining multiple exposures for dramatic effects. With these tips, you'll be well on your way to mastering the art of mobile light trail photography. Discover more secrets to elevate your shots even further.
Use a Tripod or Stabilizer

A sturdy tripod or stabilizer is essential for capturing stunning light trail photos with your mobile device. Long exposure shots require your camera to remain perfectly still, and even the slightest movement can result in blurry images.
When choosing a tripod, opt for one that's lightweight yet stable, with adjustable legs for uneven surfaces. Look for models specifically designed for smartphones, as they'll have the right mount for secure attachment.
If you don't have a tripod, improvise with a stable surface. Rest your phone against a wall, ledge, or even a stack of books. For added stability, use your phone's voice control or timer feature to trigger the shutter without touching the screen.
Consider investing in a smartphone gimbal for more dynamic light trail shots. These handheld stabilizers use motors to counteract your movements, allowing for smooth panning and tracking shots.
They're particularly useful for capturing light trails from moving vehicles or while walking.
Adjust Manual Camera Settings

To capture stunning light trails, mastering your phone's manual camera settings is crucial. Start by switching to your camera app's manual or pro mode.
You'll want to adjust three key settings: ISO, shutter speed, and focus. Set your ISO to a low value, typically between 100-400. This reduces noise and guarantees a cleaner image.
Next, adjust your shutter speed. For light trails, you'll need a long exposure, so try settings between 2-30 seconds. The longer the shutter stays open, the more dramatic your light trails will be.
For focus, switch to manual and set it to infinity. This keeps distant lights sharp. If your phone allows it, use the focus peaking feature to confirm your focus is correct.
Don't forget about white balance. Set it to "daylight" or "cloudy" to maintain natural colors. If your phone offers a built-in neutral density filter, use it to prevent overexposure in brighter conditions.
Experiment with these settings to find the perfect combination for your scene. Remember, every location and light source is different, so be prepared to fine-tune your settings as you shoot.
Find the Perfect Location
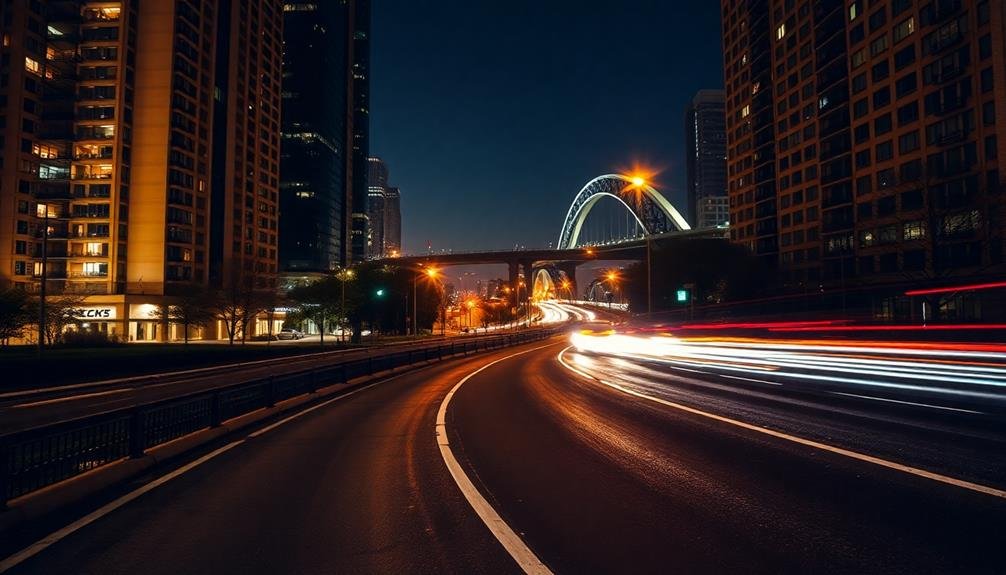
Scouting out the perfect location can make or break your light trail photos. Look for busy roads or intersections with consistent traffic flow. Urban areas with tall buildings and illuminated structures provide an excellent backdrop for your shots. Consider elevated positions like bridges or overpasses to capture a wider view of the light trails below.
Timing is essential. Visit potential locations during different hours to determine when traffic is heaviest and lighting conditions are ideal. Golden hour and blue hour often yield stunning results, as the fading natural light complements the artificial illumination from vehicles and streetlights.
Here's a quick guide to help you choose the best location:
| Feature | Urban | Rural |
|---|---|---|
| Traffic density | High | Low |
| Background | Varied, vibrant | Minimal, dark |
| Light sources | Numerous | Limited |
| Composition options | Many | Few |
| Accessibility | Easy | Challenging |
Don't forget to prioritize safety when selecting your spot. Make sure you have a stable surface for your tripod and enough space to set up without obstructing traffic or pedestrians. Scout multiple locations to give yourself options and increase your chances of capturing that perfect light trail shot.
Time Your Shots Carefully
When capturing light trails with your mobile device, timing is essential.
You'll find the best opportunities during peak traffic hours, as well as at dusk and dawn when ambient light creates a beautiful backdrop.
Experiment with long exposure settings to achieve the desired trail length and intensity in your shots.
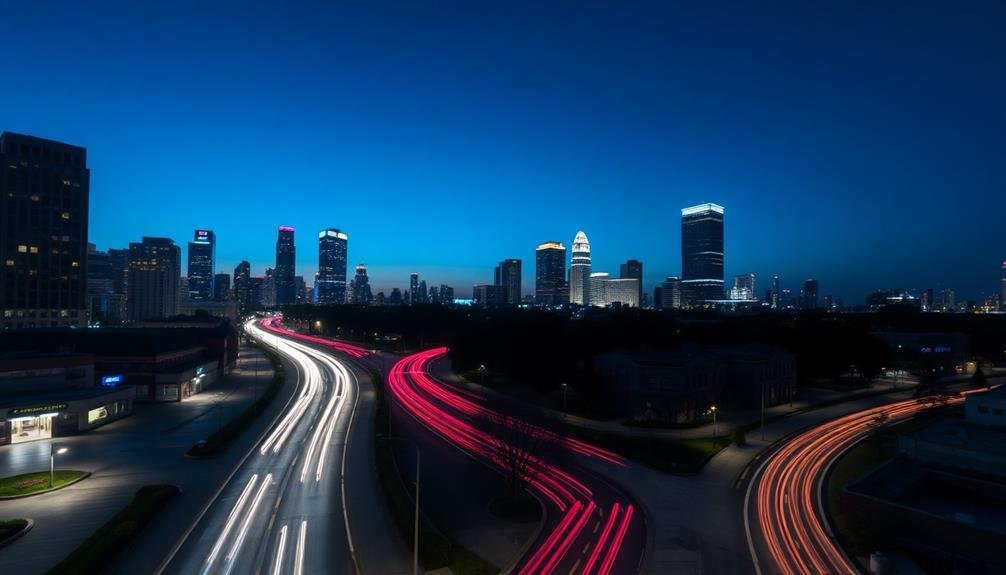
Peak Traffic Hours
Peak traffic hours often provide the perfect opportunity for capturing stunning light trail photos. During rush hour, typically between 7-9 AM and 4-7 PM on weekdays, you'll find an abundance of vehicles on the road, creating more light sources for your shots.
Weekday evenings are particularly ideal, as the combination of commuter traffic and early darkness creates ideal conditions for light trails.
To make the most of peak hours, scout your location in advance. Choose a spot with a clear view of busy roads or intersections, preferably from an elevated position. Bridges, overpasses, or nearby buildings can offer excellent vantage points.
Don't forget to evaluate safety and legality when selecting your shooting location.
As you prepare to shoot, adjust your camera settings for long exposures. Start with a shutter speed of 10-30 seconds, depending on traffic flow. Use a lower ISO to reduce noise and a narrow aperture (high f-number) for greater depth of field.
Remember to use a tripod or stabilize your phone to prevent camera shake during long exposures. Experiment with different compositions and angles to capture the most dynamic light trails during these busy traffic periods.
Dusk and Dawn Opportunities
The golden hours of dusk and dawn offer unique opportunities for capturing enchanting light trail photos. During these times, you'll benefit from a perfect balance of natural and artificial light, creating a magical atmosphere for your shots. As the sun sets or rises, the sky transforms into a canvas of warm hues, providing a stunning backdrop for your light trails.
To make the most of these moments, arrive at your chosen location well before the actual golden hour begins. This gives you time to set up your equipment and compose your shots. Experiment with different angles and perspectives as the light changes rapidly. You'll find that the fading daylight allows for longer exposures without overexposing the sky, resulting in more pronounced light trails.
Don't forget to adjust your camera settings as the ambient light decreases. Gradually lower your ISO and increase your exposure time to capture the full beauty of the light trails.
Pay attention to the changing colors in the sky and how they interact with the artificial lights. By timing your shots carefully during dusk and dawn, you'll create enchanting images that showcase the best of both natural and man-made illumination.
Long Exposure Timing
Timing your long exposures precisely is key to capturing stunning light trail photos. You'll need to experiment with different exposure times to achieve the desired effect. Start with exposures between 2 to 10 seconds, adjusting based on the speed of moving lights and the intensity of ambient light.
For city traffic, try 4-6 second exposures to capture smooth light trails without overexposing the scene. In darker environments or for slower-moving subjects, increase your exposure time to 8-10 seconds. Remember, longer exposures create longer, more dramatic light trails but may risk overexposure.
Use your phone's manual mode or a third-party camera app that allows shutter speed control. If your device lacks this feature, look for "light trail" or "long exposure" modes in your native camera app.
Pay attention to traffic patterns and time your shots to coincide with periods of consistent vehicle movement. Be patient and take multiple shots, as it may take several attempts to capture the perfect light trail composition.
Don't forget to stabilize your phone using a tripod or steady surface to guarantee sharp, blur-free images during these extended exposures.
Experiment With Shutter Speed
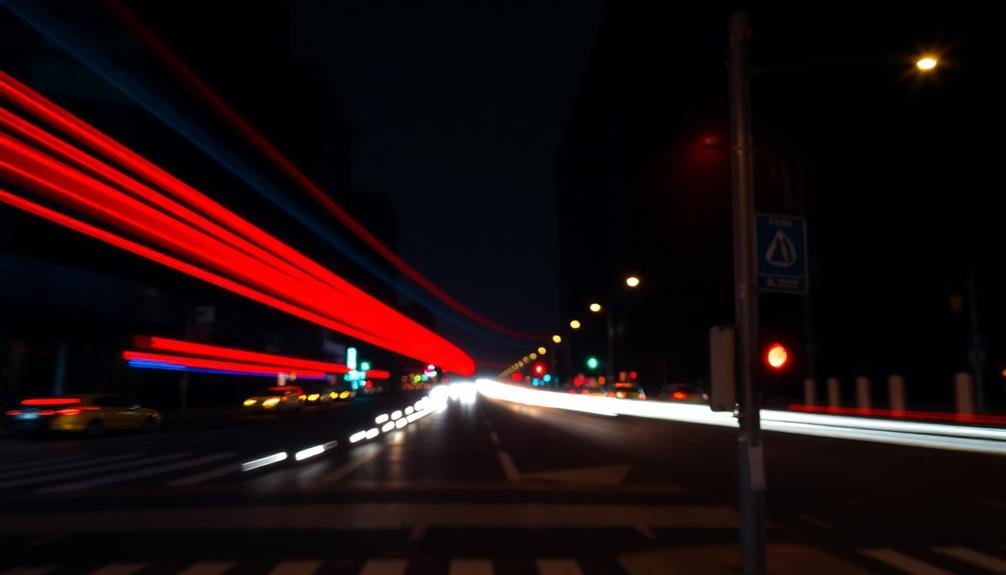
Experimenting with shutter speed is essential for capturing stunning light trails in mobile photography. Your phone's camera app may offer manual controls or a "Pro" mode that allows you to adjust shutter speed. Start with longer exposures, typically between 1 and 30 seconds, depending on the speed of the moving lights and your desired effect.
For slower-moving subjects like city traffic, try shutter speeds around 10-15 seconds. This duration often captures smooth, continuous light trails without overexposing the scene.
For faster subjects like amusement park rides, shorter exposures of 2-5 seconds might suffice. Don't be afraid to push the limits; ultra-long exposures of 30 seconds or more can create mesmerizing, abstract light paintings.
As you experiment, pay attention to how different shutter speeds affect the intensity and length of the light trails. Faster speeds will produce shorter, more defined streaks, while slower speeds create longer, more fluid lines. Keep adjusting until you achieve the desired effect.
Remember that longer exposures may require additional stability measures, such as a tripod or resting your phone on a stable surface, to prevent camera shake and guarantee sharp results.
Utilize Long Exposure Apps

You'll find several long exposure apps that can help you capture stunning light trails on your smartphone.
To get the best results, familiarize yourself with the app's settings and learn how to optimize them for different lighting conditions.
While a tripod is ideal for stability, you can also explore alternative methods like leaning your phone against a stable surface or using a makeshift support to keep your device steady during long exposures.
Best Long Exposure Apps
Long exposure apps have revolutionized mobile photography, allowing you to capture stunning light trails without lugging around a DSLR camera. These apps use advanced algorithms to simulate long exposures, even on smartphones without manual controls. To get the best results, you'll want to choose a high-quality app that offers features like exposure time control, ISO adjustment, and built-in stabilization.
Here are some of the top long exposure apps for both iOS and Android:
| App Name | Platform | Key Features |
|---|---|---|
| Slow Shutter Cam | iOS | Manual controls, light trail mode |
| ProCam X | Android | RAW capture, exposure bracketing |
| NightCap Camera | iOS | Star trails, light painting |
| Camera FV-5 | Android | DSLR-like manual controls |
| Spectre Camera | iOS | AI-assisted long exposures |
| LongExpo | Android | Easy-to-use interface, multiple modes |
When using these apps, experiment with different settings to achieve your desired effect. Start with shorter exposure times and gradually increase them as you become more comfortable. Remember to keep your phone steady or use a tripod for the sharpest results. With practice, you'll be capturing professional-looking light trails in no time.
App Settings Optimization
Once you've selected the right long exposure app for your device, it's time to fine-tune its settings for ideal results.
Start by adjusting the exposure time. For light trails, you'll typically want a longer exposure, ranging from 1 to 30 seconds. Experiment with different durations to achieve the desired effect.
Next, focus on ISO settings. Keep your ISO as low as possible to minimize noise in your images. Most apps allow you to set ISO manually; aim for 100-400 range. If your scene is too dark, gradually increase ISO, but be cautious of introducing graininess.
Adjust your white balance to match the lighting conditions. For city scenes with artificial lighting, try the "tungsten" or "fluorescent" preset. For more control, use the manual kelvin adjustment.
Don't forget about composition tools. Enable grid lines to help with framing and aligning your shots. If your app offers it, use the live histogram to guarantee proper exposure across the image.
Lastly, explore any light trail-specific features your app may offer, such as smart capture modes or trail intensity adjustments. These can help you create more dramatic and polished results with less effort.
Stability and Tripod Alternatives
While a tripod is ideal for capturing light trails, it's not always practical or available when shooting with a smartphone. Fortunately, there are several alternatives to guarantee stability for long exposure shots.
First, try leaning your phone against a stable object like a wall, railing, or even a rock. This can provide a steady base for your device.
If you're in an urban setting, look for flat surfaces such as benches, tables, or ledges to rest your phone on. Use small objects like coins or folded paper to adjust the angle if needed.
Another option is to improvise a makeshift tripod using everyday items. A rolled-up jacket or a bean bag can create a flexible support for your phone.
For added stability, consider using the volume buttons or a Bluetooth remote to trigger the shutter, minimizing camera shake.
If you're feeling adventurous, try a pocket-sized flexible tripod or a magnetic phone mount that attaches to metal surfaces.
In a pinch, you can even use a string or lanyard tied to your phone and stepped on to create tension, forming a simple stabilizer.
With these techniques, you'll be able to capture stunning light trails without a traditional tripod.
Compose With Foreground Elements

Adding foreground elements to your light trail photos can dramatically enhance their visual impact. By including objects in the foreground, you'll create depth and context, making your images more engaging and memorable. Look for interesting structures, statues, or natural elements that complement the light trails.
Position these objects strategically to frame your shot and guide the viewer's eye through the composition. Experiment with different angles and perspectives to find the most enchanting arrangement. You might try shooting from a low angle to make foreground elements appear larger and more prominent.
Don't be afraid to get creative with your compositions; sometimes, unexpected elements can lead to the most striking results. When selecting foreground elements, consider how they'll interact with the light trails.
Here are four ways to evoke emotion through your choices:
- Use reflective surfaces to create a sense of wonder
- Incorporate recognizable landmarks for nostalgia
- Frame with natural elements to inspire tranquility
- Include human silhouettes to convey loneliness or contemplation
Remember to maintain a balance between the foreground and the light trails. Your goal is to enhance the overall composition, not overshadow the main subject.
With practice, you'll develop an eye for creating compelling, multi-layered light trail photos that enchant your audience.
Play With Focus and Depth
You can enhance your light trail photos by experimenting with focus and depth.
Try using manual focus techniques to sharpen specific elements while allowing others to blur artistically.
Additionally, consider placing a foreground subject strategically to create depth and frame your light trails effectively.
Manual Focus Techniques
For enchanting light trail photos, mastering manual focus techniques is essential. Most smartphone cameras offer manual focus options, allowing you to take control of your shot's sharpness. To use manual focus effectively, tap on your screen where you want the focus to be, then adjust the focus slider that appears. This gives you precise control over which elements of your light trail composition remain sharp.
When capturing light trails, it's often best to focus on a stationary object in your frame, such as a building or street sign. This provides a sharp anchor point for your image, contrasting beautifully with the flowing light trails. Experiment with focusing at different distances to see how it affects your final image.
Manual focus can evoke powerful emotions in your audience:
- Awe – by highlighting intricate details in foreground elements
- Mystery – through deliberate soft focus on distant light sources
- Energy – by sharply capturing the start or end points of light trails
- Serenity – with a dreamlike quality from slight defocusing
Remember to lock your focus once you've found the perfect setting. This prevents your camera from readjusting focus during long exposures, ensuring consistent sharpness throughout your light trail capture.
Foreground Subject Placement
While manual focus sharpens your primary subjects, foreground elements can add depth and interest to your light trail compositions. To create engaging foreground elements, look for stationary objects like street signs, lamp posts, or architectural features. Position these in the lower third of your frame to create a sense of scale and perspective.
Experiment with different angles and distances from your foreground subject. Getting close can exaggerate its size and importance, while stepping back allows you to include more of the light trails. Try framing your shot through objects like fences or tree branches to add texture and intrigue.
Don't forget to take into account the relationship between your foreground and the light trails. Seek out complementary shapes or contrasting elements that enhance the overall composition. For example, a curved railing in the foreground can echo the swooping lines of car headlights.
Remember to adjust your focus accordingly. Use tap-to-focus on your phone to guarantee the foreground subject is sharp, or experiment with a slightly softer foreground to emphasize the light trails.
Enhance Colors in Post-Processing

Often, capturing vibrant light trails is just the first step in creating stunning mobile photography. To truly make your images pop, you'll need to enhance colors in post-processing. With today's powerful mobile editing apps, you can transform your light trail photos into eye-catching masterpieces right on your smartphone.
Start by adjusting the overall exposure and contrast to bring out the details in both the light trails and surrounding elements.
Next, fine-tune the white balance to achieve a natural color temperature that complements the scene. Don't be afraid to experiment with color grading to create a unique mood or atmosphere.
To evoke emotion in your audience, consider these color enhancement techniques:
- Boost saturation selectively to make the light trails glow without oversaturating the entire image.
- Increase vibrance to add depth and richness to muted tones.
- Apply split toning to create a cinematic look that sets your photo apart.
- Use selective color adjustments to emphasize specific hues in the light trails or background.
Combine Multiple Exposures Creatively

By combining multiple exposures, you can take your light trail photography to the next level. This technique allows you to create complex, layered images that capture more light trails and add depth to your compositions.
Start by taking several shots of the same scene, varying your exposure times and camera angles slightly. You'll want to keep your phone as steady as possible, using a tripod or stable surface.
Once you've captured multiple exposures, use a photo editing app that supports layers, like Snapseed or Adobe Lightroom Mobile. Import your images as separate layers and experiment with blending modes. "Screen" or "Lighten" modes work well for combining light trails. Adjust the opacity of each layer to control the intensity of the trails.
Don't be afraid to get creative with your combinations. Try mixing exposures taken at different times of night or with varying traffic patterns. You can even blend in non-light trail elements, like a well-exposed foreground or a dramatic sky, to create a more balanced and interesting final image.
Remember to mask out any unwanted elements and fine-tune your composition for maximum impact.
Frequently Asked Questions
Can I Achieve Light Trail Photos Without a Dedicated Camera App?
Yes, you can capture light trail photos without a dedicated app. Use your phone's built-in camera app with manual mode settings. Adjust shutter speed, ISO, and focus. Stabilize your phone and experiment with long exposures in low-light conditions.
How Do I Protect My Phone's Camera During Long Exposure Shots?
To protect your phone's camera during long exposure shots, you'll want to use a sturdy tripod or stable surface. Keep the lens clean, avoid extreme temperatures, and use a remote shutter to minimize vibrations. Don't forget a protective case.
What Are the Best Subjects for Light Trail Photography Besides Cars?
You'll find stunning subjects for light trail photography beyond cars. Try capturing fireworks, amusement park rides, or city skylines at night. Don't forget about stars, boats on water, or even light painting with flashlights for creative shots.
Is It Possible to Create Light Trails Using Artificial Light Sources?
Yes, you can create light trails with artificial sources. You'll need a long exposure and moving lights. Try using LED strips, glow sticks, or flashlights. Experiment with different movements to craft unique patterns and shapes in your photos.
How Can I Minimize Noise in Low-Light Conditions for Light Trail Photos?
To reduce noise in low-light light trail photos, you'll want to use a lower ISO setting, a longer exposure time, and a tripod. Don't forget to clean your lens and use manual focus for sharper results.
In Summary
You're now equipped with pro tricks to capture stunning light trail photos on your mobile. Don't be afraid to experiment and push your creativity. Remember, practice makes perfect. As you refine your technique, you'll develop your unique style. Keep exploring new locations and challenging yourself. With patience and persistence, you'll soon be producing jaw-dropping light trail images that stand out from the crowd. So grab your phone and start shooting!


Leave a Reply