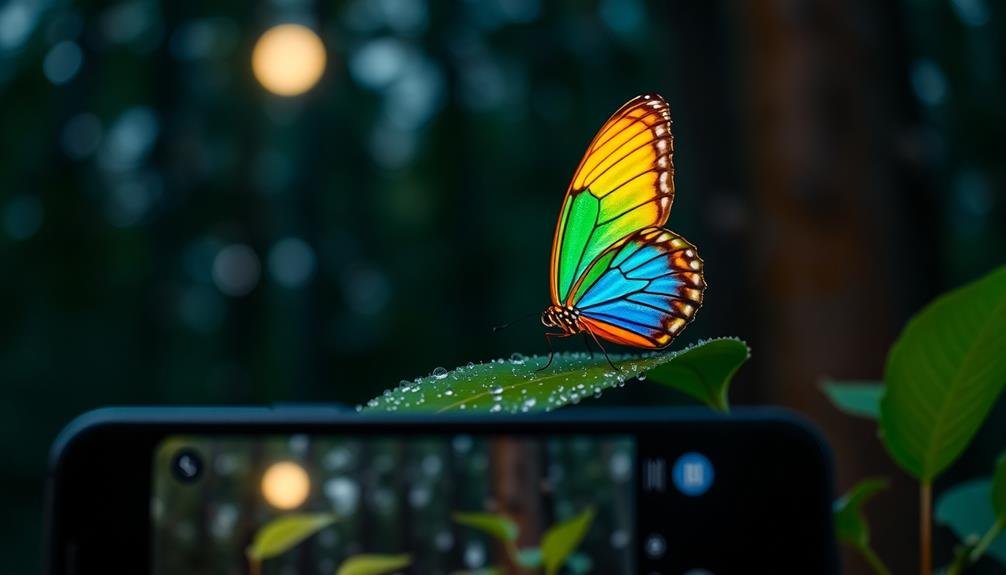
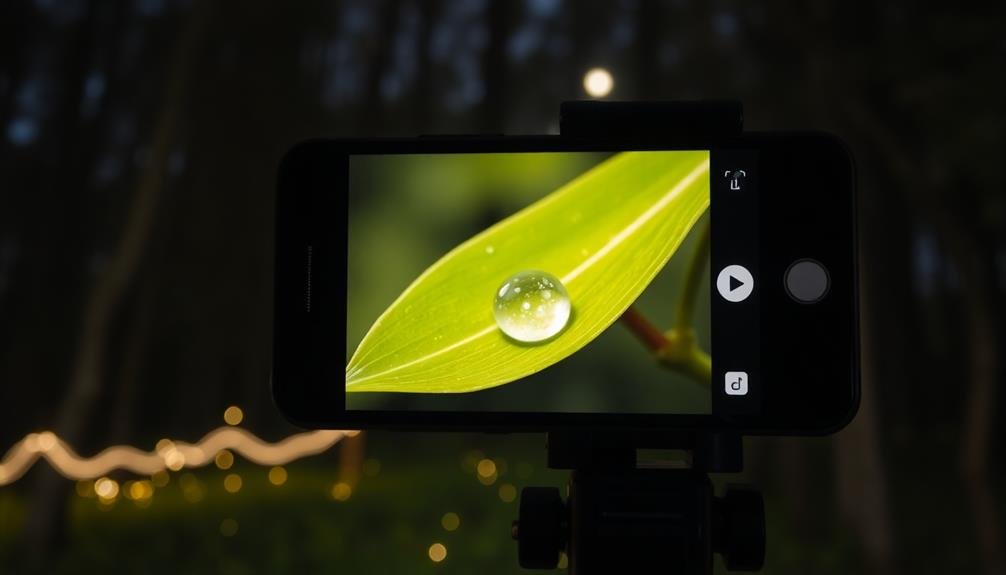
To capture stunning low-light macro photos with your smartphone, start by mastering manual camera settings. Stabilize your device using a tripod or steady surface to prevent blur. Maximize available light sources, like window light or LED panels, and position reflectors strategically. Try focus stacking for razor-sharp images across the entire subject. Experiment with editing apps to enhance details and adjust exposure. Don't shy away from high ISO; embrace it creatively for atmospheric effects. Finally, explore long exposure techniques to reveal hidden details in your macro subjects. These tips are just the beginning of your low-light macro photography journey.
Use Manual Camera Settings

The key to successful low-light macro photography on your mobile device lies in mastering manual camera settings. By taking control of your camera's parameters, you'll achieve better results in challenging lighting conditions.
Start by switching your camera app to manual or pro mode, which gives you access to essential settings. Focus on adjusting your ISO first. In low light, you'll need to increase it, but be cautious as higher ISOs can introduce noise. Find a balance between brightness and image quality.
Next, slow down your shutter speed to allow more light in. However, this may lead to motion blur, so use a tripod or stabilize your phone against a solid surface. Experiment with your phone's aperture settings if available. A wider aperture (lower f-number) lets in more light but reduces depth of field. For macro shots, you might prefer a narrower aperture to keep more of your subject in focus.
Adjust your white balance to match the lighting conditions, ensuring accurate colors in your final image. Don't forget about exposure compensation. In tricky lighting situations, you may need to manually brighten or darken your image to capture the details you want.
Practice and patience are key to mastering these settings and producing stunning low-light macro photos.
Stabilize Your Smartphone
Stabilizing your smartphone is essential for sharp, clear macro photos in low light. Even the slightest movement can blur your images, especially when shooting close-up subjects in dim conditions. To combat this, you'll need to employ various stabilization techniques.
First, adopt a stable stance by planting your feet shoulder-width apart and tucking your elbows into your body. This creates a more solid foundation for your shots.
Next, consider using physical supports like tripods, mini-stands, or even makeshift rests like a stack of books or a nearby wall.
Here are five key stabilization methods to try:
- Use a smartphone-specific tripod or clamp
- Activate your device's built-in image stabilization
- Employ the volume button or a remote shutter release
- Utilize the timer function to avoid shake from pressing the screen
- Try propping your phone against a stable object
Maximize Available Light Sources
To make the most of limited light for your mobile macro shots, start by mastering window light techniques.
You'll want to position your subject strategically near windows and experiment with reflector placement to bounce light where needed.
For additional illumination, consider using small LED panels, which can provide focused light and help you achieve the desired exposure in challenging low-light conditions.
Window Light Techniques
When natural light is scarce, window light becomes your best friend for low-light macro photography. Position your subject near a window to take advantage of the soft, diffused light. This technique works well for both daytime and nighttime shoots, as long as there's some ambient light outside.
To make the most of window light for your macro shots:
- Use a reflector to bounce light back onto your subject
- Experiment with different angles to create interesting shadows
- Place a sheer curtain over the window for softer light
- Try backlighting your subject for a dramatic effect
- Adjust your camera's white balance to match the window light color
Don't be afraid to move your subject around to find the perfect lighting. You'll often find that the best light is just a few inches away from where you started.
Remember to turn off any artificial lights in the room to avoid conflicting color temperatures. If you're shooting at night, try using a long exposure to capture more light.
Reflector Positioning Strategies
Building on the window light techniques, reflectors can amplify and shape the available light for your macro shots. Position a white or silver reflector opposite your main light source to bounce light back onto your subject, filling in shadows and creating a more balanced exposure.
For low-light situations, opt for a silver reflector as it's more efficient at redirecting light. Experiment with the reflector's distance and angle to your subject. Closer placement creates stronger, more defined reflections, while moving it farther away produces softer, more diffused light.
Tilt the reflector slightly downward to mimic natural overhead lighting and prevent harsh upward shadows. You don't need professional equipment; improvise with household items like white cardboard, aluminum foil, or even a white t-shirt.
For precise control, use smaller reflectors or create DIY mini-reflectors from cardstock. These allow you to direct light into tight spaces, perfect for intricate macro subjects.
When working with multiple light sources, use reflectors to balance the overall lighting. Place them strategically to fill shadows or create highlights, enhancing the three-dimensional appearance of your macro subject.
LED Panel Usage
LED panels have revolutionized low-light mobile macro photography, offering a versatile and portable lighting solution. These compact light sources provide continuous illumination, allowing you to see the effect of your lighting in real-time.
When using LED panels for mobile macro photography, position them close to your subject to maximize their impact. Experiment with different angles to create depth and highlight textures.
To make the most of your LED panel:
- Adjust the brightness to avoid overexposing your subject
- Use diffusers to soften harsh light and reduce glare
- Combine multiple panels for more creative lighting setups
- Experiment with color temperature settings for different moods
- Try backlighting to create a glowing effect around your subject
Remember to balance the LED panel's light with any available ambient light. This will help create a more natural-looking image.
If your LED panel has adjustable color temperature, match it to the existing light source for consistent color across your photo. Don't be afraid to get creative with your lighting placement – sometimes unconventional angles can lead to stunning results.
With practice, you'll develop an intuitive sense of how to use LED panels effectively in your low-light mobile macro photography.
Focus Stacking for Sharpness
Focus stacking is a technique you'll want to master for achieving tack-sharp macro images in low light.
You'll need a steady phone mount and a focus stacking app to capture multiple shots at different focus points.
Once you've taken your series of images, you can merge them using specialized software to create a final photo with extended depth of field.
What Is Focus Stacking
In light of the challenges posed by macro photography, focus stacking emerges as a powerful technique to achieve maximum sharpness.
It's a method where you take multiple photos of the same subject at different focus points and then combine them into a single image with enhanced depth of field. This process allows you to overcome the limitations of shallow depth of field in macro shots, especially in low-light conditions.
When you're shooting close-ups with your mobile device, you'll often find that only a small portion of your subject is in focus. Focus stacking solves this problem by merging several images to create one that's sharp from front to back.
Here's what you need to know about focus stacking:
- It requires taking multiple shots with different focus points
- You'll need specialized software to blend the images
- It's particularly useful for subjects with intricate details
- It can be time-consuming but yields impressive results
- Many modern smartphones now offer built-in focus stacking features
Necessary Equipment and Apps
To successfully implement focus stacking in your low-light mobile macro photography, you'll need a few key pieces of equipment and apps.
First, invest in a sturdy tripod or phone mount to keep your device stable during multiple shots. A remote shutter release or timer app will help minimize camera shake.
For lighting, consider a small LED panel or ring light to illuminate your subject evenly. A diffuser can soften harsh shadows and create a more natural look.
Don't forget a macro lens attachment to get those super close-up shots.
On the software side, you'll need a camera app that allows manual focus control and exposure settings. Popular options include ProCamera, Camera+ 2, and Halide.
For focus stacking, try specialized apps like Focus Stacker or Focusing Screen.
Post-processing is essential for combining your stacked images. Adobe Photoshop or Affinity Photo are excellent desktop options, while Snapseed or TouchRetouch work well on mobile devices.
These apps help align and blend your images, creating a final photo with enhanced depth of field and sharpness throughout.
Step-By-Step Stacking Process
Now that you've gathered the necessary equipment and apps, let's walk through the focus stacking process step-by-step. Focus stacking is vital for achieving sharp macro images in low light conditions.
Begin by setting up your mobile device on a tripod and composing your shot. Make certain your subject remains perfectly still throughout the process.
Next, use your chosen focus stacking app to capture a series of images, each with a slightly different focus point. Start from the nearest part of your subject and gradually move towards the farthest point. The number of images you'll need depends on the depth of your subject and the desired depth of field.
Once you've captured your stack of images, use the app to align and blend them. Here's a quick overview of the process:
- Capture 10-20 images with varying focus points
- Maintain consistent exposure and composition
- Use manual focus or tap-to-focus between shots
- Allow the app to process and align the images
- Fine-tune the result by adjusting blending options
After processing, review the final image for any artifacts or misalignments. If necessary, repeat the process or manually adjust problem areas.
With practice, you'll master this technique and produce stunningly sharp low-light macro photographs.
Experiment With Editing Apps

Frequently, the real magic of low-light macro photography happens after you've taken the shot. Editing apps can transform your images, enhancing details and creating stunning effects. You'll find a wealth of options available, from basic adjustments to advanced features tailored for macro photography.
Start with adjusting exposure and contrast to bring out hidden details in shadows. Then, fine-tune color balance to capture the true essence of your subject. Many apps offer noise reduction tools, which are essential for low-light shots. Don't be afraid to experiment with artistic filters or selective focus effects to add drama to your macro images.
Here's a quick guide to some popular editing apps and their key features:
| App Name | Key Features | Difficulty Level |
|---|---|---|
| Snapseed | Selective edits, curves, healing | Intermediate |
| VSCO | Film-like presets, advanced tools | Beginner to Intermediate |
| Lightroom Mobile | RAW editing, presets, selective adjustments | Advanced |
Embrace High ISO Creatively
High ISO settings often get a bad rap in photography, but they can be your secret weapon in low-light macro situations. When you're shooting tiny subjects in dim conditions, don't shy away from cranking up your ISO.
While it's true that higher ISOs can introduce noise, this grain can add a unique, artistic texture to your macro shots.
Embrace the high ISO aesthetic by:
- Using noise as a creative element to add atmosphere
- Experimenting with black and white conversions to enhance grainy textures
- Combining high ISO with intentional blur for dreamy effects
- Leveraging noise reduction in post-processing to fine-tune results
- Pairing high ISO with wider apertures for a balance of light and depth of field
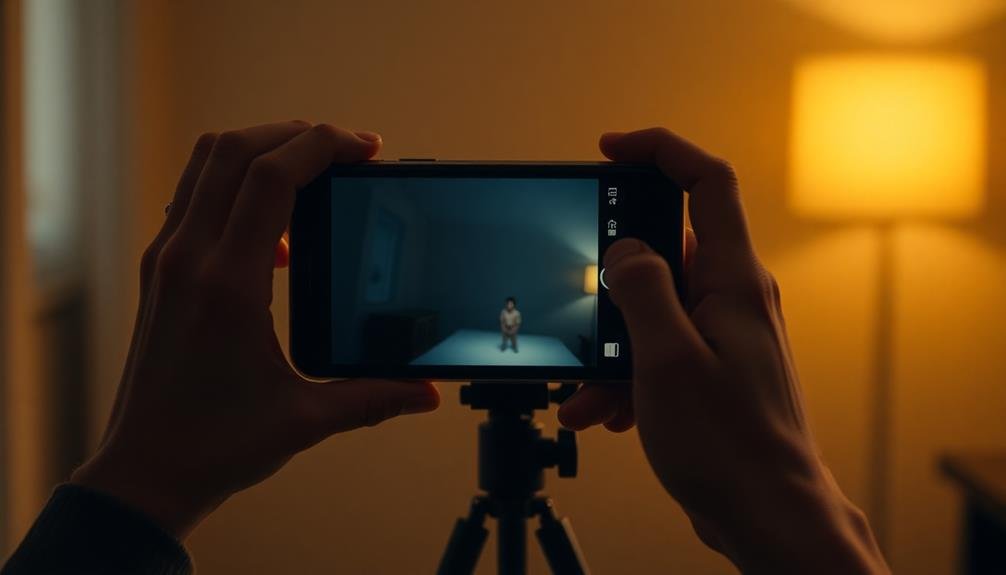
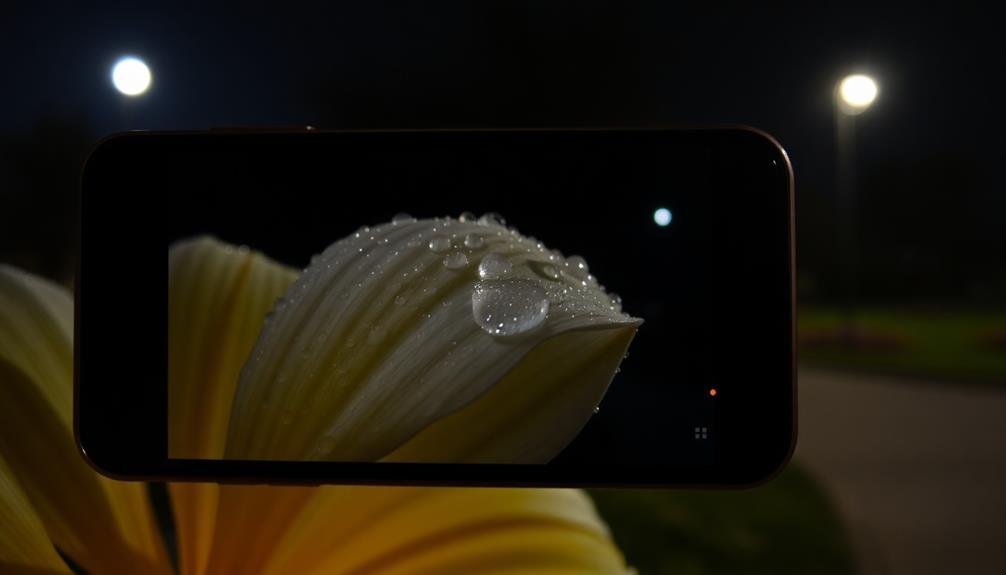
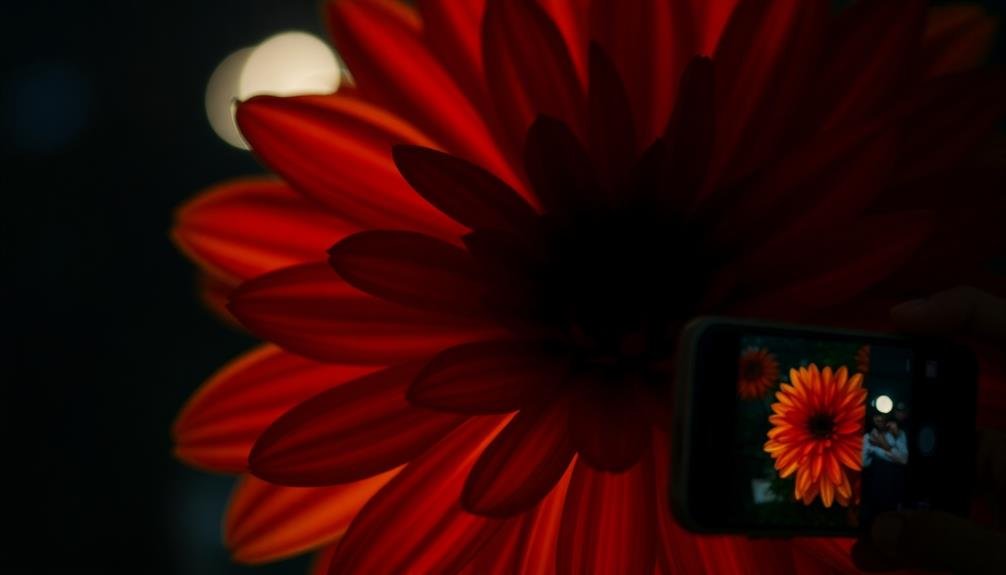
Master Long Exposure Techniques
While high ISO can be a quick fix for low-light situations, long exposure techniques offer another powerful approach to macro photography in dim conditions. You'll need to stabilize your phone using a tripod or steady surface to capture sharp images. Start by exploring your phone's manual mode or downloading a specialized camera app that allows for longer shutter speeds.
Experiment with various exposure times to achieve different effects:
| Exposure Time | Subject Type | Effect | Creative Use |
|---|---|---|---|
| 1-2 seconds | Static flora | Soft glow | Ethereal flower portraits |
| 5-10 seconds | Moving water | Silky smooth | Dewdrops on petals |
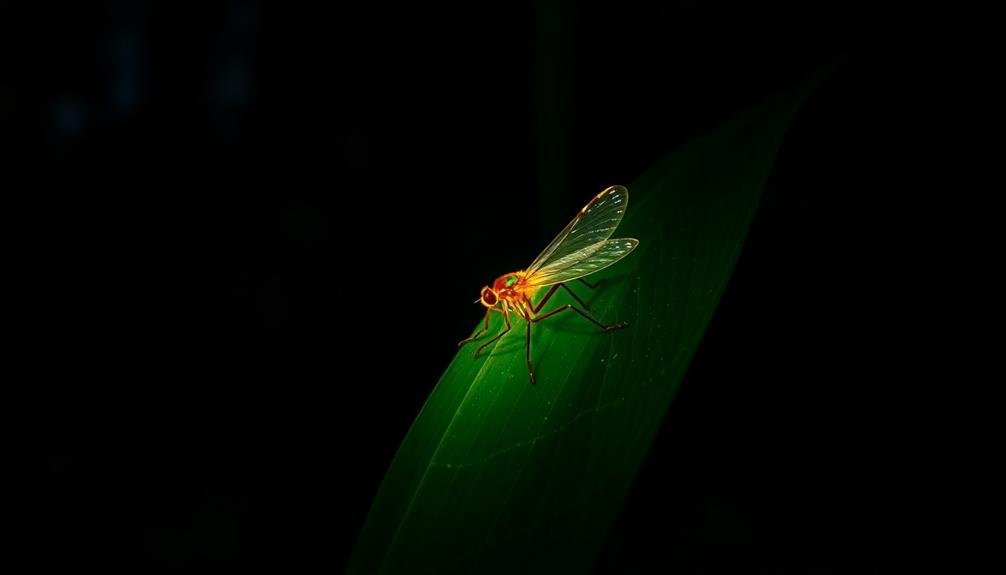
| 15-30 seconds | Insects | Light trails | Firefly paths |
| 30+ seconds | Night sky | Star points | Cosmic flower backdrops |
As you increase exposure time, you'll capture more light, revealing hidden details in your macro subjects. Be mindful of potential motion blur from slight movements. To counteract this, use your phone's timer or a remote shutter release. Don't forget to adjust your ISO and aperture settings to complement your chosen shutter speed. With practice, you'll master the art of long exposure macro photography, opening up a world of creative possibilities in low-light conditions.
Frequently Asked Questions
What Equipment Is Essential for Low-Light Mobile Macro Photography Besides a Smartphone?
You'll need a clip-on macro lens for your smartphone, a small tripod or stabilizer, and a portable LED light or ring light. Don't forget a remote shutter release to minimize camera shake during long exposures.
How Close Can You Get to Subjects With Smartphone Macro Photography?
You can get incredibly close with smartphone macro photography. Most modern phones let you focus as close as 2-4 cm from your subject. With clip-on lenses, you'll get even closer, capturing amazing details you'd normally miss.
Are There Specific Smartphone Models Better Suited for Low-Light Macro Photography?
You'll find several smartphones excel in low-light macro photography. Look for models with larger sensors, wide apertures, and advanced night modes. iPhones, Google Pixels, and high-end Samsung Galaxy devices are often top contenders for this specific use.
Can You Achieve Bokeh Effects in Mobile Macro Photography?
You can achieve bokeh effects in mobile macro photography. Use portrait mode or wide aperture settings on your phone. Position your subject close to the lens and guarantee there's distance between it and the background. Experiment with different angles.
What Are the Best Subjects for Beginners in Low-Light Mobile Macro Photography?
You'll find small, stationary objects ideal for low-light mobile macro photography. Try flowers, insects, water droplets, or textured surfaces. Don't forget household items like jewelry or coins. These subjects allow you to practice without movement challenges.
In Summary
You've now got the tools to capture stunning macro shots in low light with your smartphone. Don't be afraid to experiment and push your device's limits. Remember, practice makes perfect. Keep exploring new subjects, techniques, and apps to refine your skills. With patience and creativity, you'll soon be producing professional-looking macro images that'll wow your audience. So grab your phone, find a tiny subject, and start shooting – even in the dark!


Leave a Reply