To create cleaner, quieter mobile videos, start by using external microphones for better audio capture. Choose quiet shooting locations and enable wind noise reduction settings. Adjust your audio gain and utilize manual controls for ideal sound. Apply noise reduction software in post-production and invest in smartphone stabilizers for smoother footage. Leverage directional microphone techniques to focus on desired sounds. Don't forget to enhance audio in post-processing with EQ, compression, and de-essing. By implementing these pro tricks, you'll greatly improve your mobile video quality. Discover more advanced techniques to take your mobile filmmaking to the next level.
Use External Microphones

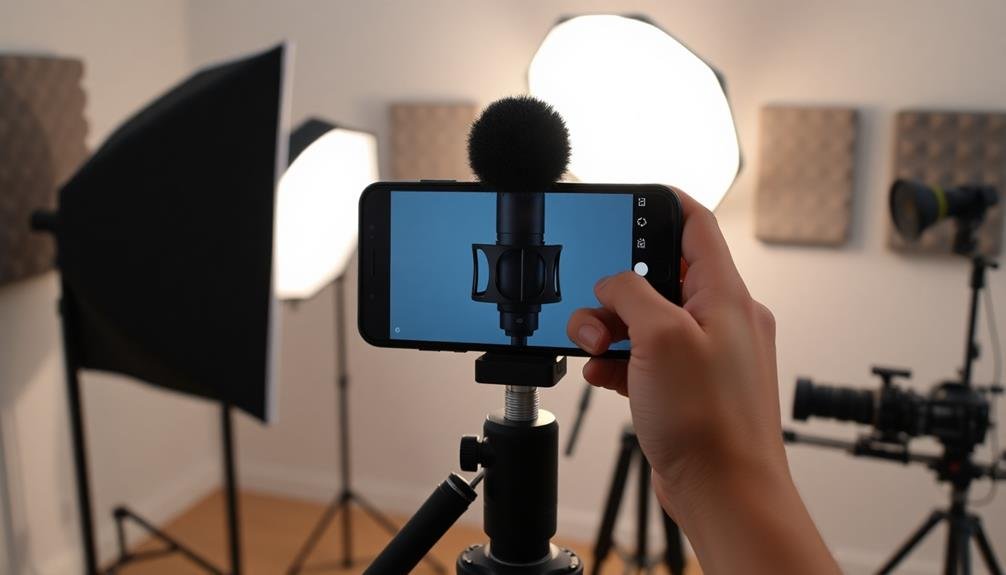
When it comes to capturing clean audio for your mobile videos, external microphones are a game-changer. They considerably reduce ambient noise and improve sound quality, elevating your content to a professional level.
You'll find various types of external mics suitable for mobile devices, including lavalier, shotgun, and handheld options.
Lavalier mics are small and clip onto clothing, making them ideal for interviews or vlogging. They're discreet and capture clear voice audio.
Shotgun mics are directional, focusing on sound from a specific area while minimizing background noise. They're perfect for capturing audio from a distance or in noisy environments.
Handheld mics offer versatility and are great for on-the-go reporting or music performances.
To use an external mic, you'll need an adapter that connects it to your phone's charging port. Some mics come with built-in phone connectivity.
Once connected, adjust your phone's audio settings to recognize the external mic as the input source. Experiment with mic placement to find the best position for clear, balanced sound.
Remember to monitor your audio levels and use windscreens outdoors to prevent unwanted noise.
Find Quiet Shooting Locations
When seeking quiet shooting locations, you'll want to scout for indoor sound havens and utilize outdoor noise buffers.
Look for spaces with sound-absorbing materials like carpets, curtains, or upholstered furniture indoors.
Outdoors, leverage natural barriers like trees, hills, or buildings to shield your shooting area from ambient noise.
Scout Indoor Sound Havens
Three key indoor locations can serve as sound havens for cleaner, quieter mobile videos. First, consider using a walk-in closet. The clothes and soft surfaces absorb ambient noise, creating a natural sound booth.
Hang blankets or towels to further dampen echoes and isolate your audio.
Next, try your car. It's designed to minimize external noise and offers a compact, controlled environment. Park in a quiet area, turn off the engine, and you'll have a ready-made recording studio.
The car's interior fabrics and padding will help reduce unwanted reverb.
Finally, explore empty conference rooms or offices after hours. These spaces are often well-insulated and free from outside disturbances.
Look for rooms with carpeting and furniture to help absorb sound reflections. If possible, choose a room away from elevators, restrooms, and high-traffic areas.
Before recording, test each location by listening through headphones or watching a short test clip.
Pay attention to any persistent background noises like air conditioning units or fluorescent lights. You may need to adjust your position or timing to minimize these intrusions and capture the cleanest possible audio for your mobile videos.
Utilize Outdoor Noise Buffers
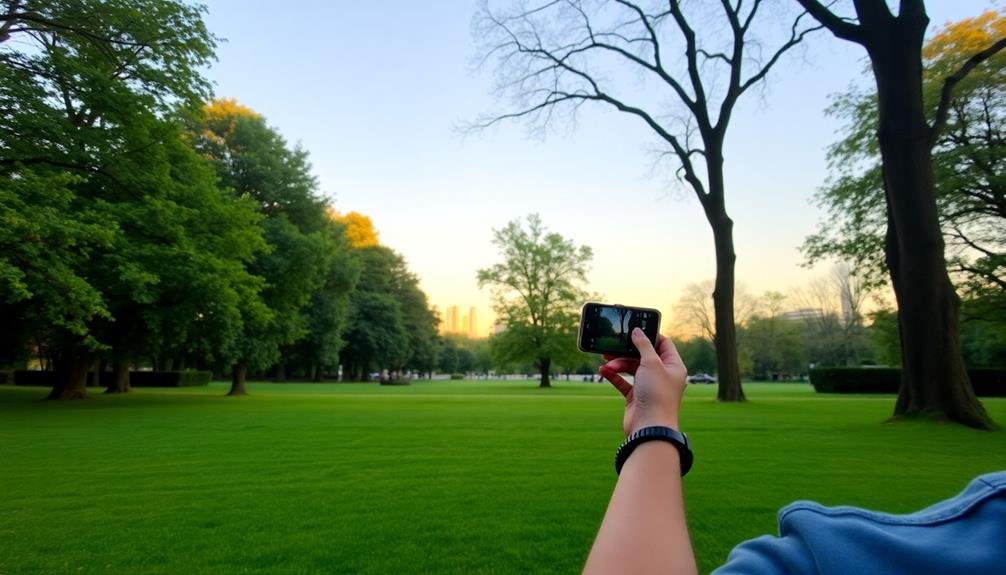
While indoor locations offer controlled environments, outdoor settings can provide unique backdrops for your mobile videos. To capture clean audio outdoors, you'll need to utilize natural noise buffers.
Look for areas shielded from wind and traffic noise, such as courtyards, gardens, or parks surrounded by buildings or trees. These structures act as barriers, reducing ambient sound.
Position yourself near walls or large objects to block wind and create a sound pocket. Dense foliage can also absorb background noise, so consider filming near bushes or hedges. If you're shooting near water, find a spot where the flow is gentle to avoid overwhelming audio.
Time your shoots strategically. Early mornings or late evenings often have less traffic and human activity, resulting in quieter outdoor environments. Check weather forecasts and avoid windy days, which can wreak havoc on your audio.
Don't forget to use your surroundings creatively. A cluster of trees can serve as both a visual element and a sound buffer.
Enable Wind Noise Reduction

You'll want to tackle wind noise to improve your mobile video quality.
Start by activating your device's built-in wind noise reduction setting, typically found in the camera or audio options.
For even better results, consider using external wind shields or "dead cats" that fit over your phone's microphone.
Activate Built-In Settings
Once activated, your phone will use its multiple microphones to detect and filter out wind noise, resulting in clearer audio.
Keep in mind that this feature works best for moderate wind conditions. In extreme wind, you might still need additional protection like a windscreen.
Remember that using wind noise reduction can slightly alter the overall audio quality, so it's best to test it in different conditions.
You may want to record short clips with and without the feature to compare results.
If you're filming in a controlled environment or indoors, it's often better to leave this setting off to preserve the most natural sound.
Always consider your specific filming situation when deciding whether to use built-in wind noise reduction.
Use External Wind Shields
When built-in settings aren't enough, external wind shields can greatly reduce wind noise in your mobile videos. These accessories are designed to cover your smartphone's microphone, effectively blocking wind while still allowing sound to pass through.
You'll find various types of wind shields available for mobile devices. Foam windscreens are affordable and easy to use; simply slip them over your phone's microphone area. For more professional results, consider investing in a furry "deadcat" windshield, which provides superior wind noise reduction.
When using an external wind shield, make certain it's properly positioned over your phone's microphone. Some shields are device-specific, while others are universal. If you're using a case, you may need to remove it or cut a small hole to accommodate the wind shield.
Remember that wind shields work best in conjunction with other noise reduction techniques. Combine them with built-in settings and proper microphone positioning for best results.
In extreme wind conditions, you might also want to create a physical barrier or find a sheltered area to shoot your video.
Adjust Audio Gain Settings

Beyond capturing crisp visuals, adjusting your audio gain settings is essential for professional-quality mobile videos. Audio gain controls the input sensitivity of your device's microphone, directly impacting the volume and clarity of recorded sound.
To optimize your audio gain, start by accessing your camera app's advanced settings. Look for an option labeled "audio gain" or "microphone sensitivity." Begin with a moderate setting and test it in your filming environment. If the audio is too quiet, gradually increase the gain. Conversely, if you're picking up excessive background noise or distortion, lower the gain.
Remember, higher gain doesn't always mean better quality. Overamplification can lead to clipping and distortion, especially in loud environments. It's vital to find the sweet spot where your subject's voice is clear without overpowering ambient sounds.
For interviews or dialogue-heavy scenes, consider using a separate audio recording app that offers more precise gain control. This allows you to fine-tune your audio independently from the video.
Always monitor your audio levels using headphones while recording to catch any issues in real-time. With practice, you'll develop an ear for the ideal gain setting in various situations, ensuring your mobile videos sound as professional as they look.
Apply Noise Reduction Software

You'll find several popular noise reduction apps available for mobile video editing, such as FilmoraGo and KineMaster.
When using these tools, it's essential to adjust the reduction settings carefully, striking a balance between noise removal and preserving audio quality.
For more challenging audio issues, you can try layering multiple noise filters to target different types of background sounds effectively.
Popular Noise Reduction Apps
Several powerful noise reduction apps can transform your noisy mobile videos into crystal-clear masterpieces. These apps use advanced algorithms to analyze and remove unwanted background noise, leaving you with professional-quality audio. Some popular options include Adobe Premiere Rush, Filmora, and iMovie for iOS users.
When choosing a noise reduction app, consider these factors:
- Ease of use: Look for an intuitive interface that doesn't require extensive technical knowledge.
- Compatibility: Verify the app works with your device and video format.
- Features: Some apps offer additional editing tools beyond noise reduction.
To get the best results, start by isolating the noise you want to remove. Many apps allow you to select a portion of the video where only background noise is present, which helps the software identify and eliminate it throughout the entire clip.
Don't overdo the noise reduction, as it can make your audio sound unnatural or robotic. Instead, aim for a balance between noise removal and preserving the original sound quality.
Adjusting Reduction Settings Effectively
Once you've selected a noise reduction app, it's time to fine-tune the settings for best results. Start by analyzing your video's audio to identify the types of noise present. Common culprits include background hum, wind noise, and echoes. Adjust the reduction strength gradually, as over-processing can lead to unnatural-sounding audio.
Pay attention to these key settings:
| Setting | Purpose |
|---|---|
| Threshold | Determines noise floor level |
| Reduction | Controls how much noise is removed |
| Attack/Release | Affects how quickly noise reduction is applied |
| Frequency Range | Targets specific noise frequencies |
Begin with conservative settings and increase them incrementally. Listen carefully after each adjustment to verify you're not losing desirable audio elements. Focus on maintaining a balance between noise reduction and preserving the original sound quality.
Don't forget to test your settings on different sections of your video, as noise levels may vary throughout. If possible, use high-quality headphones to catch subtle changes in audio quality. Remember, the goal is to enhance your video's sound without making it sound artificial or processed.
Layering Multiple Noise Filters
Layering multiple noise filters can greatly enhance your video's audio quality. By combining different types of filters, you'll address various noise issues simultaneously, resulting in cleaner, more professional-sounding audio.
Start with a broad-spectrum noise reduction filter to tackle general background noise, then add specific filters to target remaining problems.
- Combine high-pass and low-pass filters to remove rumble and hiss
- Use a de-esser to reduce sibilance in speech
- Apply a spectral noise reduction tool for precision cleanup
When layering filters, always apply them in order from least to most aggressive. Begin with subtle, broad adjustments and gradually move to more specific, targeted filters. This approach helps preserve the original audio quality while effectively reducing unwanted noise.
Be cautious not to over-filter, as this can lead to a hollow or artificial sound. Listen carefully after each filter application and adjust settings accordingly.
If you're unsure, try A/B testing between filtered and unfiltered versions to guarantee you're improving the audio without compromising its naturalness.
Record in Airplane Mode
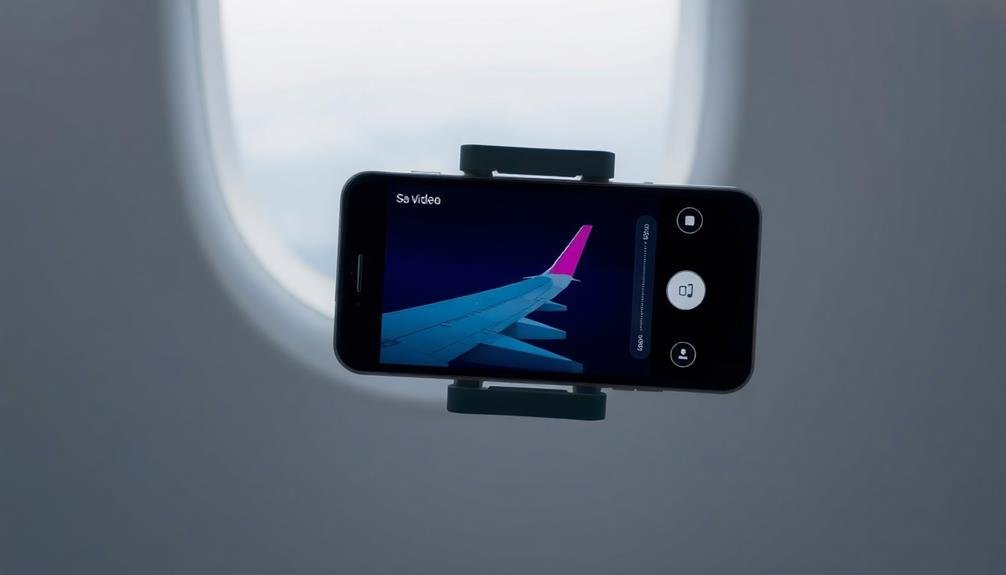
To eliminate unwanted interference and background noise, switch your phone to airplane mode before recording video. This simple step can greatly improve your audio quality by preventing electromagnetic interference from cellular signals, Wi-Fi, and Bluetooth connections.
When your phone's radios are active, they can create subtle buzzing or static sounds that your microphone might pick up. Airplane mode also helps conserve battery life, allowing you to record for longer periods without interruption.
It prevents incoming calls, messages, and notifications from disrupting your recording session. You'll avoid those embarrassing moments when a text message alert ruins a perfect take.
Remember to enable airplane mode before you start filming, as turning it on mid-recording can create a noticeable audio glitch. If you need location services for your video, you can re-enable GPS separately while keeping other radios off.
For interviews or dialogue scenes, ask your subjects to switch their devices to airplane mode as well. This guarantees a clean audio environment free from potential interference from nearby phones.
Once you've finished recording, don't forget to disable airplane mode to restore your phone's normal functionality.
Use Manual Audio Controls

Many smartphone cameras offer manual audio controls that can greatly enhance your video's sound quality. By adjusting these settings, you'll have more control over the audio input, resulting in clearer and more professional-sounding videos.
To access manual audio controls, open your camera app and switch to video mode. Look for an audio or microphone icon, which may be hidden in advanced settings. Once you've found it, you'll typically see options to adjust:
- Microphone sensitivity or gain
- Audio format (e.g., stereo or mono)
- Wind noise reduction
Start by setting the microphone sensitivity to an appropriate level for your environment. If you're in a quiet setting, lower the sensitivity to reduce background noise. In louder environments, increase it to capture clear audio. Experiment with different levels to find the sweet spot.
Consider using an external microphone for even better audio quality. Many smartphones support plug-in mics, which can remarkably improve sound capture. If you're recording in windy conditions, enable wind noise reduction or use a windscreen on your microphone.
Remember to monitor your audio levels while recording. If you see the levels peaking or distorting, quickly adjust the sensitivity to prevent audio clipping.
With practice, you'll become adept at using manual audio controls to create professional-quality videos on your smartphone.
Invest in Smartphone Stabilizers
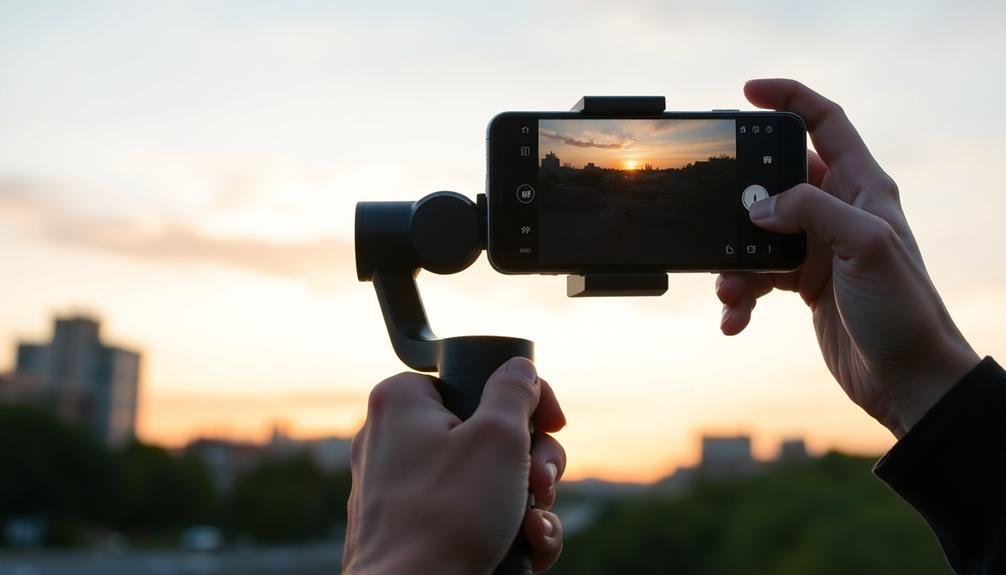
While manual audio controls enhance your video's sound quality, shaky footage can still detract from your overall production. That's where smartphone stabilizers come in. These devices greatly reduce camera shake, resulting in smoother, more professional-looking videos.
Smartphone stabilizers come in various types, including handheld gimbals and steadicams. Gimbals use motorized axes to counteract your hand movements, while steadicams rely on counterweights and inertia. Both options offer superior stability compared to handheld shooting.
When choosing a stabilizer, consider factors like battery life, weight, and compatibility with your smartphone model. Look for features such as object tracking, time-lapse modes, and adjustable balancing options to expand your creative possibilities.
Using a stabilizer takes practice, but you'll quickly notice the improvement in your footage. Start with basic panning and tracking shots, then progress to more complex movements. Remember to keep your movements slow and deliberate for the best results.
While stabilizers aren't essential for every shot, they're invaluable for walking shots, action sequences, and any situation where you can't use a tripod. By investing in a quality stabilizer, you'll elevate your mobile video production to a more professional level.
Leverage Directional Microphone Techniques

In addition to stabilizing your footage, leveraging directional microphone techniques can greatly enhance your video's audio quality. Directional microphones focus on capturing sound from a specific direction while minimizing background noise. This selectivity allows you to capture clearer, more professional-sounding audio for your mobile videos.
To effectively use directional microphones:
- Position the microphone close to your subject
- Point the microphone directly at the sound source
- Use windscreens or foam covers to reduce wind noise
When choosing a directional microphone for your smartphone, consider options like shotgun mics or lavalier mics. Shotgun mics are highly directional and excel at capturing sound from a distance, making them ideal for interviews or outdoor scenes.
Lavalier mics, on the other hand, are small and can be clipped onto clothing, providing clear audio for speakers or presenters.
Remember to monitor your audio levels while recording. Most smartphone video apps display a visual meter showing audio input levels. Aim to keep the levels in the middle range, avoiding peaks that could cause distortion.
Post-Processing Audio Enhancement

Have you ever captured the perfect video only to find the audio lacking? Post-processing audio enhancement can greatly improve your mobile videos' sound quality. With the right tools and techniques, you'll transform mediocre audio into professional-grade sound.
Start by using a dedicated audio editing software. Popular options include Audacity, Adobe Audition, or iZotope RX. These tools offer powerful features to clean up your audio:
| Feature | Purpose | Effect |
|---|---|---|
| Noise Reduction | Remove background noise | Clearer voice |
| EQ | Adjust frequency balance | Richer sound |
| Compression | Even out volume levels | Consistent audio |
| De-essing | Reduce harsh sibilance | Smoother speech |
| Reverb | Add spatial depth | Natural ambiance |
Apply these effects judiciously to avoid over-processing. Begin with noise reduction to eliminate unwanted sounds. Then, use EQ to boost clarity and warmth in voices. Apply compression to maintain consistent volume levels throughout your video. De-essing can soften harsh "s" sounds, while a touch of reverb can add natural ambiance.
Frequently Asked Questions
How Do I Sync External Audio With Video Footage on My Smartphone?
To sync external audio with your smartphone video, use a video editing app that supports multi-track editing. Import both your video and audio files, align them using visual cues or waveforms, then adjust timing as needed for perfect synchronization.
Can I Use Noise-Canceling Headphones as a Microphone for Mobile Video Recording?
You can't directly use noise-canceling headphones as a microphone for mobile video recording. They're designed to cancel external noise, not capture sound. Instead, consider using a dedicated external microphone or your phone's built-in mic for better audio quality.
What's the Best File Format for High-Quality Audio in Smartphone Videos?
For high-quality audio in smartphone videos, you'll want to use either AAC or PCM formats. AAC offers excellent compression while maintaining quality, while PCM provides uncompressed audio. Your choice depends on your storage capacity and quality requirements.
How Can I Reduce Echo When Recording Videos Indoors With My Phone?
To reduce echo when recording indoor videos, you'll want to soften hard surfaces. Hang curtains, add rugs, or use foam panels. Position yourself away from walls and choose smaller rooms. Don't forget to speak clearly and project your voice.
Are There Any Legal Considerations When Recording Audio in Public Spaces?
You should be aware of local laws regarding audio recording in public. In many places, it's legal if there's no expectation of privacy. However, you can't record private conversations without consent. Always check your specific location's regulations.
In Summary
You've now got a toolkit of pro tricks to elevate your mobile video quality. By focusing on both audio and visual elements, you'll create cleaner, quieter content that stands out. Don't be afraid to experiment with different techniques and equipment. Remember, practice makes perfect. As you apply these tips, you'll notice a significant improvement in your videos. Keep refining your skills, and soon you'll be producing professional-level content right from your smartphone.


Leave a Reply