
To freeze motion in HDR mobile photography, start by using burst mode for multiple shots. Lock focus and exposure to maintain consistency, and enable HDR+ mode for enhanced dynamic range. Manually adjust shutter speed for faster captures, and increase ISO sensitivity in low light. Utilize pre-shutter technology to catch fleeting moments, and experiment with night mode for dimly lit scenes. Master the panning technique for dynamic motion effects, and leverage bracketing for ideal exposures. Don't forget to employ AI-enhanced features like motion detection and smart scene optimization. These tricks will elevate your mobile HDR photography, but there's even more to explore.
Use Burst Mode
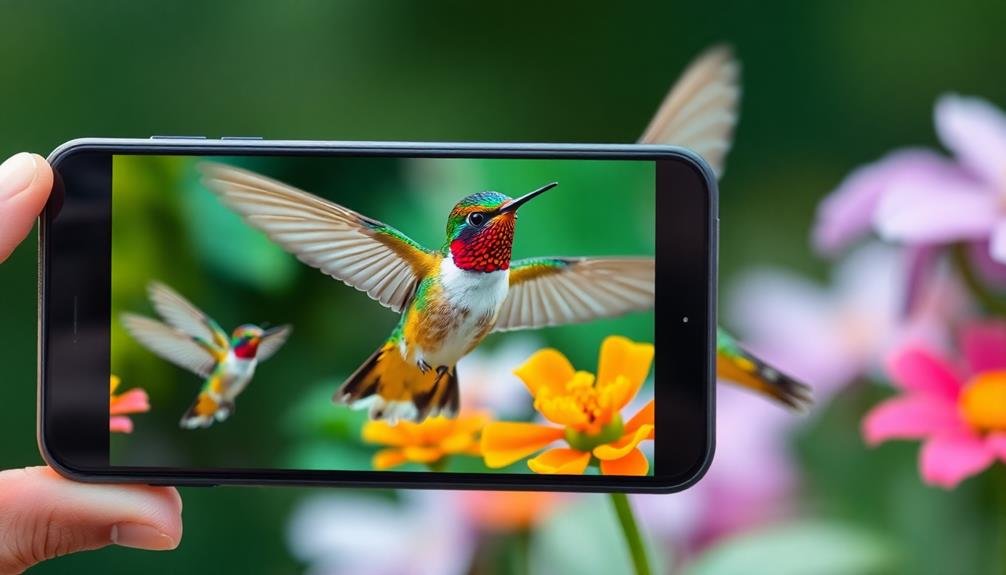
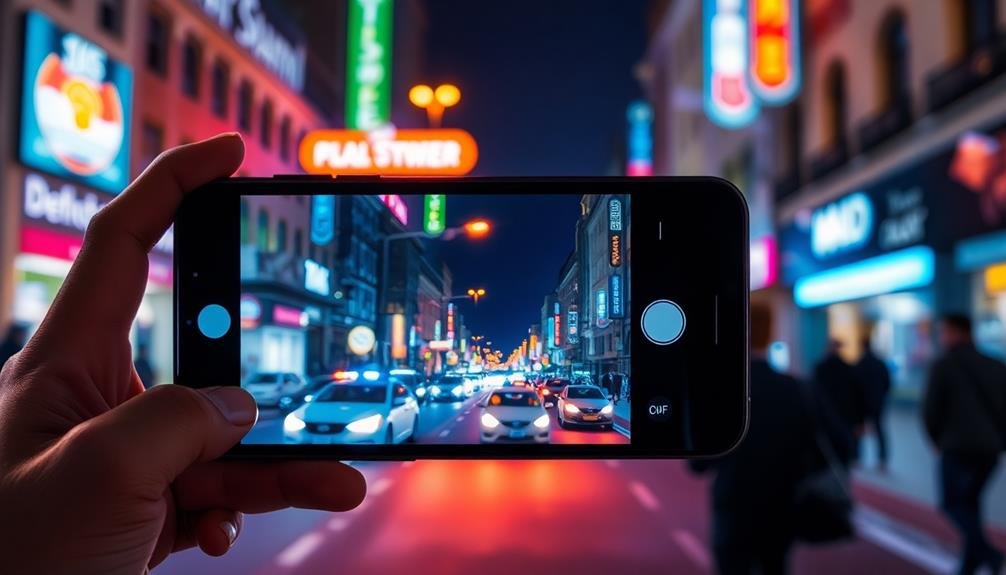
Leveraging your smartphone's burst mode is a game-changer for capturing fast-moving subjects in HDR. When you activate burst mode, your phone rapidly takes multiple shots in quick succession, increasing the likelihood of capturing the perfect moment.
To use burst mode effectively, press and hold the shutter button or volume key (depending on your device) when you're ready to shoot. This action will trigger a rapid series of photos, typically around 10 frames per second. As you're shooting, keep your phone steady and follow your subject's movement.
After capturing the burst, review the series of images and select the best ones. Look for shots where the subject is in focus and positioned ideally within the frame. Many smartphones now offer AI-assisted selection, helping you identify the sharpest images from the burst.
For HDR photography, burst mode is particularly useful as it allows you to capture multiple exposures of fast-moving subjects. This technique increases your chances of getting well-exposed shots with frozen motion, even in challenging lighting conditions.
Experiment with different burst speeds and durations to find what works best for your specific subject and scene.
Lock Focus and Exposure
To lock focus and exposure on your mobile device, tap and hold on your subject until you see the AE/AF Lock indicator.
This technique prevents your camera from constantly readjusting as you compose your shot, ensuring consistent results.
You can also separate focus from exposure by tapping to set focus, then sliding your finger up or down to adjust exposure independently.
Tap-And-Hold for Ae/Af Lock
One often-overlooked feature in mobile photography can make a world of difference when freezing motion: the AE/AF lock. You'll find this handy tool on most smartphone cameras, and it's a game-changer for capturing fast-moving subjects in HDR.
To use the AE/AF lock, simply tap and hold on your screen where you want to focus. You'll see a yellow box appear, indicating that both focus and exposure are now locked. This means your camera won't continuously adjust these settings as your subject moves, helping you maintain consistency in your shots.
Here's why the AE/AF lock is essential for freezing motion:
- It prevents focus hunting, ensuring your subject stays sharp.
- It maintains consistent exposure, even with changing lighting conditions.
- It allows you to recompose your shot without losing your settings.
- It gives you more control over your final image, especially in HDR mode.
Separate Focus From Exposure
Focus-exposure separation is a powerful technique that takes your mobile HDR photography to the next level. By controlling these elements independently, you'll achieve greater precision in your shots, especially when freezing motion.
To separate focus from exposure, start by tapping on your subject to set focus. Then, adjust the exposure by sliding your finger up or down on the screen. This allows you to fine-tune the brightness without changing the focus point. Many advanced camera apps offer separate focus and exposure controls, giving you even more flexibility.
When freezing motion, you'll often need a faster shutter speed, which requires more light. By separating exposure from focus, you can increase the exposure on your moving subject while keeping the background properly exposed. This technique is particularly useful in challenging lighting situations, such as backlit scenes or high-contrast environments.
Practice this method in various scenarios to master it. You'll find it especially helpful when capturing fast-moving subjects like athletes or wildlife.
Enable HDR+ Mode

Turning on HDR+ mode is the first step to freezing motion in your mobile photography. This feature, available on many modern smartphones, combines multiple exposures to create a single, well-balanced image. When enabled, HDR+ mode can help you capture sharp, detailed photos of moving subjects, even in challenging lighting conditions.
To make the most of HDR+ mode for freezing motion, follow these tips:
- Hold your phone steady: HDR+ works best when your device remains as still as possible during capture.
- Pre-focus on your subject: Tap the screen to set focus before taking the shot, ensuring the moving subject stays sharp.
- Anticipate the action: Frame your shot and be ready to capture the moment just before peak action occurs.
- Experiment with timing: Try capturing a series of shots to increase your chances of freezing the perfect moment.
Remember that HDR+ processing may take a few seconds, so be patient after pressing the shutter button.
While it's not a guaranteed solution for all motion-freezing scenarios, HDR+ mode can greatly improve your chances of capturing crisp, dynamic images of moving subjects on your mobile device.
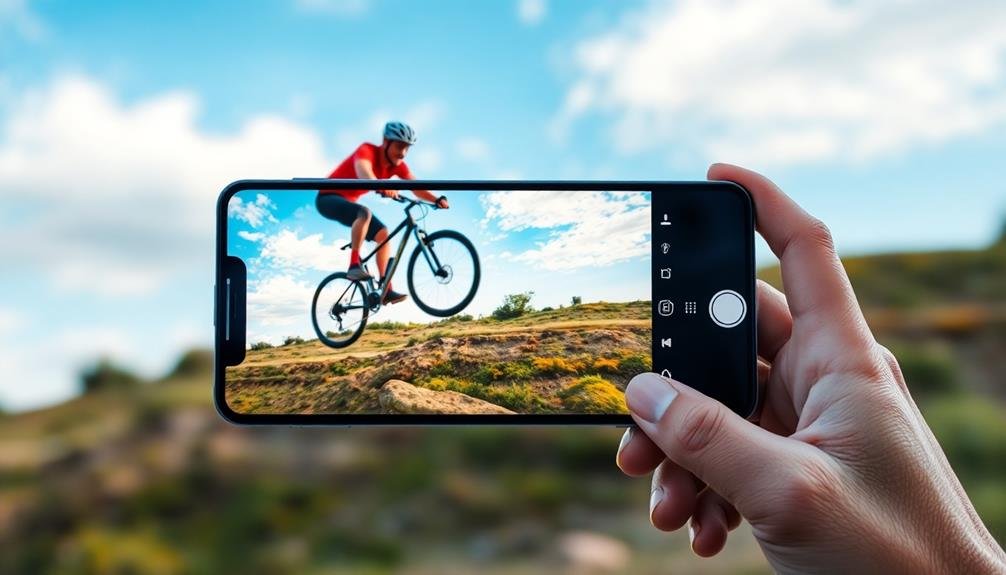
Adjust Shutter Speed Manually
Shutter speed control is a powerful tool for freezing motion in mobile photography. While many default camera apps don't offer manual shutter speed adjustments, you can download third-party apps that provide this functionality. Look for apps like ProCam, Manual, or Halide on iOS, or Camera FV-5, Open Camera, or Manual Camera on Android.
Once you've installed a suitable app, you'll want to experiment with faster shutter speeds to capture sharp images of moving subjects. Start with 1/500th of a second for most fast-moving objects, and go even higher for extremely quick movements like sports action or wildlife.
Remember, the faster the shutter speed, the less light enters the camera, so you may need to compensate by increasing ISO or opening up your aperture (if your phone allows).
To freeze motion effectively, you'll also need to take into account your subject's speed and direction. For subjects moving across your frame, you can use slightly slower shutter speeds than for those moving towards or away from you.
Don't forget to stabilize your phone, either by using a tripod or bracing it against a stable surface, to guarantee your images are as sharp as possible.
Increase ISO Sensitivity

ISO sensitivity plays an essential role in freezing motion on mobile devices. When you're trying to capture fast-moving subjects, increasing your ISO can help you achieve faster shutter speeds without underexposing your image. Most modern smartphones allow you to adjust ISO manually in their pro or advanced camera modes.
Higher ISO values make your camera's sensor more sensitive to light, allowing you to use faster shutter speeds in low-light conditions. However, be aware that increasing ISO can introduce digital noise or grain to your images.
To balance this trade-off, consider the following tips:
- Start with the lowest ISO that allows for an acceptable shutter speed
- Experiment with different ISO values to find the sweet spot for your specific scene
- Use noise reduction software or in-app tools to minimize grain in post-processing
- Combine higher ISO with other techniques like burst mode for better results
Remember that the ideal ISO setting will vary depending on your lighting conditions and subject movement.
Practice adjusting your ISO in different scenarios to develop a feel for how it affects your mobile HDR shots. With experience, you'll be able to quickly select the right ISO to freeze motion effectively.
Utilize AI-Enhanced Motion Capture

Modern smartphones leverage AI-powered motion detection to enhance your ability to freeze action in HDR photography.
You'll find smart scene optimization features that automatically adjust settings for moving subjects.
These AI enhancements often include predictive blur reduction, which anticipates movement and helps you capture crisp, clear images even in challenging conditions.
Ai-Powered Motion Detection
As smartphone technology continues to evolve, AI-powered motion detection has become a game-changer for mobile photographers. This advanced feature leverages artificial intelligence to identify and track moving subjects in real-time, ensuring sharper images even in challenging conditions.
You'll find that AI motion detection greatly enhances your ability to capture freeze-frame moments with unprecedented accuracy.
When using AI-powered motion detection for HDR photography on your mobile device, keep these key points in mind:
- Anticipate movement: The AI predicts subject motion, allowing you to prepare for the perfect shot.
- Optimize shutter speed: AI adjusts shutter speed automatically based on detected motion, freezing action more effectively.
- Reduce motion blur: By analyzing movement patterns, the AI minimizes blur in high-contrast scenes.
- Enhance focus tracking: AI-powered systems maintain focus on moving subjects, ensuring crisp details throughout the frame.
Smart Scene Optimization
Building on AI-powered motion detection, smart scene enhancement takes mobile HDR photography to the next level. This advanced feature analyzes your scene in real-time, adjusting camera settings to capture the best possible image, even with fast-moving subjects.
You'll find that smart scene enhancement works by:
- Identifying the type of motion in your frame
- Selecting the ideal shutter speed and ISO
- Applying intelligent noise reduction
- Enhancing image stabilization
- Fine-tuning exposure and contrast
Here's a breakdown of how smart scene enhancement handles different motion scenarios:
| Scene Type | Shutter Speed | ISO | Stabilization | Post-Processing |
|---|---|---|---|---|
| Sports | 1/1000s | 400 | High | Noise reduction |
| Wildlife | 1/2000s | 800 | Medium | Sharpening |
| Street | 1/500s | 200 | Low | Contrast boost |
| Night | 1/60s | 3200 | Ultra | HDR blending |
| Portraits | 1/250s | 100 | Medium | Skin smoothing |
To make the most of this feature, confirm you've enabled smart scene enhancement in your camera settings. As you frame your shot, you'll notice the AI working in real-time, adjusting parameters to freeze motion effectively. Remember, while this technology is impressive, it's still essential to practice good composition and timing for the best results.
Predictive Blur Reduction
Revolutionary AI-enhanced motion capture takes mobile HDR photography a step further with predictive blur reduction. This cutting-edge technology analyzes movement patterns in real-time, anticipating the subject's motion before you even press the shutter button.
By predicting the trajectory of moving objects, your phone's camera can adjust its settings to minimize blur and capture crisp, clear images.
To make the most of predictive blur reduction, you'll want to:
- Enable HDR mode and verify your camera app's AI features are turned on
- Frame your shot and allow the camera a moment to analyze the scene
- Follow the movement of your subject smoothly as you prepare to shoot
- Time your shutter press with the AI's suggestions for peak results
This advanced feature works by combining multiple exposures, each captured at different speeds and settings. The AI then selects the sharpest elements from each frame, merging them into a single, blur-free image.
You'll notice improved results when photographing fast-moving subjects like athletes, vehicles, or wildlife. Predictive blur reduction is especially useful in challenging lighting conditions where traditional HDR might struggle to freeze motion effectively.
Employ Pre-Shutter Technology
Pre-shutter technology is a game-changer for capturing motion in HDR on mobile devices. This innovative feature allows your phone to start capturing image data before you fully press the shutter button. By continuously buffering frames, it guarantees you don't miss the perfect moment, even with fast-moving subjects.
To employ pre-shutter technology effectively, you'll need to enable it in your camera app's settings. Once activated, half-press the shutter button to initiate the buffering process. This action tells your device to start collecting image data, giving you a head start on freezing motion.
When you're ready to take the shot, fully press the shutter button. The pre-captured frames are then combined with the final exposure, resulting in a sharp, well-timed HDR image. This technique is particularly useful for unpredictable subjects like wildlife or sports events.
It compensates for human reaction time, allowing you to capture split-second moments you might otherwise miss. Remember, pre-shutter technology works best when you anticipate the action and prepare your shot in advance.
With practice, you'll be able to freeze motion consistently, even in challenging lighting conditions.
Experiment With Night Mode
Night Mode on your smartphone can be a powerful tool for capturing movement in low-light conditions.
You'll find that extended exposure techniques, often automatically applied in Night Mode, can create interesting motion trails or blur effects.
Experiment with AI-assisted night photography features, which can help balance the exposure and reduce noise while still preserving some motion details.
Low-Light Movement Capture
Often overlooked, low-light movement capture can be a game-changer for mobile photographers. When you're shooting in dimly lit environments, it's crucial to master techniques that freeze motion while maintaining image quality. HDR (High Dynamic Range) mode on your smartphone can be a powerful tool for achieving this balance.
To capture low-light movement effectively, focus on these key strategies:
- Stabilize your device: Use a tripod or prop your phone against a stable surface to minimize camera shake.
- Adjust exposure compensation: Slightly underexpose the image to maintain shutter speed and reduce motion blur.
- Enable HDR mode: This allows your camera to capture multiple exposures, potentially freezing motion in one of the frames.
- Experiment with manual settings: If available, try adjusting ISO and shutter speed manually for more control.
Remember that HDR processing takes slightly longer, so anticipate your subject's movement.
Practice timing your shots to coincide with moments of relative stillness. Don't be afraid to take multiple shots, as HDR can sometimes produce unexpected results in low-light conditions.
With patience and practice, you'll soon be capturing stunning low-light action shots that once seemed impossible on a mobile device.
Extended Exposure Techniques
Beyond the domain of standard HDR techniques, extended exposure methods open up a world of creative possibilities for freezing motion in low light. Night Mode, available on many modern smartphones, is your secret weapon for capturing crisp, well-lit images in challenging conditions. This feature combines multiple exposures, often extending shutter times to several seconds.
To freeze motion using Night Mode, you'll need to get creative. Start by finding a stable surface or using a tripod to keep your phone steady. Experiment with different exposure durations, typically ranging from 1 to 10 seconds.
For subjects in motion, try light painting techniques. Have your subject stand still initially, then move quickly out of frame while you're capturing the scene. This can create interesting light trails while keeping the subject sharp.
Another trick is to use burst mode in conjunction with Night Mode. Capture a series of shots, then blend them in post-processing to achieve a sharp subject against a motion-blurred background.
Don't be afraid to play with your phone's pro mode settings, adjusting ISO and shutter speed manually to fine-tune your results.
Ai-Assisted Night Photography
Artificial intelligence has revolutionized night photography on mobile devices. Night mode, powered by AI algorithms, allows you to capture stunning low-light images without a tripod. To freeze motion in night shots, you'll need to experiment with your phone's AI-assisted features.
Start by enabling night mode on your camera app. This feature automatically adjusts settings like ISO, shutter speed, and exposure time to optimize your shot. For moving subjects, try these techniques:
- Pre-focus on your subject before they move
- Use burst mode to capture multiple frames
- Experiment with your phone's AI motion detection
- Try manual mode for more control over shutter speed
Remember, AI assistance works best when there's some ambient light. In extremely dark conditions, you may need additional lighting or a longer exposure time.
Don't be afraid to push your phone's capabilities – modern AI can often produce surprisingly good results in challenging situations.
If your phone has a pro or manual mode, you can fine-tune settings for even more control. Adjust ISO and shutter speed to balance noise reduction with motion freezing.
With practice, you'll master the art of AI-assisted night photography on your mobile device.
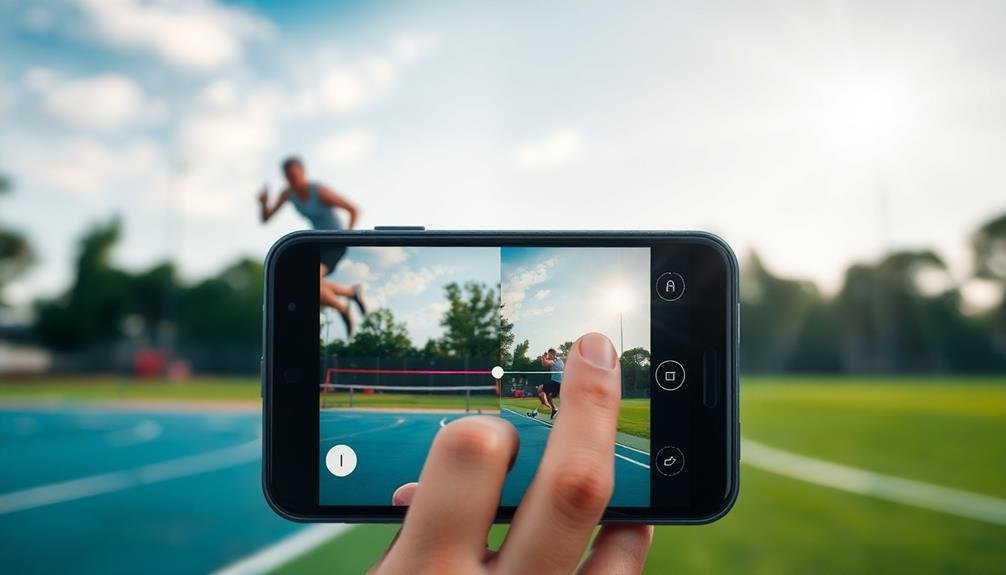
Master Panning Technique
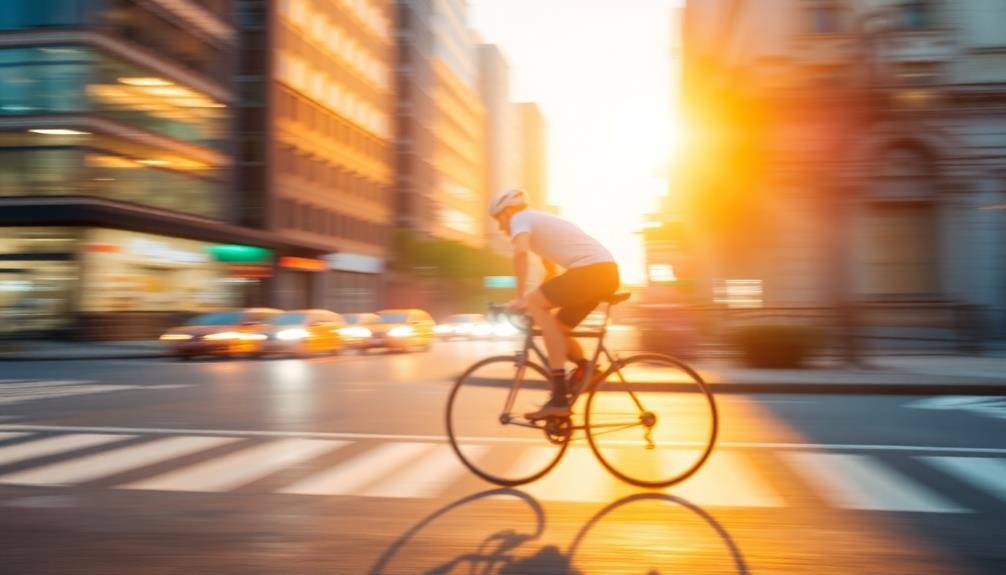
In addition to freezing motion, mastering the panning technique can create stunning HDR images with a sense of movement on your mobile device. This technique involves following a moving subject with your camera while using a slower shutter speed. As you pan, the subject remains relatively sharp while the background blurs, creating a dynamic effect.
To master panning for HDR on mobile, start by enabling your device's HDR mode and selecting a slower shutter speed. Position yourself parallel to your subject's path and practice smooth, steady movements. As the subject approaches, begin tracking it through your viewfinder. Press the shutter button and continue following the subject's motion even after you've taken the shot.
Experiment with different shutter speeds to find the right balance between subject sharpness and background blur. For faster subjects like cars, try 1/30th to 1/60th of a second. For slower subjects like cyclists, use 1/15th to 1/30th.
Leverage Bracketing for HDR

Bracketing's power in HDR photography can't be overstated, especially when it comes to freezing motion. By capturing multiple exposures of the same scene, you're able to combine them later, creating a final image with a broader dynamic range and frozen motion.
Most modern smartphones offer automatic exposure bracketing, allowing you to take several shots at different exposures in rapid succession.
To leverage bracketing effectively for HDR and motion freezing:
- Set your camera to burst mode or HDR bracketing if available.
- Hold your phone steady or use a tripod for consistent framing.
- Capture at least three exposures: underexposed, properly exposed, and overexposed.
- Use HDR merging software to combine the best parts of each exposure.
When merging your bracketed exposures, pay attention to moving elements in the scene. Choose the sharpest version of any moving object from your exposures to guarantee crisp details in the final image.
This technique allows you to capture both the motion and the full range of tones in high-contrast scenes, resulting in stunning HDR images with frozen action on your mobile device.
Frequently Asked Questions
Can HDR Motion Freezing Work in Low-Light Conditions?
Yes, HDR motion freezing can work in low-light conditions, but you'll face challenges. You'll need to balance longer exposures with noise reduction. It's trickier, but with practice and the right techniques, you can achieve impressive results.
How Does Image Stabilization Affect HDR Motion Capture?
Image stabilization can greatly enhance HDR motion capture. It helps reduce camera shake, allowing for sharper images in low-light conditions. You'll notice clearer details and less blur when combining multiple exposures for HDR shots.
Are There Any Post-Processing Techniques to Enhance Frozen Motion in HDR?
Yes, you can enhance frozen motion in HDR through post-processing. Try adjusting contrast, sharpening edges, and using selective blurring. You'll also want to experiment with highlight and shadow recovery to bring out details in high-contrast areas.
What's the Impact of HDR Motion Freezing on Battery Life?
You'll notice increased battery drain when using HDR motion freezing. It's demanding on your phone's processor and camera, requiring rapid captures and complex processing. To conserve power, use this feature sparingly and keep your device charged.
Can HDR Motion Freezing Be Applied to Videos on Mobile Devices?
You can't directly apply HDR motion freezing to videos on mobile devices. It's primarily a photo technique. However, you'll find some video apps offer motion blur reduction or frame interpolation features that can create a similar effect.
In Summary
You've now got a toolkit of HDR tricks to freeze motion on your mobile device. Don't be afraid to experiment with these techniques in various settings. Remember, practice makes perfect. As you become more comfortable with each method, you'll find yourself capturing stunning, crisp images of fast-moving subjects. Keep pushing your photography skills, and you'll soon be amazed at the dynamic, professional-quality photos you're able to create right from your smartphone.


Leave a Reply